Who is this article for?
This article is focused on people who are interested in, first of all, automation of deployments, and secondly, for people who want to learn more about GitHub Actions. The article is intended to serve both, complete beginners who are venturing into their first foray into automated deployments, and the seasoned veterans of industry who know how to exit Vim and are curious about this (relatively) shiny, new deployment tool - GitHub Actions.
What are GitHub Actions?
Virtually all of us are familiar with GitHub, the platform that provides storage for version-controlled software repositories. GitHub now also provides a compute service, called GitHub Actions, to perform operations such as packaging, deployment on GitHub itself instead of first fetching code into another tool/platform, and then working on it.
GitHub Actions consists of a YAML file that contains all the instructions that are to be executed on the repository along with some other meta-information like which operating system to run the steps on, which secrets to use, and so forth. GitHub Actions is really useful, not only because they allow you to write the required processing/packaging steps for the code right along with the code itself, but also because it is free! Well, somewhat. Most other cloud providers that give either finite amount of credits (ahem! GCP ahem!) or have a time limit associated with free-tier resources (not taking any names like AWS). GitHub Actions, on the other hand, has a free-tier with it’s quota refreshing every month. This is incredibly useful for someone, for example, that only wants to package their software and not rent a server to accomplish a fairly simple task.
Deploying Application with GitHub Actions
Okay, enough talk, let’s start using GitHub Actions now! In the upcoming sections, we will deploy a simple web application to a server every time a new commit is made to the mas… Oops! I mean main branch!
Prerequisites
Before we begin, there are a few things that are required to be set up:
- A GitHub account (this really should not come as a surprise)
- A server (to serve the web application that will be deployed)
Setting up the repository
Let’s start setting up our repository both, locally and on GitHub.
-
Log into your GitHub Account by navigating to https://github.com/login (on a side note, enable 2-factor authentication for your account if you have not already!)
-
Click on the “New” button to create a new repository

-
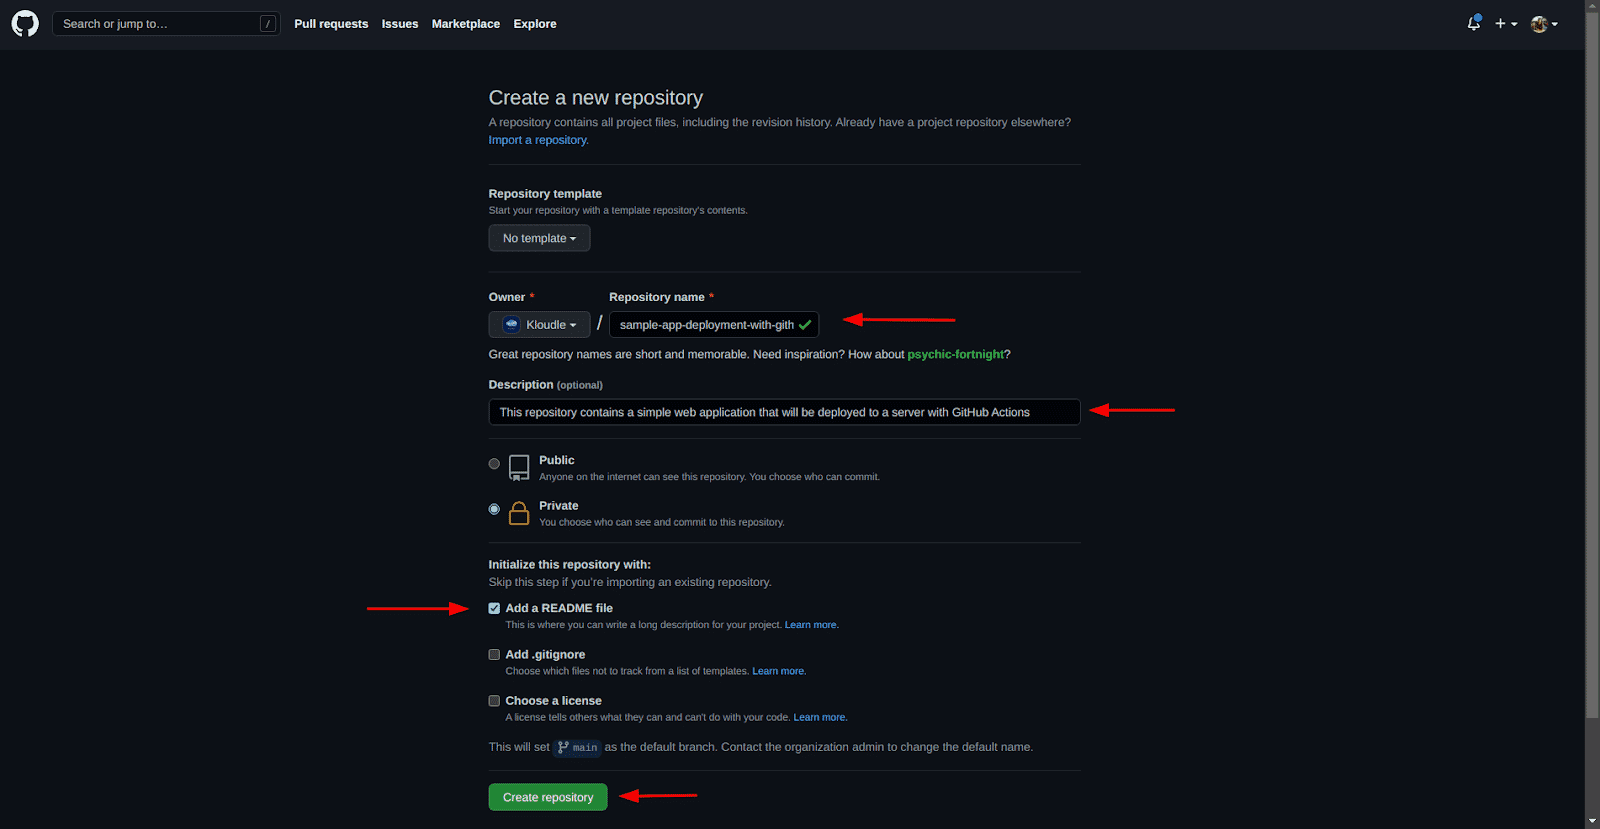
Next, fill the details such as the repository name, description and it’s always a good idea to have a README.md for your repositories, and click on the “Create repository” button
-
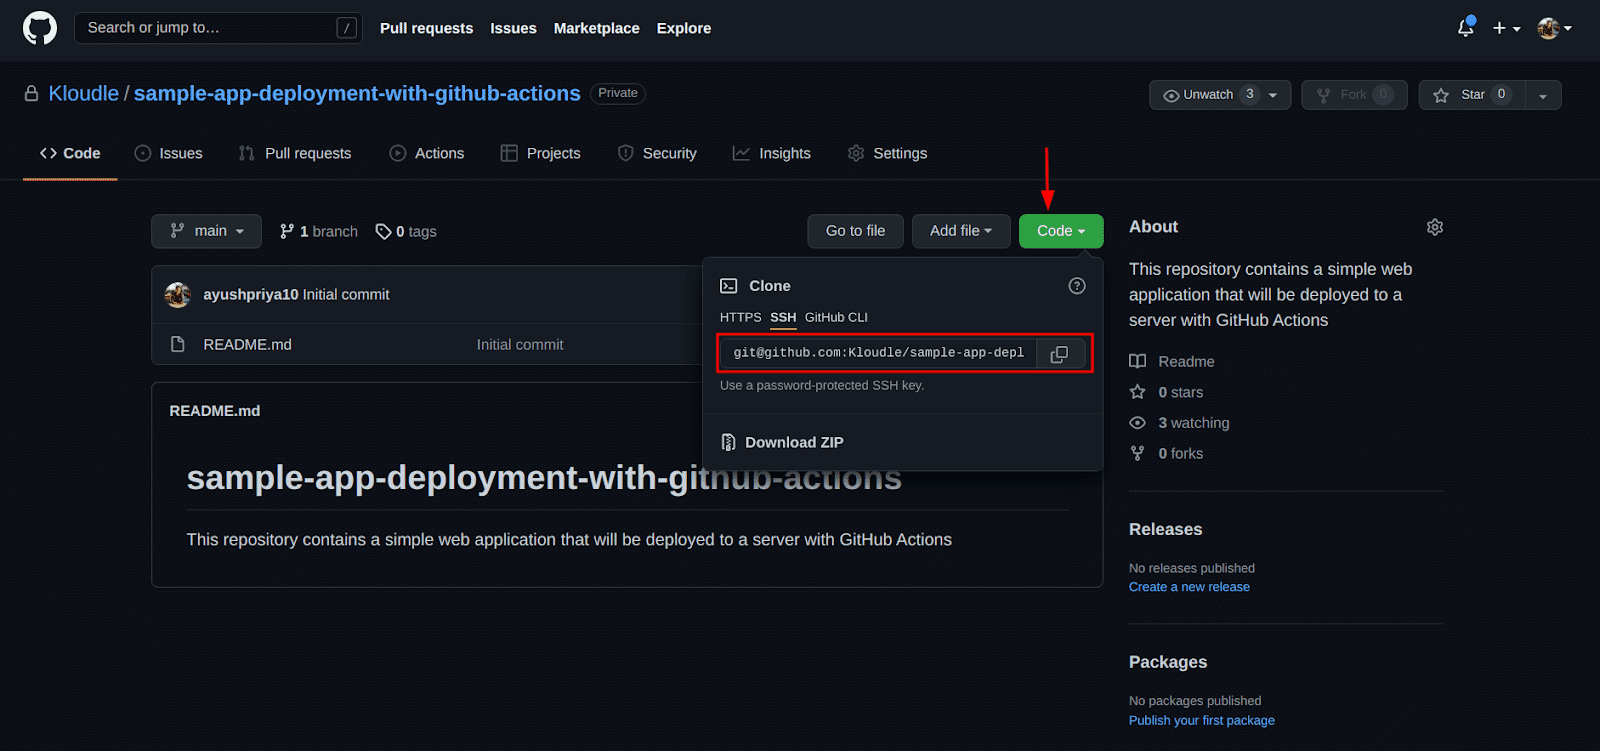
On the repository page, click on the “Code” dropdown and copy the Git URL for the repo, HTTPS or SSH, whichever one works for you.
-
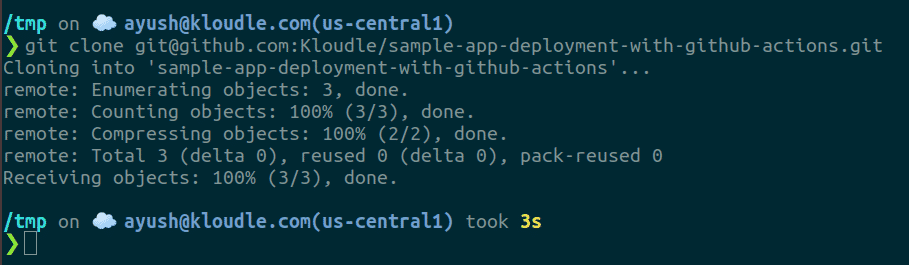
Now in a terminal window clone the repository locally by running the following command:
git clone
-
Now we can open the repository/folder with the code editor of our choice. I have used VSCode for this example.
-
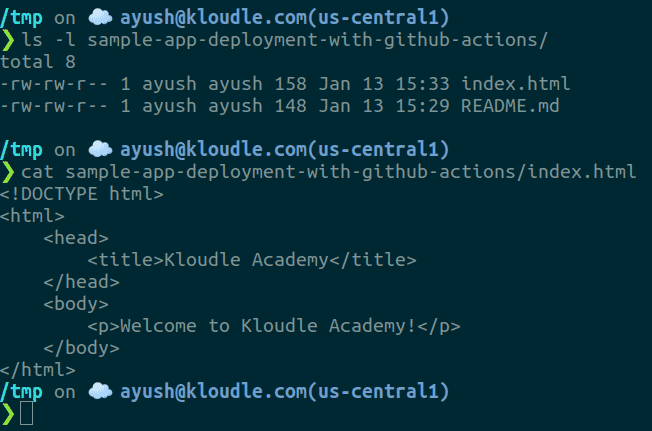
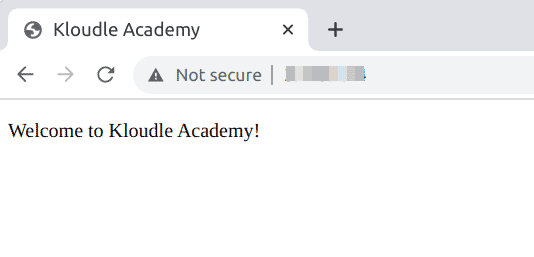
Let’s add a single index.html file so we have something to serve as our web application.
<!DOCTYPE html>

<html>

     <head>

           <title>Kloudle Academy</title>

     </head>

           <body>

                 <p>Welcome to Kloudle Academy!</p>

           </body>

</html>
-
This is how the files in the repository look now:
Adding secrets to GitHub Secrets
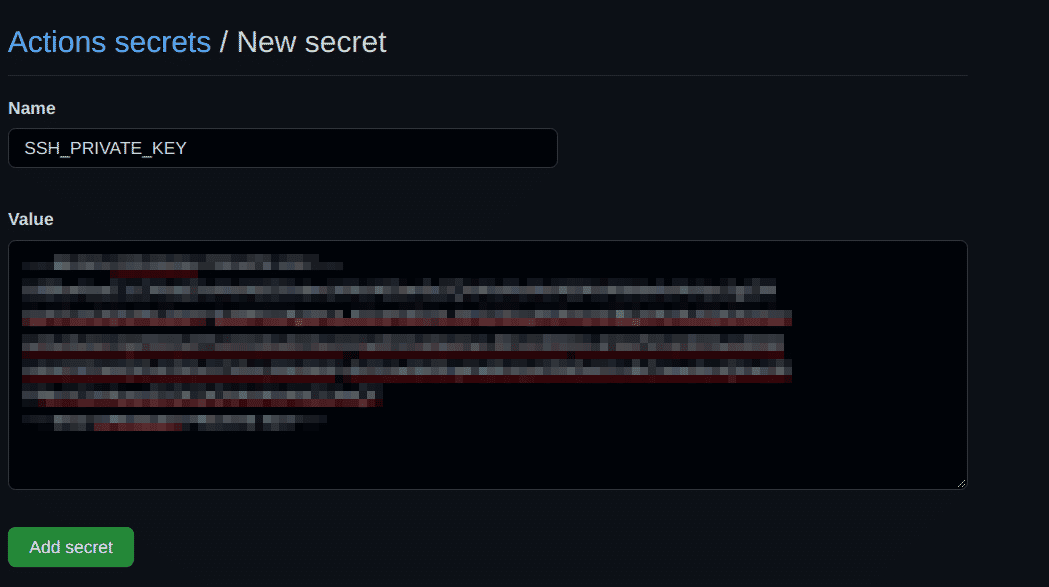
To be able to SSH into the server we want to deploy our web app to, we need an SSH key. Keep in mind, we also need to avoid committing the key to the repository as anyone with access to the repository will also have access to the key. A lot of meaningful workflows would need some kind of credentials to perform their actions - Pushing code to a server, fetching files from S3, uploading a scan report somewhere, etc. We can use GitHub secrets to add these secrets to our repository without having to commit them.
To add a secret to the repository, in our case the SSH Private key, perform the following steps:
-
Navigate to the repository’s settings page, click on the “Secrets” menu and then the “New repository secret” button.

-
Then give the secret a name (I prefer using all caps with underscores so it’s easy to identify secrets in the workflow), the secret value and click on the “Create secret” button.
Note: There are two kinds of secrets in GitHub - repository and organization. The difference between the two is that repository secrets are only available to the repository they are added for, while organization secrets are available to all repositories in the organization. Organization secrets are great to store credentials that are used by multiple repositories, it makes it much more convenient to rotate and revoke them if required. A quick factoid - if a secret is added with the same name to both, a repository and the organization, GitHub Actions will give precedence to the repository secrets and use it instead of the organization secret.
Enabling GitHub Actions
Before we can run our workflows on GitHub Actions, we need to enable our repositories for it. To enable Actions for the repository,
Navigate to the repository’s settings tab, select the “Action” menu item and ensure that the “Allow select actions” option is chosen along with only the “Allow actions created by GitHub” checkbox and click the “Save” button.

While any of the annotated options mentioned in the above screenshot would have worked, they have different levels of permissions on which sources in the Actions Marketplace we trust to run actions from:
- “Allow all actions” permissions is overly permissive, it allows any actions from the marketplace to be run as part of our workflows irrespective of who the author is.
- “Allow local actions only” allows only the actions that are defined in the repository to run, but these local workflows can no longer use pre-built actions from the marketplace.
- “Allow select actions” allows local actions as well as actions that were created by GitHub and/or Verified creators to run as part of our workflows. This is the option I recommend to use, to avoid accidentally using an unsafe action from the marketplace.
Writing the Workflow file
Now that we have all permissions and secrets in place, let’s write the workflow file that would deploy our variant of the Kloudle Academy website.
-
Create the following directories inside the repository
cd /path/to/repo
mkdir -p .github/workflows
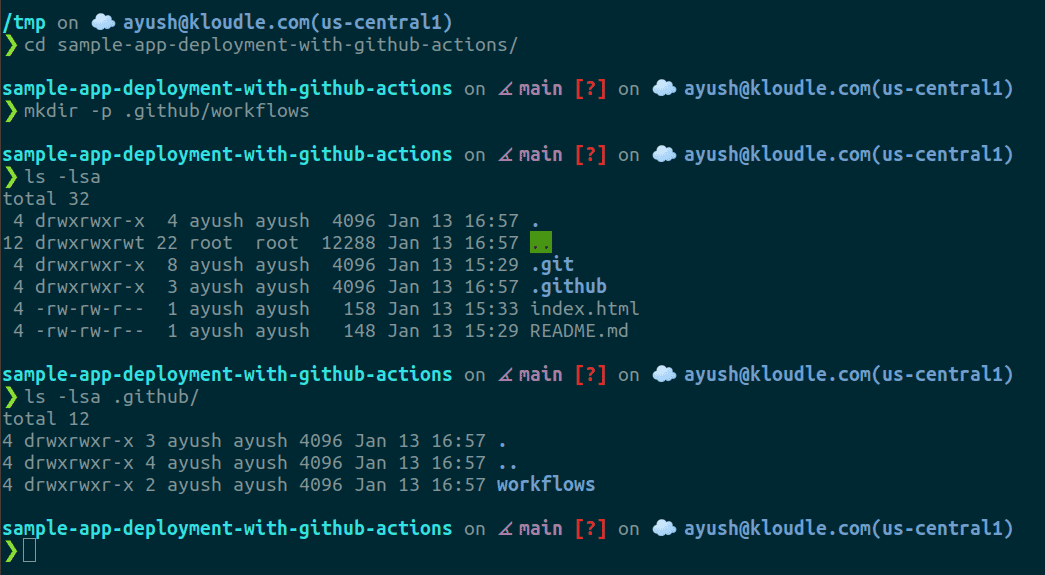
- Now with the code editor of your choice, add a new YAML file called server-deployment.yml and paste the following content in the file (note that this is not the complete configuration, we will get to it soon)
name: "Server Deployment"

on:

	push:

  		branches: [main]

jobs:

	deployment:

  	runs-on: ubuntu-latest

    steps:

    - uses: actions/checkout@v2

    - name: Say Hello!

    run: echo "Hello there!"
A quick primer on the different sections present in the workflow:
- name - defines the workflows name
- on - defines the trigger on which the workflow is supposed to be executed, in this case it’s the “push” event but there are other trigger events too that can be used such as a new pull request. Additionally the branch keyword defines what git branch to run the workflow with
- jobs - defines the different operations that are to be performed
- deployment - is a user-defined name for the particular segment
- steps - is a collection of operations to run, either in the form of a shell command or pre-built actions from the marketplace which are incorporated using the “uses” keyword
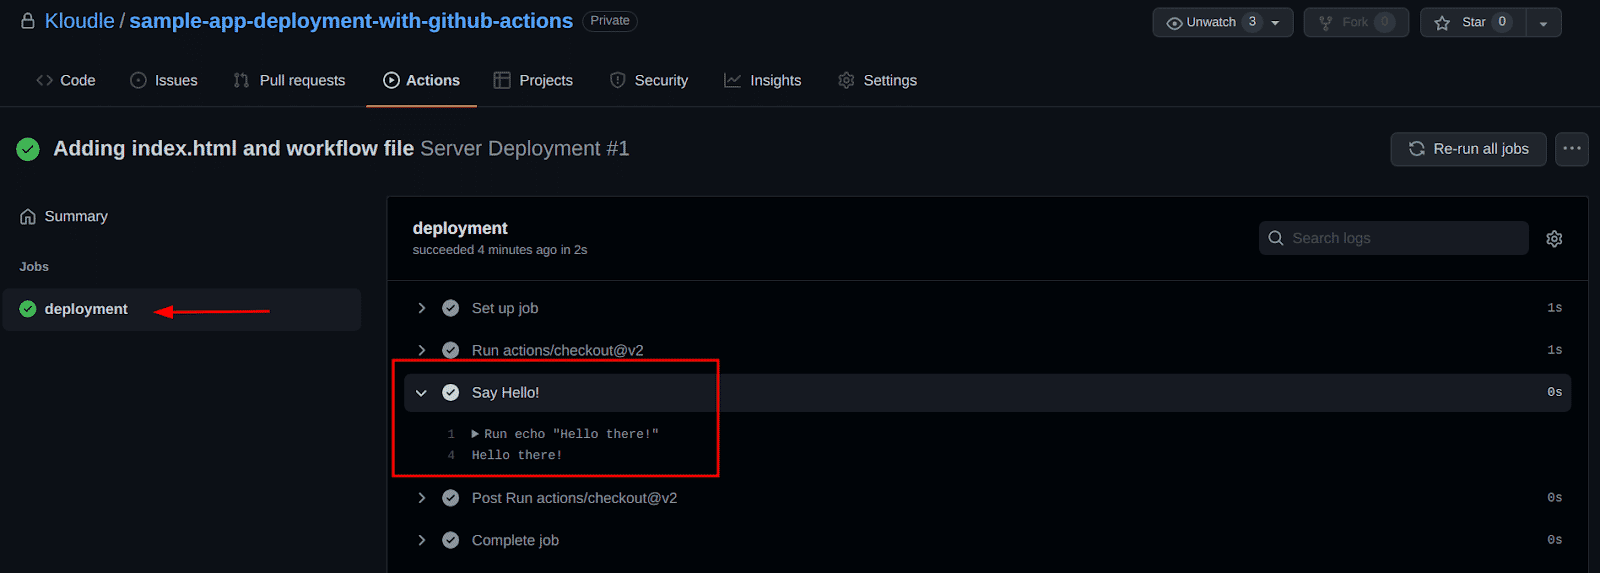
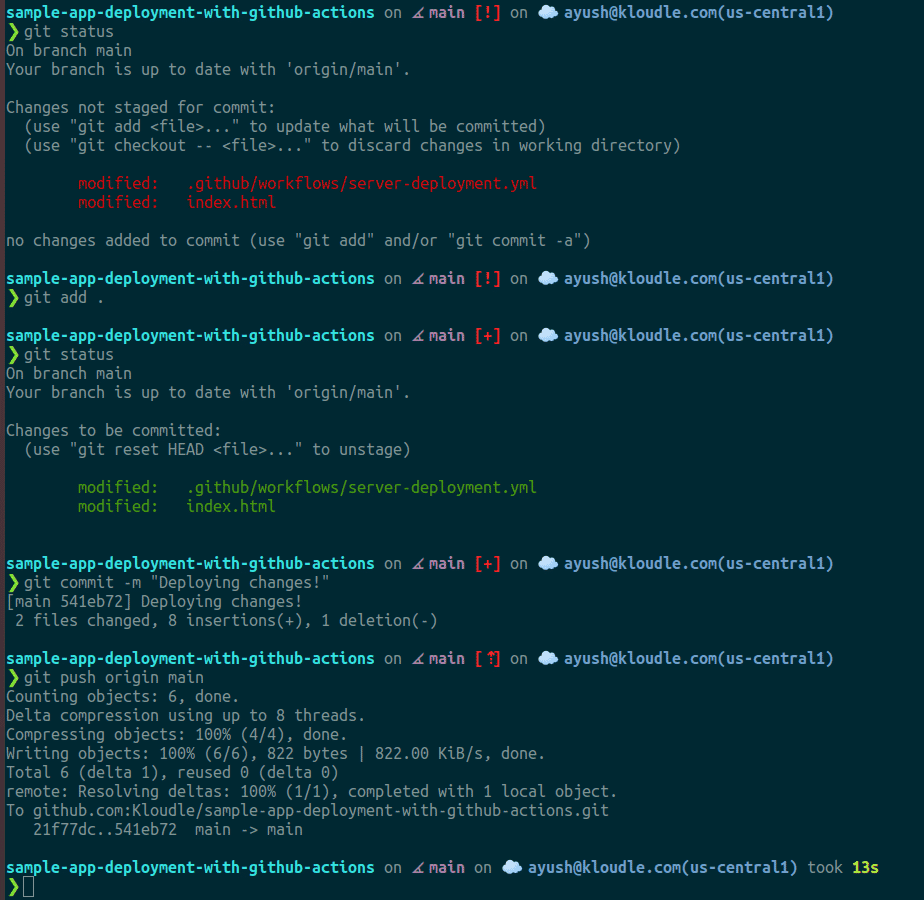
- Let’s commit all the files we have added and push to GitHub to see our workflow’s execution
git add .

git commit -m "Adding index.html and workflow file"

git push origin main

- Next, navigate to the GitHub repository, go to the Actions tab and click on “Server Deployment” workflow and then click on the commit message to see execution details for the workflow
- Next click on the “deployment” job and now we can see our workflow’s output
- Before moving ahead, let’s see how our current app deployment looks like
- Now we know how to add commands to the workflow and how to check it’s execution, with that let’s add the deployment steps to copy our HTML file
name: "Server Deployment"

on:

	push:

  	branches: [main]

jobs:

	deployment:

	runs-on: ubuntu-latest


	steps:

	- uses: actions/checkout@v2

	- name: Say Hello!

	run: echo "Hello there!"


	- name: Deploy code to Server

	env:

		SSH_KEY: ${{ secrets.SSH_PRIVATE_KEY }}

	run: |

		echo $SSH_KEY | base64 -d > ssh-key

    chmod 400 ssh-key

    	ssh -i ssh-key -o StrictHostKeyChecking=no ubuntu@3.145.1.14 "cd /home/ubuntu/sample-app-deployment-with-github-actions && GIT_SSH_COMMAND='ssh -i /home/ubuntu/.ssh/ssh-key' git pull origin main"
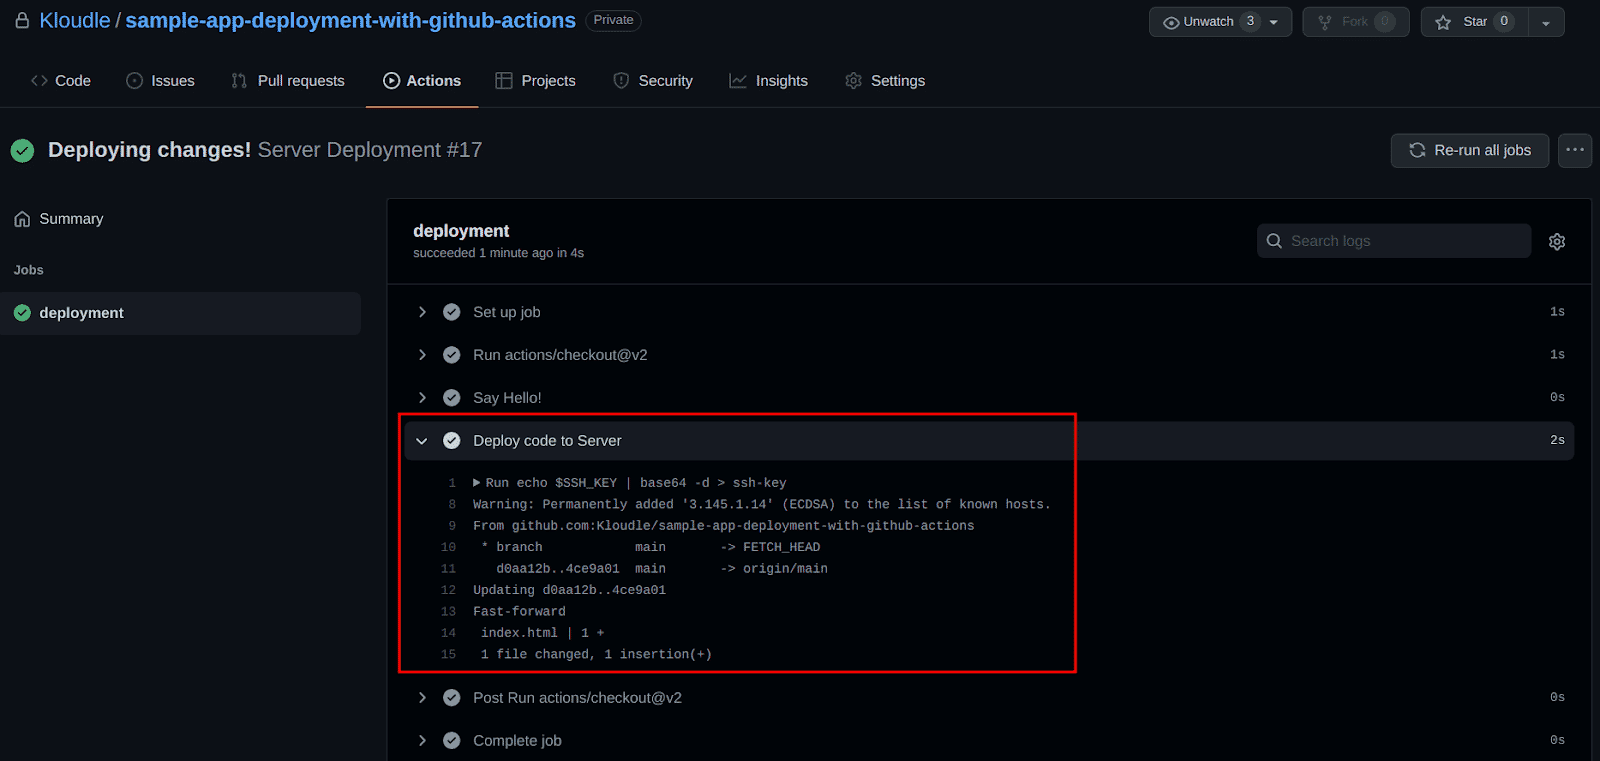
8. Optionally, add a few changes to our _index.html _file so we can see our changes once deployed
-
We will repeat Step 3 to commit and push all updates to GitHub with the new commit message “Deploying changes!”
-
Repeating steps 4 and 5 for the latest build, shows us a successful deployment (ignore the build number in this image)
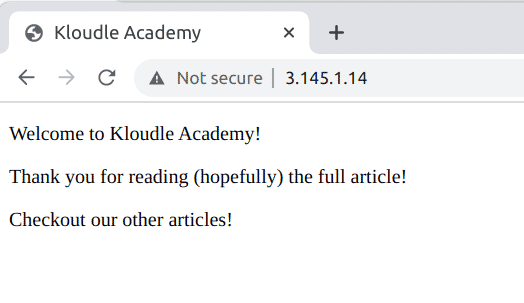
- And lastly, let’s check our cutting edge website
Conclusions
GitHub Actions is an amazing service that can be utilised to perform almost all kinds of operations on our code and repositories - packaging, deployment, etc. Although it does require buying a plan to unlock its full potential, the refreshing quota system present in the free-tier is a boon and is good for most individual projects. We took a look at an example where we deploy one static page to a server, but there could be other complex scenarios as well such as building a docker image and then deploying it to AWS’ Elastic Container Service, or GCP’s Cloud Run.
The idea of this blog is to provide building blocks with a brief introduction about GitHub Actions and workflows and enable the readers to start writing their own workflows. Some scenarios may require troubleshooting but once we get the hang of it, GitHub Actions becomes yet another tool in our DevOps tool belt.
This article is brought to you by Kloudle Academy, a free e-resource compilation, created and curated by Kloudle. Kloudle is a cloud security management platform that uses the power of automation and simplifies human requirements in cloud security. If you wish to give your feedback on this article, you can write to us here.

Riyaz Walikar
Founder & Chief of R&D
Riyaz is the founder and Chief of R&D at Kloudle, where he hunts for cloud misconfigurations so developers don’t have to. With over 15 years of experience breaking into systems, he’s led offensive security at PwC and product security across APAC for Citrix. Riyaz created the Kubernetes security testing methodology at Appsecco, blending frameworks like MITRE ATT&CK, OWASP, and PTES. He’s passionate about teaching people how to hack—and how to stay secure.