Introduction
Elastic Load Balancing on AWS supports different types of load balancers: Application Load Balancers, Network Load Balancers, Gateway Load Balancer, and Classic Load Balancers.
The Application Load Balancer makes decisions of routing at the application layer (HTTP/HTTPS). It supports path-based routing. The requests are routed to one or more ports on each instance in the cluster. Dynamic host mapping is also supported by Application Load Balancers.
In this article we will take a look at how to create an Application Load Balancer on AWS.
Creating an Application Load Balancer on AWS
Following are the steps to create the Application Load Balancer:
-
Login to your AWS account. https://aws.amazon.com/console/
-
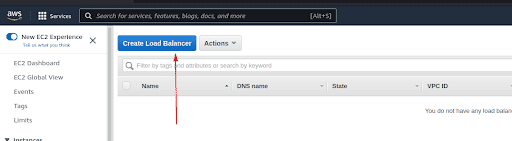
Navigate to Load Balancer in EC2
-
Click on Create Load Balancer
-
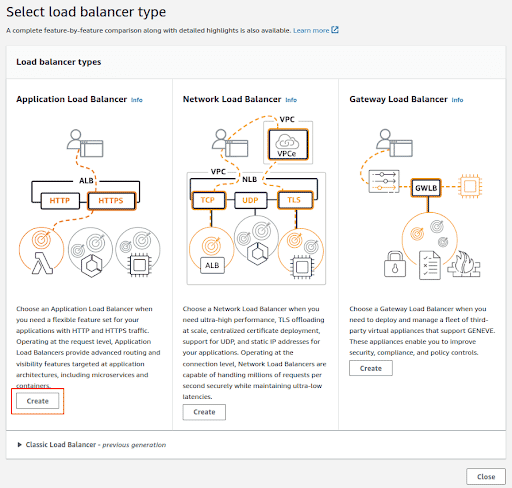
Select the load balancer type as Application Load Balancer
-
Click on Create.
-
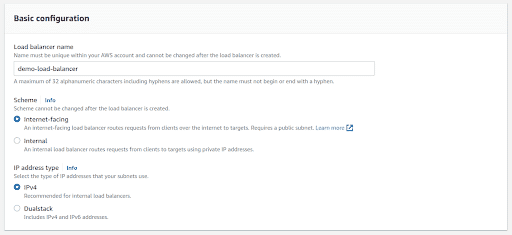
In the Basic configuration section, enter the name of Load Balancer and select the Scheme
**Scheme:**When you create a load balancer, you have to choose whether to make it an internal load balancer or an internet-facing load balancer. In internet-facing load balancer nodes have public IP addresses. In internal load balancer nodes have only private IP addresses.
-
Select the IP address type. Choose IPv4 if your clients use IPv4 addresses to communicate with the load balancer, or choose Dualstack if your clients use both IPv4 and IPv6 addresses to communicate with the load balancer.
-
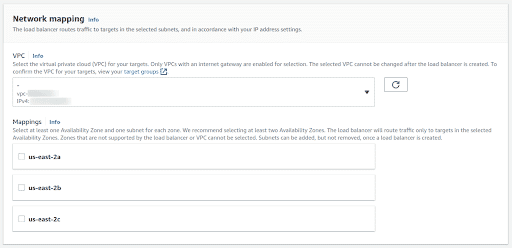
For Network Mapping select the VPC and enable two or more Availability Zones, to increase the fault tolerance of your application
-
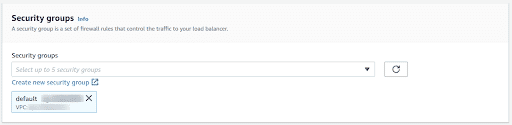
Select the Security Group for your Load balancer which will act as a firewall and control the traffic to your Load Balancer.
-
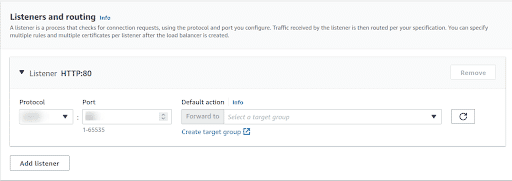
In the Listeners and routing section configure the protocol and port. Traffic received by the listener is then routed per your specification. You can specify multiple rules and multiple certificates per listener after the load balancer is created.
-
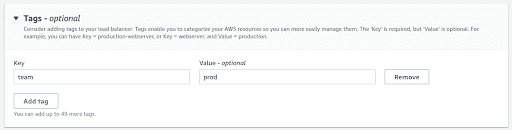
Add Tags to your Load Balancer. Though this is a good practice, but this is optional
-
Check the Summary section and go through all the details you have provided. Then select Create Load Balancer and the load balancer will be created successfully
Conclusion
In this article we did a quick walkthrough of how you can create an Application Load Balancer on AWS. This article serves as a step by step guide for those who are looking to get started with AWS Application Load Balancers.
Now that you have created your first load balancer on AWS, you can also take a look at the security aspect of it as well. We have also published an interesting article on How to protect your AWS Load Balancers against HTTP Desync Attacks. Check out this article as well.