Introduction
DigitalOcean is an Infrastructure as a Service cloud provider, much like AWS and Google cloud, with a limited set of resources that you can create and manage. Amongst other things, you can run compute instances, databases, Kubernetes clusters, Load Balancers, serverless functions and storage buckets.
Steampipe supports integrating with DigitalOcean using an API key that you can generate within DigitalOcean. Once setup, you can use Steampipe to retrieve information from the cloud provider to be able to query locally.
Configuring steampipe to work with DigitalOcean
To make this work, we will need to
- Install the plugin required for Steampipe to work with DigitalOcean
- Generate a read only API authentication token from DigitalOcean
- Configure Steampipe to work with the generated token
Installing the DigitalOcean plugin
Integrations with Steampipe are called plugins that can be installed using the command line.
-
To install the DigitalOcean plugin, run the following command
steampipe plugin install digitalocean -
Run the following command to confirm that the plugin is installed correctly
steampipe plugin list
Generating the DigitalOcean Token
A read only token needs to be generated to be provided to Steampipe.
-
Login to DigitalOcean and navigate to https://cloud.digitalocean.com/account/api/tokens
-
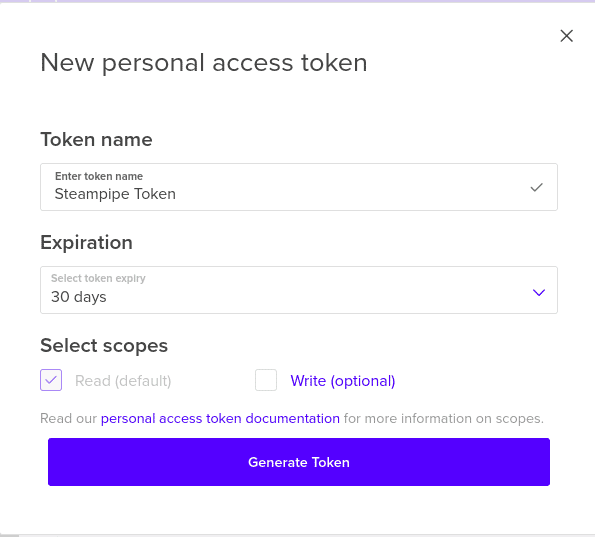
Under the
Tokens/Keystab, click on the “Generate New Token” button -
Give the token a name - for example, “Steampipe Token”. Set an expiration of 30 days (you can increase or decrease this based on your preference) and remove the “Write (optional)” checkbox.
-
Click on Generate Token and copy the value displayed. The token starts with the string
dop. The token will not be shown again so make sure this is copied.
Configure Steampipe to use the generated token
-
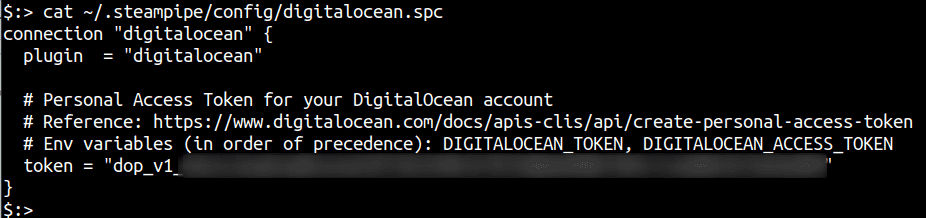
Open the
~/.steampipe/config/digitalocean.spcin your favorite editor -
Add the DigitalOcean token obtained in the previous section, at the end of the file and save it
Testing the set up for DigitalOcean
Once configured, the following commands can be used to figure out if the setup is complete and that DigitalOcean data is being retrieved successfully
-
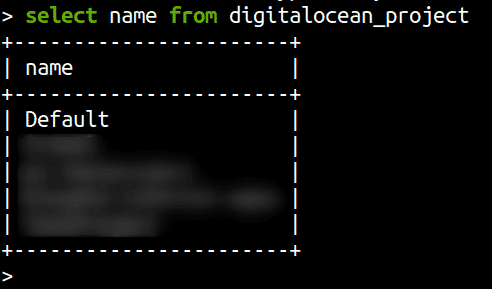
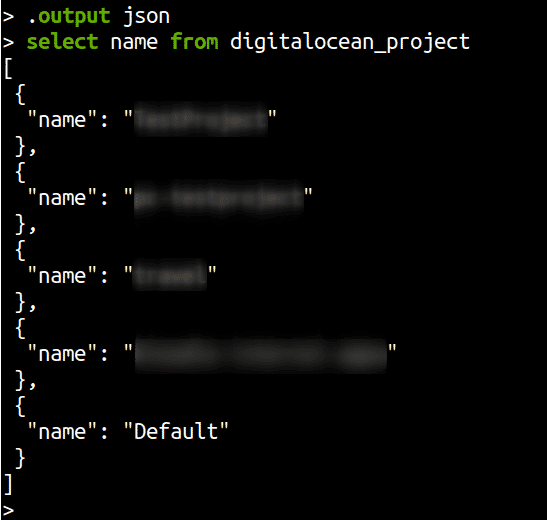
Start Steampipe in query mode and query for DigitalOcean resources
steampipe query
select name from digitalocean_project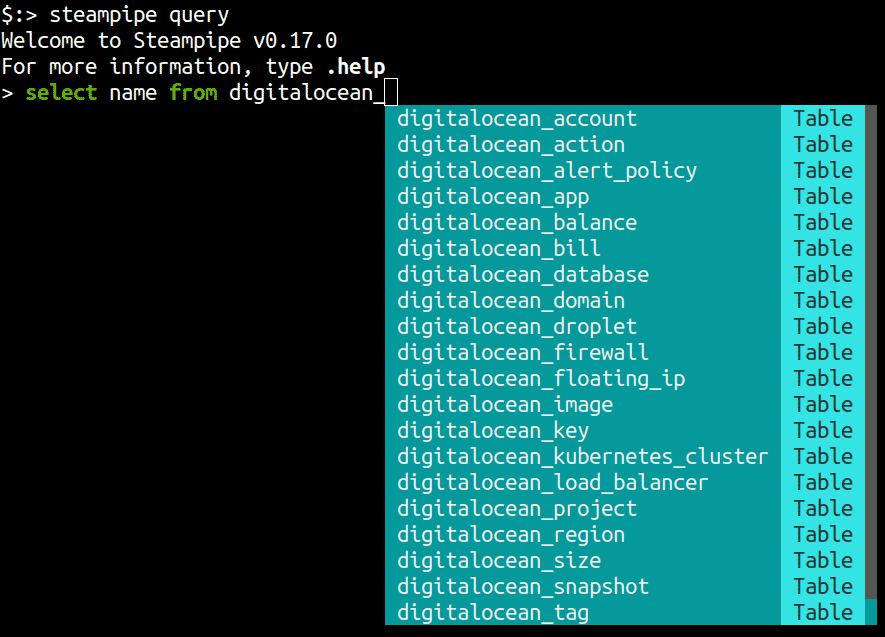
-
You can use
.inspectto look at the structure of other tables and query them as standard SQL queries.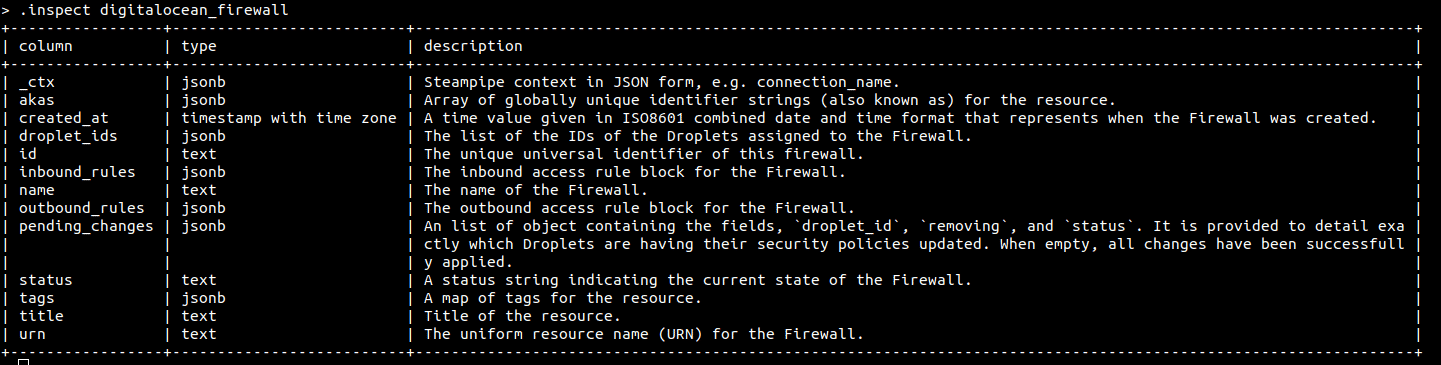
Output formats
A quick note about output formats. Steampipe supports csv, json, table and line output formats.
For example, if you want to see the output to a SQL select command as json, then set the output format to json using .output.
Here’s an example


Riyaz Walikar
Founder & Chief of R&D
Riyaz is the founder and Chief of R&D at Kloudle, where he hunts for cloud misconfigurations so developers don’t have to. With over 15 years of experience breaking into systems, he’s led offensive security at PwC and product security across APAC for Citrix. Riyaz created the Kubernetes security testing methodology at Appsecco, blending frameworks like MITRE ATT&CK, OWASP, and PTES. He’s passionate about teaching people how to hack—and how to stay secure.