What is a Vulnerability Scan?
A computer system consists of many dynamic processes, their libraries, helper files and configuration data. Sometimes (actually, more often than not) the system becomes vulnerable to attacks due to the way the software is written, installed or configured. EC2 instances on AWS (or any cloud platform for that matter) are virtual machines that have different software installed, some which comes with the operating system, some that is installed by AWS and some which the user/admin installs on the systems.
Each of these components can become vulnerable to attacks owing to vulnerabilities. The process of discovery of a system’s attack footprint based on what version of software (and its helper components), the way it is configured etc. is called a vulnerability scan. This is usually an automated process.
Introduction to Amazon Inspector
Amazon Inspector is a service provided by AWS that can automate certain security checks derived from various compliances and best practises for softwares running on AWS compute offerings such as EC2 and networks present in the AWS account. Amazon Inspector can automatically detect instances in the account and container images in AWS Elastic Container Registry (ECR) to scan for software vulnerabilities.
Performing the scan with Amazon Inspector
Performing the scan with Amazon Inspector is an automated activity. Once enabled, Amazon Inspector scans the EC2 instances and container workloads automatically, based on the defined schedule created at the time of enabling Amazon Inspector. In the next sections, we will look at enabling Amazon Inspector with console and AWS CLI to perform the audit.
Note: Amazon Inspector is a regional service and thus is required to be enabled in the specific regions that we want to perform the audit in.
Prerequisites
To allow Amazon Inspector to scan EC2 workloads, it requires that the instances be managed by AWS Systems Manager. To enable Systems Manager for EC2 instances, use this documentation as reference. This is so that the AWS Systems manager can be used to execute commands locally to gather information about the system.
Auditing with the console
The following steps are to be performed to enable Amazon Inspector via the AWS Web Console
-
Log in to the AWS Console and navigate to the Amazon Inspector service page
-
Click on the “Get Started” button

-
Click on “Enable Inspector” button
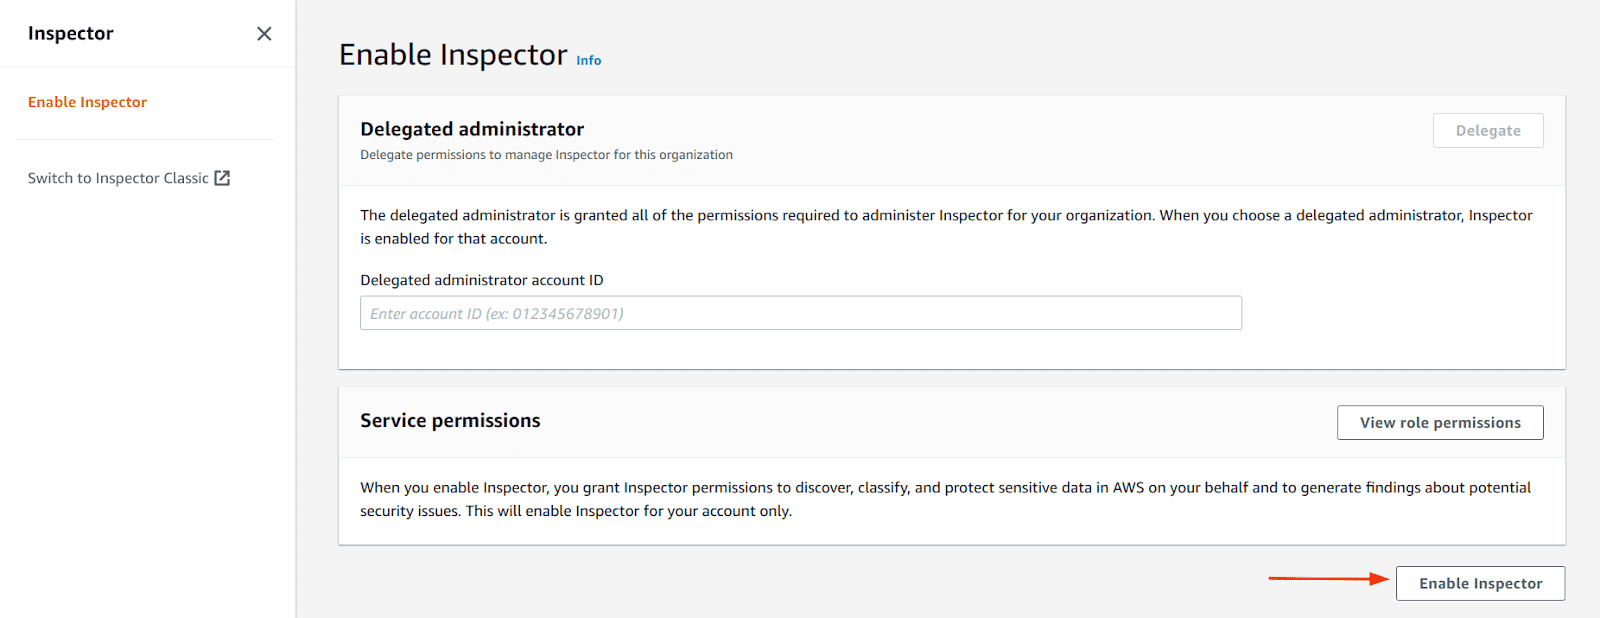
-
Once enabled successfully, we can see a similar page
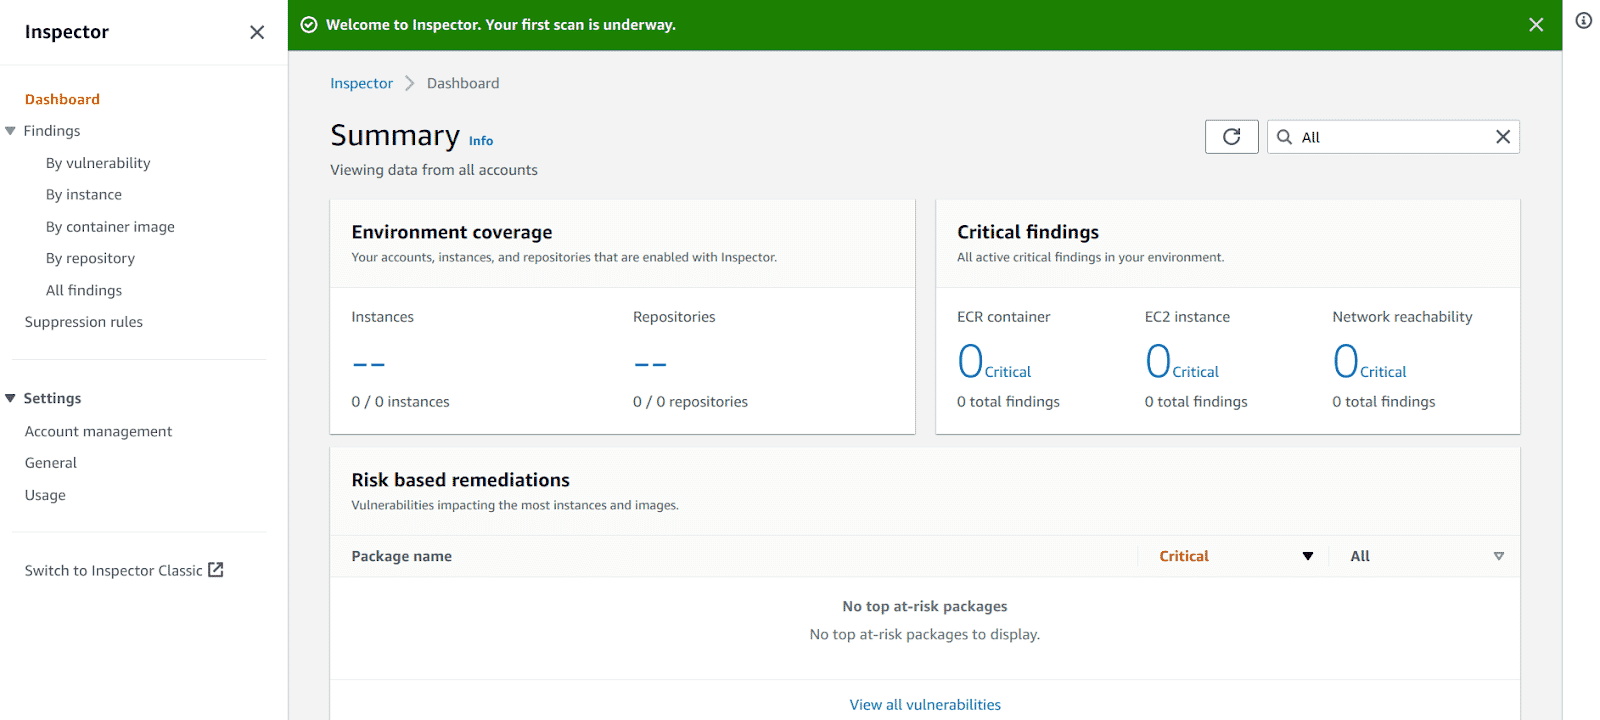
-
Next, click on the “Account Management” menu and enable the “All scanning” option if “EC2 scanning” an “ECR container scanning” columns say “disabled”
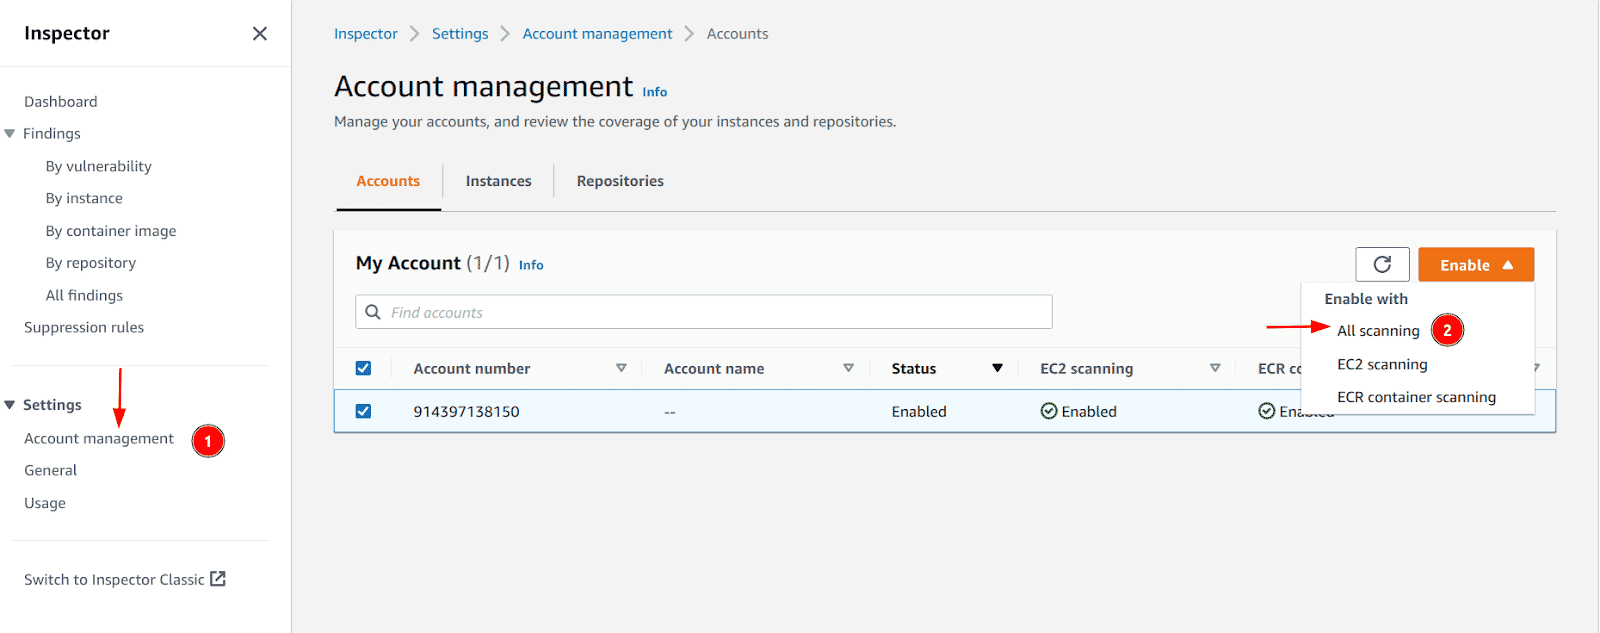
-
Once the scans are enabled and the prerequisite for EC2 instances is satisfied, the results can be found on the dashboard. You can click on each component to see a more detailed description of what is vulnerable etc.
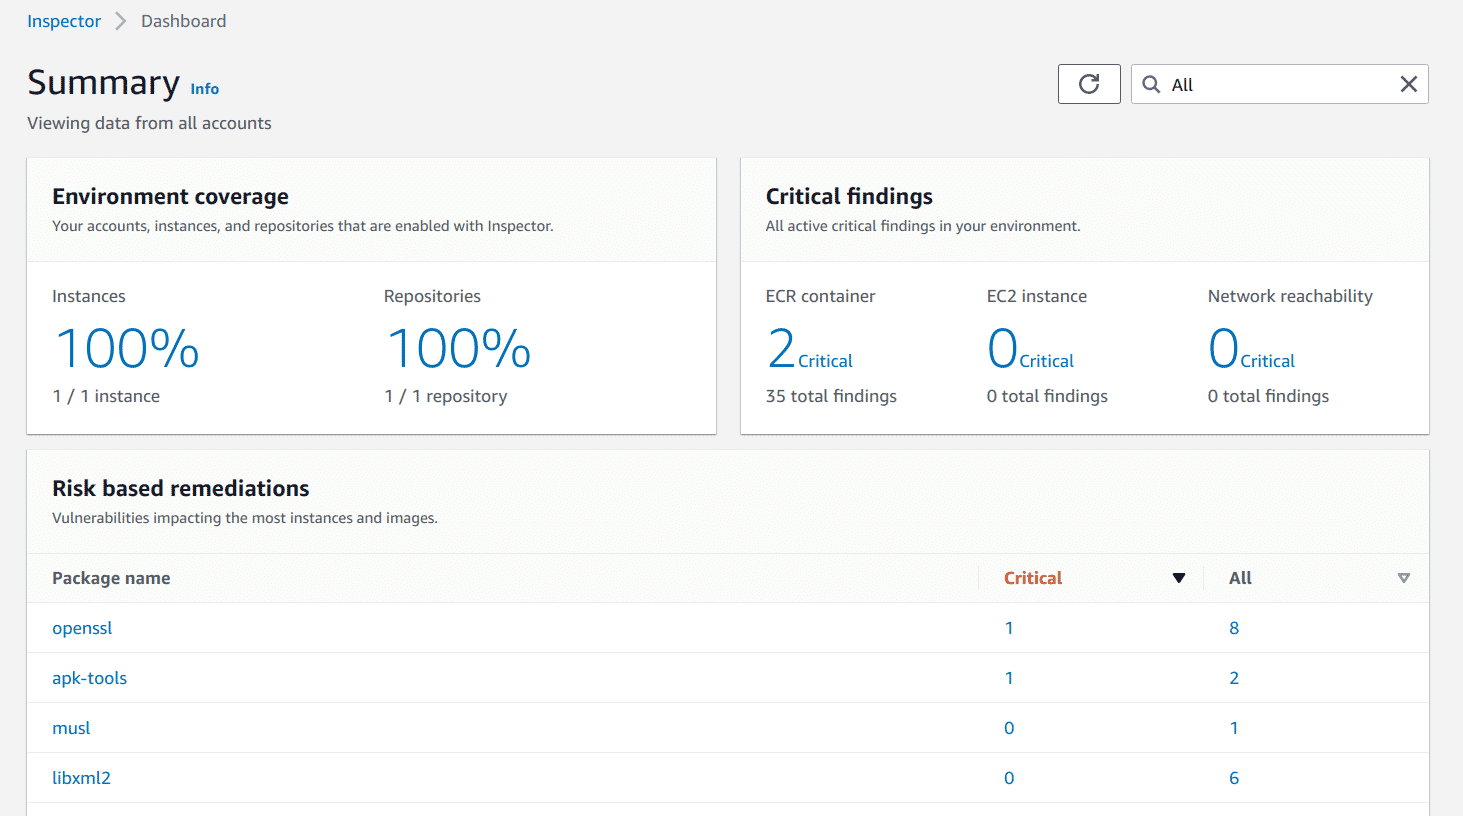
Scanning with AWS CLI
The following steps are to be performed to enable Amazon Inspector via the AWS CLI:
-
Run the following command to enable Amazon Inspector with AWS CLI for EC2
aws inspector2 enable --resource-types EC2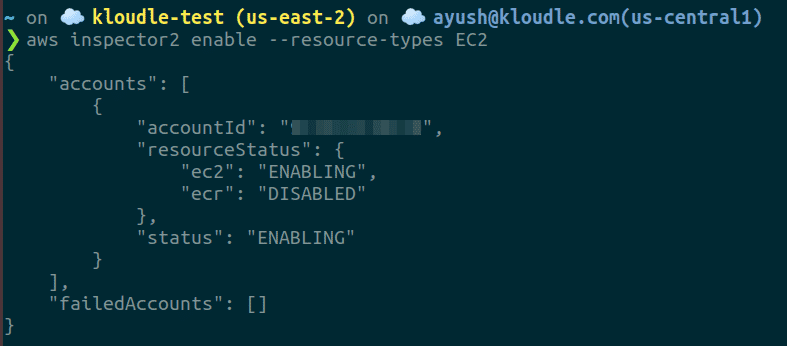
-
Run the following command to enable Amazon Inspector with AWS CLI for ECR
aws inspector2 enable --resource-types ECR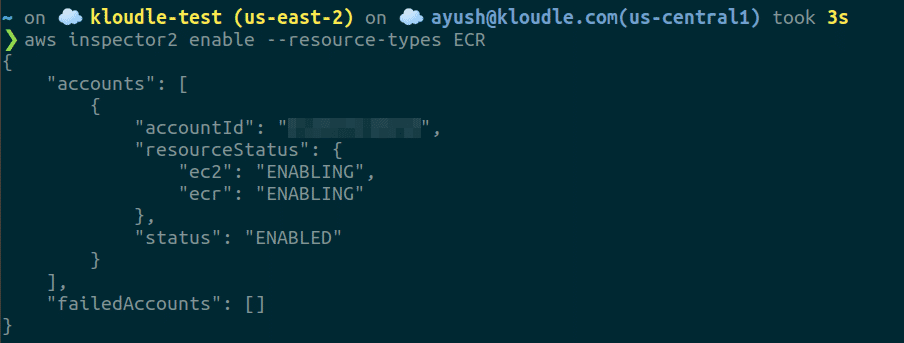
-
To list findings identified from the scan, run the following command
aws inspector2 list-findings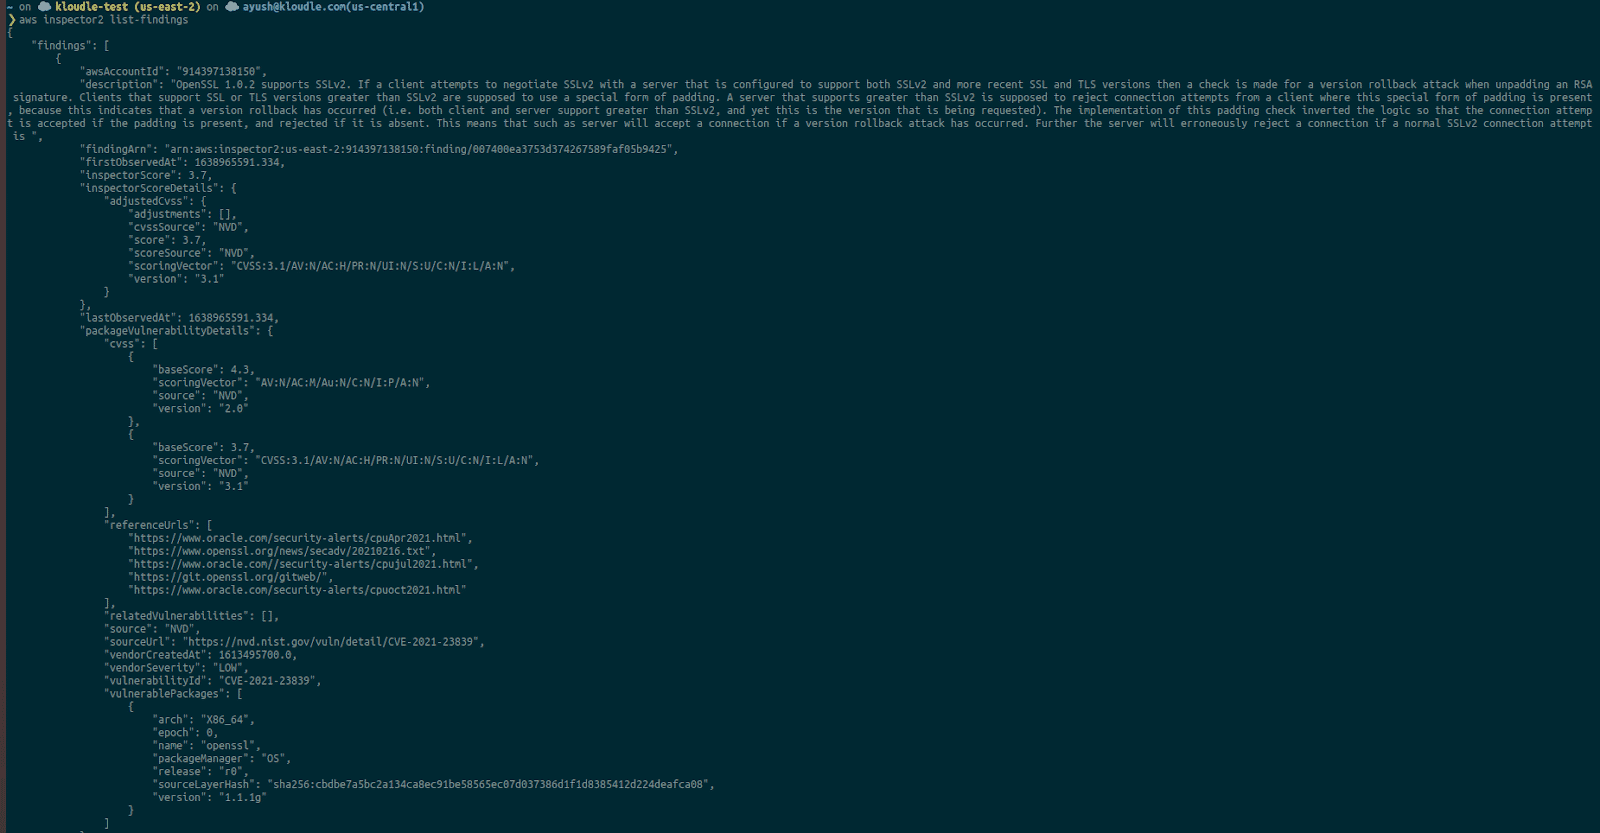
Conclusion
Vulnerability scans are an important part of ensuring system security is maintained and that there are no inherent issues within the instances that could be used or abused to exploit the systems. Attackers can use vulnerabilities to gain access to data, leak information and even execute commands on the remote machine. Amazon Inspector is an AWS service that can be used to perform vulnerability scans on AWS EC2 instances and ECR images for software vulnerabilities automatically in a periodic fashion. This allows us to continuously monitor for security issues that our AWS environment can have and remediate them before they cause an incident.

Riyaz Walikar
Founder & Chief of R&D
Riyaz is the founder and Chief of R&D at Kloudle, where he hunts for cloud misconfigurations so developers don’t have to. With over 15 years of experience breaking into systems, he’s led offensive security at PwC and product security across APAC for Citrix. Riyaz created the Kubernetes security testing methodology at Appsecco, blending frameworks like MITRE ATT&CK, OWASP, and PTES. He’s passionate about teaching people how to hack—and how to stay secure.