Introduction
GitHub repository visibility can either be public or private. A public repository allows anyone to access the code and other information in the repository. These are searchable on GitHub and can be crawled by search engines.
Publicly exposing a repository when it is not supposed to be exposed allows any Internet user to access the code and can result in theft of intellectual property. A repository should not be made public unless it has to be shared with the world.
In this article, we will see how to update visibility of a public repository to private.
Update Repository visibility from public to private
Following are the steps to update the visibility of a public repository to private:
-
Login to your GitHub account
-
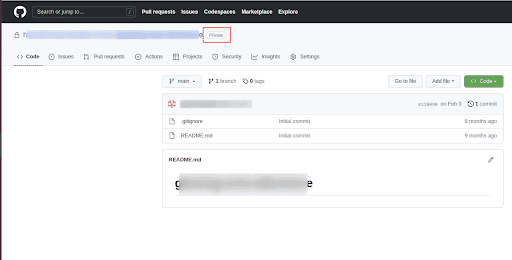
Navigate to the main page of the repository for which you want to update the visibility
-
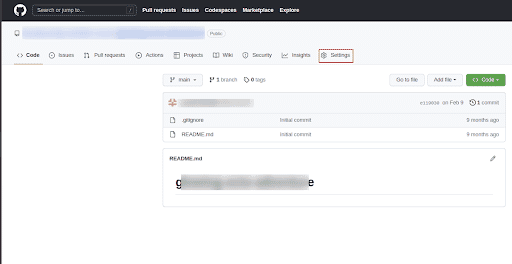
Click on Settings
-
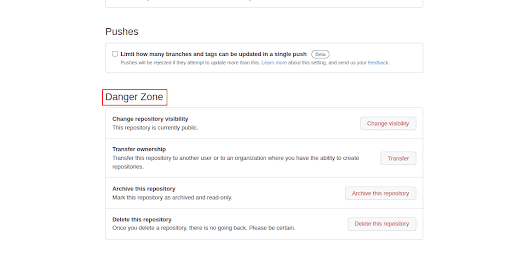
On the Settings page under General scroll down to Danger Zone section
-
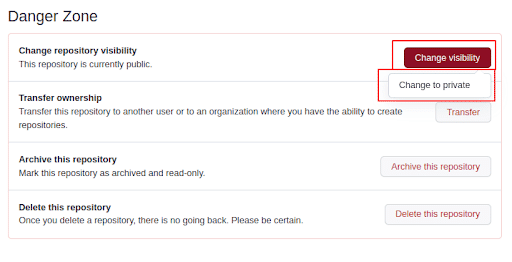
Click on Change visibility and then click on Change to private
-
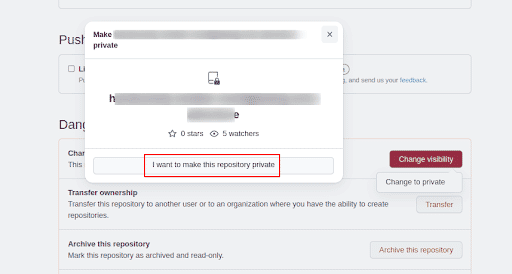
A pop-up will appear for action confirmation. Click on I want to make this repository private
-
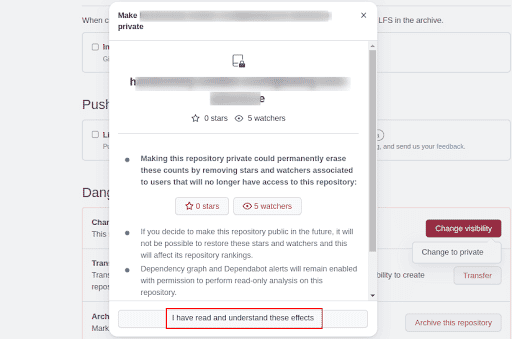
The pop-up will provide more information on effects of changing a public repository to private. Click on I have read and understand these effects
-
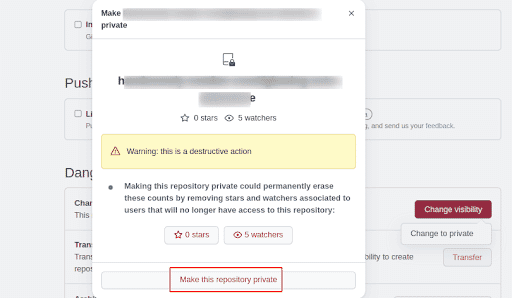
A warning regarding the action appears. Finally click on Make this repository private
-
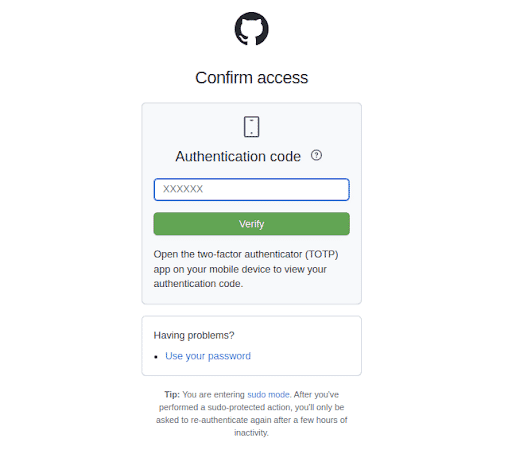
Confirm access by providing the authentication code
-
The repository visibility will change to private

Riyaz Walikar
Founder & Chief of R&D
Riyaz is the founder and Chief of R&D at Kloudle, where he hunts for cloud misconfigurations so developers don’t have to. With over 15 years of experience breaking into systems, he’s led offensive security at PwC and product security across APAC for Citrix. Riyaz created the Kubernetes security testing methodology at Appsecco, blending frameworks like MITRE ATT&CK, OWASP, and PTES. He’s passionate about teaching people how to hack—and how to stay secure.