Introduction
In our listicle on Tools for Scanning IPv6 networks we had shared some open source tools that can be used for scanning IPv6 networks. In this article, we will take a look at our first tool in the list - Nmap.
Nmap is a popular open source utility for performing network discovery and network security auditing. The utility can be used to identify hosts and services on a network and is considered a core part of any security auditor’s toolkit.
With Nmap you can scan for both IPv4 and IPv6 networks. This article is a hands-on guide for getting started with Nmap for scanning IPv6.
Note: Make sure that the scans are conducted on the networks where you are allowed to do so with appropriate permissions.
Before we begin
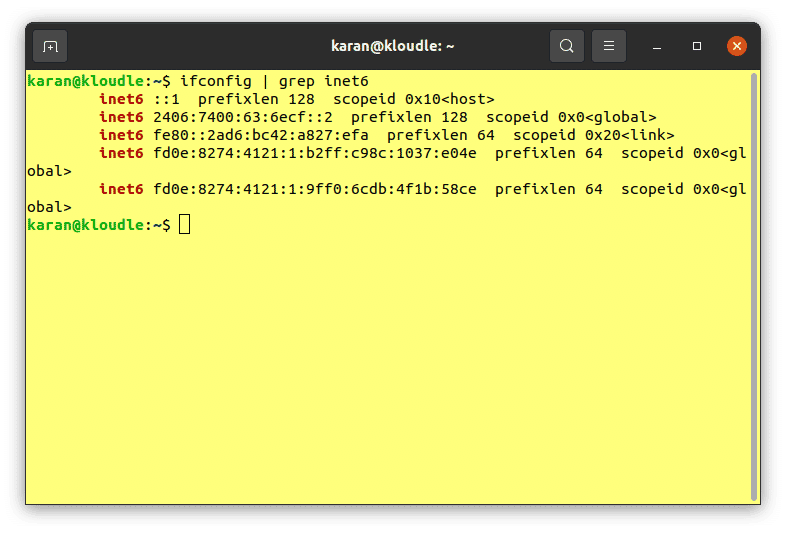
Access to an IPv6-enabled network is required in order to utilise Nmap’s IPv6 scanning capabilities. To verify that your system and network are properly configured to have IPv6 access, you can run either of the following commands:
-
ip -6 addr

-
ifconfig | grep inet6
Setting up Nmap
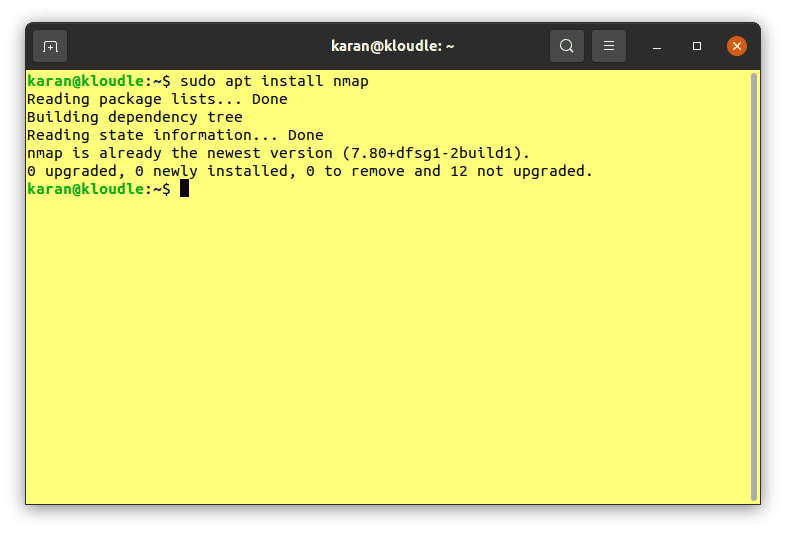
In this section we will go through the steps for setting up Nmap on the system. Here, we will install Nmap on Ubuntu. On systems with Ubuntu, the package manager can be used to install Nmap.
Run the following commands in your terminal to install Nmap:
-
sudo apt update
-
sudo apt install nmap
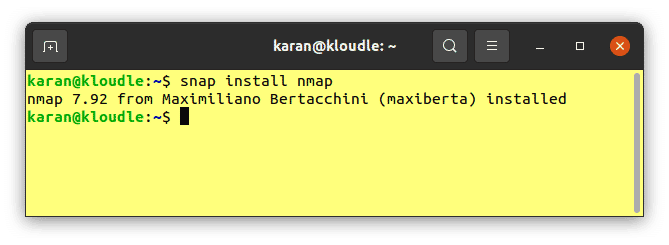
Alternatively, it’s also possible to install Nmap from the Snap Store or by using the Snap package manager.
If you don’t already have Snap installed, run the following commands:
- sudo apt update
- sudo apt install snapd
- sudo snap install core
After that, run the following command for installing Nmap:
-
sudo snap install nmap
The Nmap project website provides installer packages and compiled binaries for various operating systems as well as for several popular Linux distributions. Installation guides for various operating systems and environments can be found in case you are using a different operating system.
Scanning IPv6 with Nmap
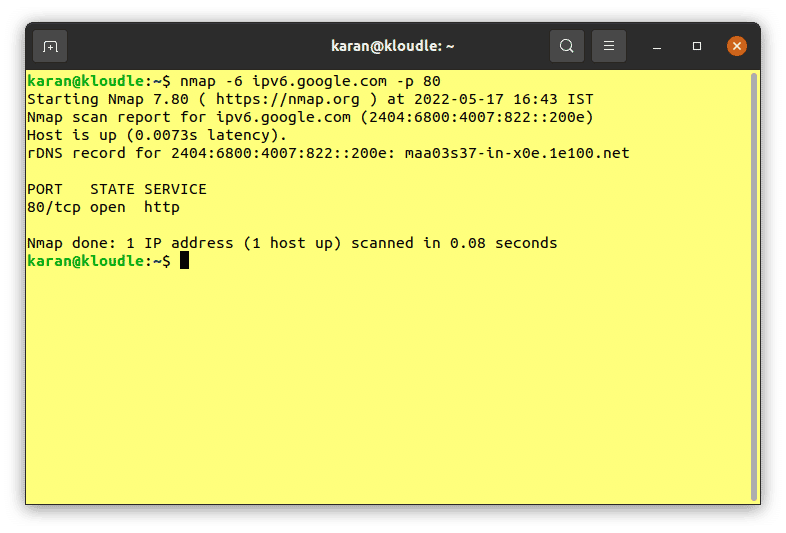
Nmap can be used to scan IPv6 addresses for open ports. To do this, the -6 option must be supplied along with any other options and arguments for the scan. Refer to the command below for an example:
-
nmap -6 ipv6.google.com
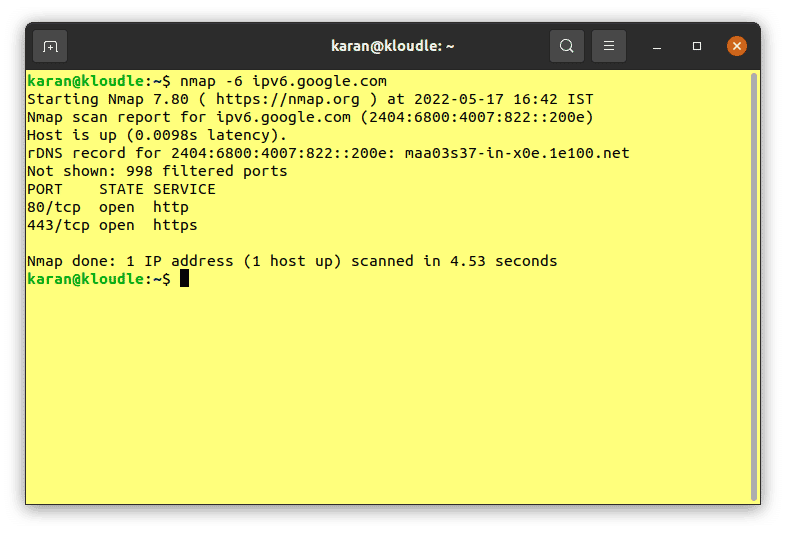
The above command will perform a regular scan of the IPv6 address for the “ipv6.google.com” host.
All Nmap functionalities can be utilised for IPv6 scanning in the same way we use it for IPv4 scanning. For example, providing “-p 80” as an argument along with the nmap command for IPv6 will only scan port 80 on the host.
Consideration for address ranges
While scanning a large set of IPv4 addresses may be a relatively quick process, scanning IPv6 addresses in practice is much slower. This is due to the larger address space of IPv6. When dealing with IPv6 addresses, if you use Nmap primarily for performing service detection and port scanning on already discovered hosts, instead of port scanning for the purpose of discovering hosts, it can save a lot of time.
Conclusion
In this article, we discussed how to set up and use Nmap for scanning IPv6 addresses. We also looked at considerations that need to be taken into account with regards to the considerably larger address space one is presented when scanning IPv6 networks.
This article is part of a series on scanning IPv6 addresses. Come back for our next article in the series in which we will take a look at another IPv6 scanner - fi6s.

Riyaz Walikar
Founder & Chief of R&D
Riyaz is the founder and Chief of R&D at Kloudle, where he hunts for cloud misconfigurations so developers don’t have to. With over 15 years of experience breaking into systems, he’s led offensive security at PwC and product security across APAC for Citrix. Riyaz created the Kubernetes security testing methodology at Appsecco, blending frameworks like MITRE ATT&CK, OWASP, and PTES. He’s passionate about teaching people how to hack—and how to stay secure.