Introduction
AWS S3 is one of the most widely used services in the (ever increasing) family of services that AWS provides. The ability for a storage bucket to act not only as storage but also serve static websites right from the bucket itself is an amazing additional feature. However, having many features also invites the possibility of having misconfigured settings for the S3 bucket that can lead to our data stored in these buckets being at risk.
There are various pieces of documentation that refer to the best practices and security settings one must employ to keep S3 secure. However, this article has been written from the perspective of an attacker as well as a defender of cloud resources to give a better idea of what misconfigurations to look out for and what settings would make your S3, and the data that it holds, secure.
In this article, we will look at the top 10 actions to take for your S3 buckets to enhance their security. You can follow along with a test bucket within your AWS account.
Top 10 Security best-practices
Here is the list of the top 10 things to do to enhance the security of your S3 buckets:
Block Public Access
The public access block is a configuration for an S3 bucket to control access to the bucket and the objects in the bucket. By blocking public access, we safeguard our data from unauthorised entities. Unless you want the objects within your bucket to be visible to the world as part of your business requirements (CDN, image hosting etc.), you would want to ensure public access is blocked. There are search engines available (like grayhatwarfare) that hunt and curate openly accessible buckets and their object information for anyone to download.
Blocking public access can be enabled by following the given steps:
-
Log in to AWS console
-
Navigate to the S3 details page
-
Navigate to the relevant bucket’s details page
-
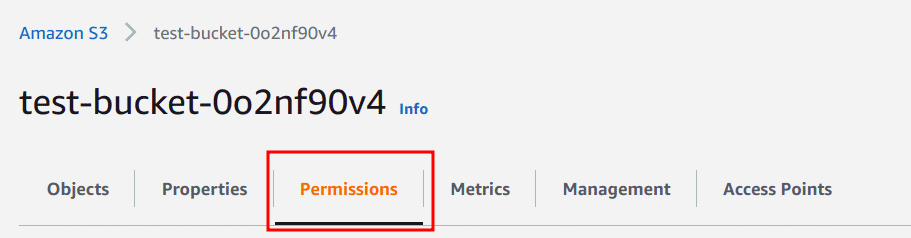
Click on the “Permissions” tab
-
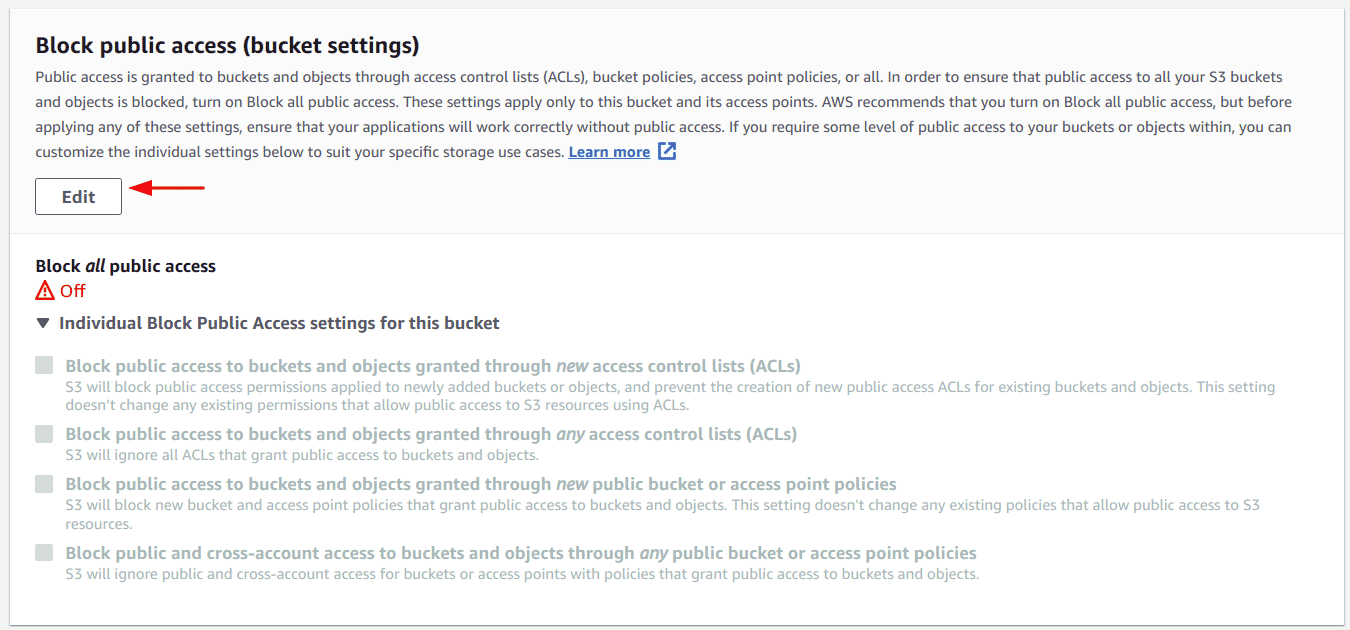
Scroll to the “Block public access (settings)” section and click on the “Edit” button
-
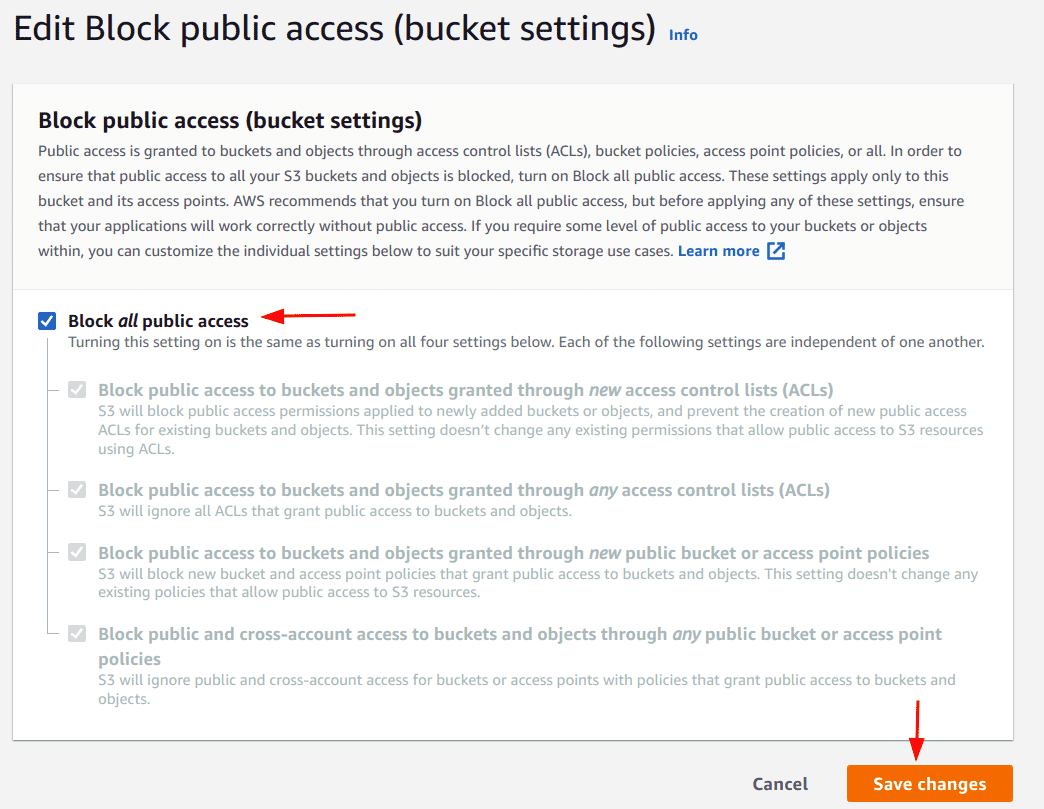
Select the “Block all public access” option and click on the “Save changes” button. Optionally, one can choose to use the other options as needed
-
Alternatively, the following AWS CLI command can be used to block all public access to the bucket
aws s3api put-public-access-block --bucket <BUCKET NAME> --public-access-block-configuration "BlockPublicAcls=true,IgnorePublicAcls=true,BlockPublicPolicy=true,RestrictPublicBuckets=true"
Disallow wildcards “*” in Bucket policies
Bucket policies are used to define fine-grained permissions for S3 buckets. They can be used to define which principles - IAM Users, roles, etc. can access the bucket, what operations - GetObject, GetBucket, etc. they can perform, and which bucket the actions can be performed are defined by the resource block. Using wildcards (“*”) in the policies is a bad security practice as it means all principal/actions are included, depending on which section the wildcard was used in. Thus, it is a good idea to add the right principals and “allowed” actions for those principals explicitly instead of using wildcards.
S3 bucket policies can be very extensive and thus it is not feasible to give all variations. So here is a sample bad policy that uses a wildcard for the principal and actions it can perform. The next policy shown has specific resources and a list of allowed actions on them, which is the recommended way of creating policies.
Bad Policy
{

  "Version": "2012-10-17",

  "Statement": [

    {

      "Sid": "",

      "Effect": "Allow",

      "Principal": "*",

      "Action": "*",

      "Resource": "*"

    }

  ]

}
Good Policy
{

  "Version": "2012-10-17",

  "Statement": [

    {

      "Sid": "",

      "Effect": "Allow",

      "Principal": "arn:aws:iam::444455556666:role/s3-access-role",

      "Action": [

        "s3:ListBucket",

        "s3:DeleteObject",

        "s3:GetObject",

        "s3:PutObject"

      ],

      "Resource": [

        "arn:aws:s3:::awsexamplebucket1/*",

        "arn:aws:s3:::awsexamplebucket1"

      ]

    }

  ]

}
The bucket policy can be updated by following the given steps:
-
Log in to the AWS console
-
Navigate to the S3 details page
-
Navigate to the relevant bucket’s details page
-
Click on the “Permissions” tab

-
Scroll to the “Bucket Policy” section and click on the “Edit” button

-
Add the policy in the given text area and click on the “Save changes” button
-
Alternatively, the following AWS CLI command can be used to add a bucket policy
aws s3api put-bucket-policy --bucket <BUCKET NAME> --policy file://<PATH TO POLICY JSON FILE>
Disallow “Any authenticated AWS user” in Bucket ACLs
Bucket ACLs is another way that can be used to permit different principals to perform actions on the S3 bucket and its objects. The “Any authenticated AWS user” option implies any global user that has an AWS account and does not mean only an authenticated user in the account in which the bucket was created. This is clearly not a secure configuration to allow anybody with an AWS account to list and read contents from our S3 buckets.
The bucket policy can be updated by following the given steps:
-
Log in to AWS console
-
Navigate to the S3 details page
-
Navigate to the relevant bucket’s details page
-
Click on the “Permissions” tab
-
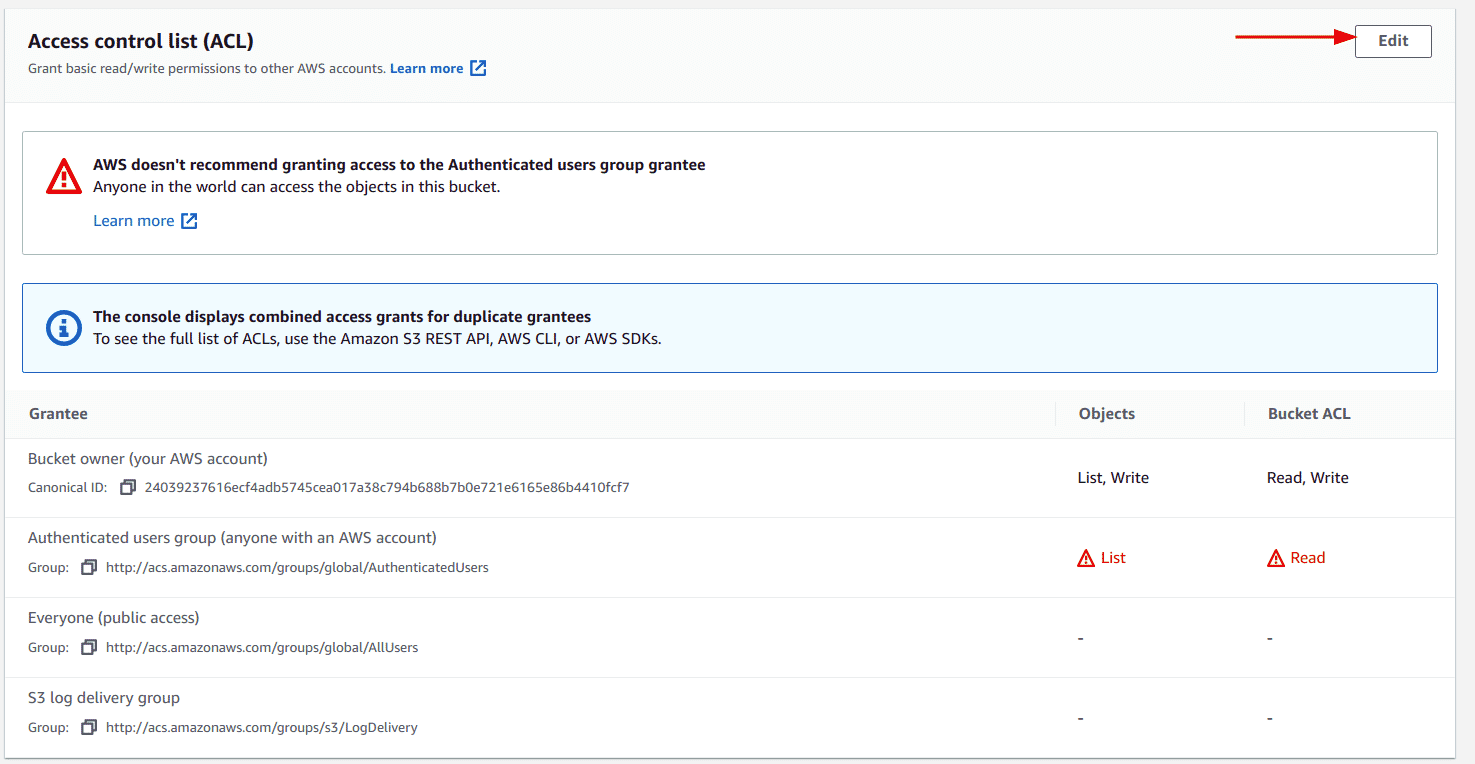
Scroll to the “Access control list (ACL)” section and click on the “Edit” button
-
Ensure that the “List” action for objects and “Read” action for Bucket ACL is unchecked and then click on the “Save changes” button
-
Alternatively, the following AWS CLI command can be used to update the Bucket ACL
aws s3api put-bucket-acl --bucket <BUCKET NAME> --acl public-read
Note: This command can be used to update the Object ACL as well but it needs to be done recursively for each object. The command is as follows:
aws s3api put-object-acl --bucket <BUCKET NAME> --acl authenticated-read --key "<OBJECT PATH>"
Implement least privilege access to Buckets
The concept of least privilege means providing an entity, in this case, an IAM user or role, the exact set of permissions it requires to complete its objective. For example, if there exists a service on a VM whose only task is to upload a file to an S3 bucket, it should only have write access to the specific bucket and nothing else. Similarly, if a web application requires to fetch some data from a bucket, the credential use should only be provided with read access to the bucket, and if possible only to the objects or folders it needs to read from.
The least privilege specification can be done in various ways in the case of S3 buckets. The policy attached to the IAM user/role can have allowed actions defined explicitly, or the same can be defined in bucket policies. ACLs are another way in which we can grant or deny actions to a set of users at once. Since crafting a policy and all the variations go out of the bounds of this article, here are a few resources to get you started and serve as a reference to implement least privilege access for your IAM users and roles:
Enable Server Access Logs
Server access logs are a service provided by AWS to record and log all actions made on an S3 bucket. Enabling server access logs not only allows us to monitor our buckets, actions performed by users and services but it also serves as the source of truth when performing audits or in the case of an incident response post a breach.
Server access logs can be enabled by following the given steps:
-
Log in to AWS console
-
Navigate to the S3 details page
-
Navigate to the relevant bucket’s details page
-
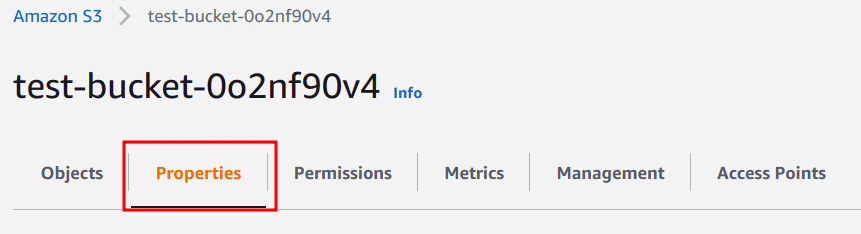
Click on the “Properties” tab
-
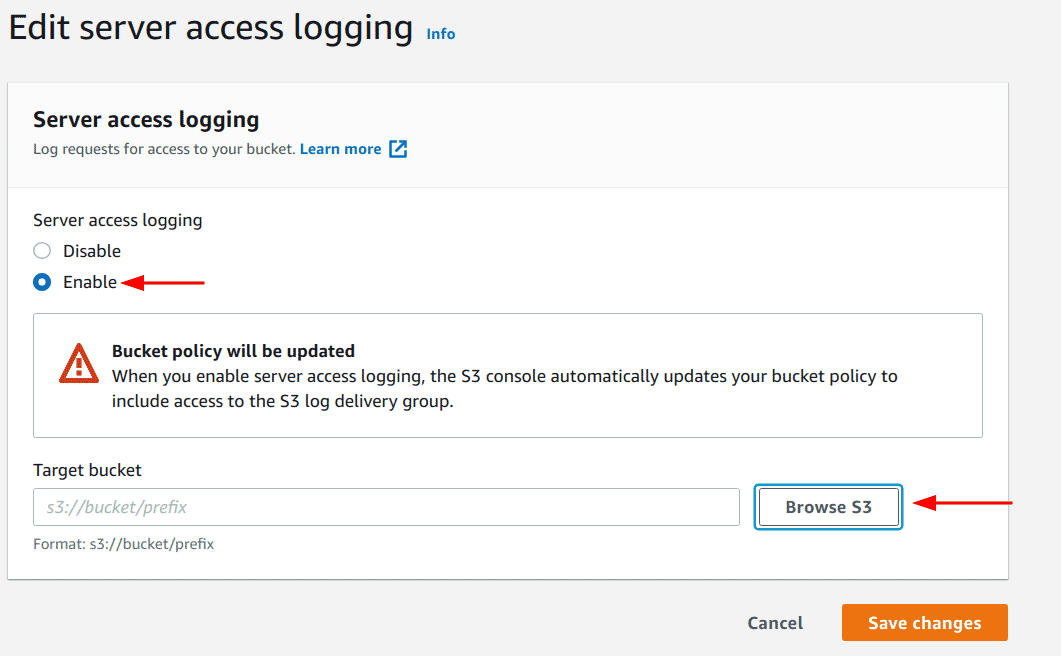
Scroll to the “Server access logging” section and click on the “Edit” button

-
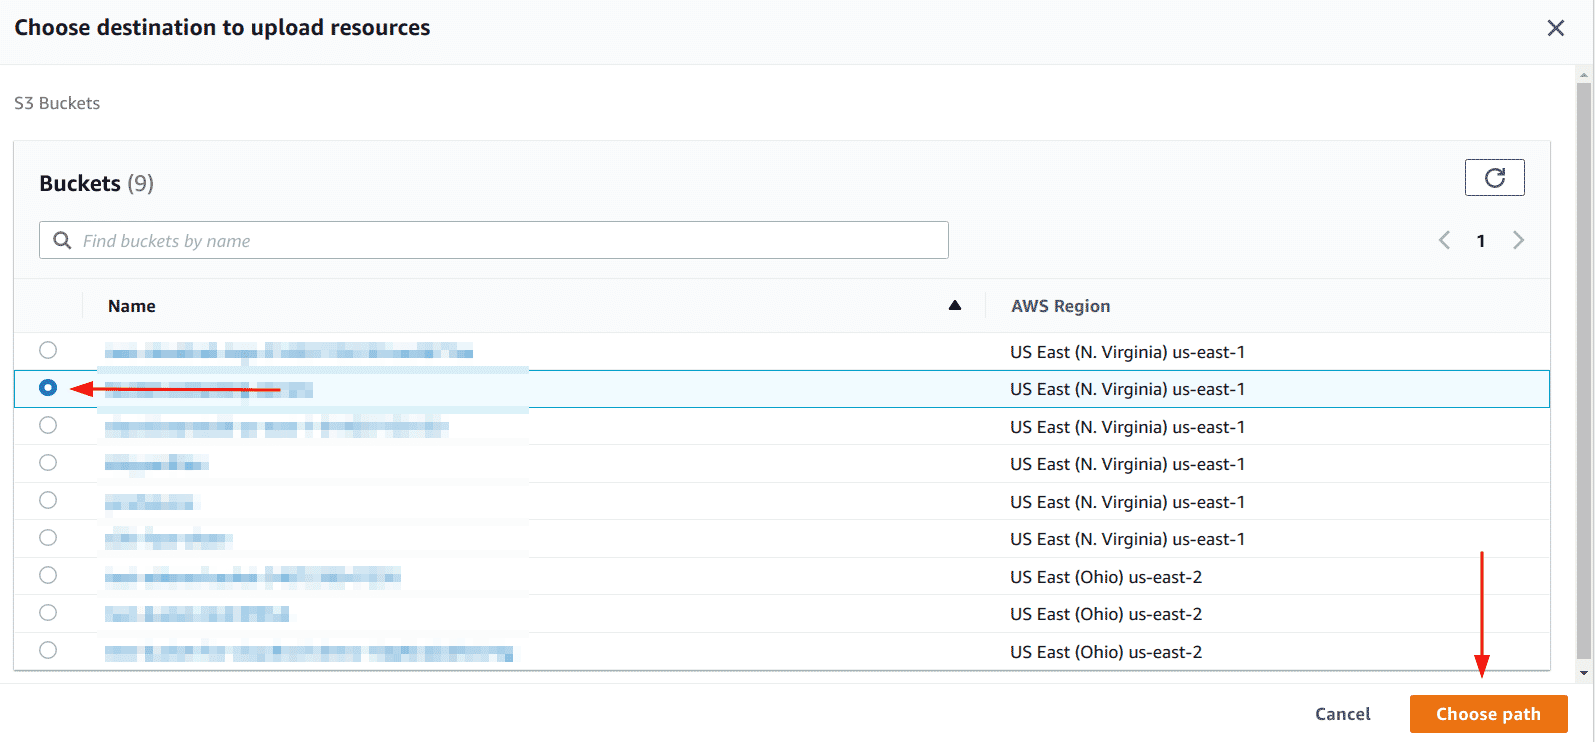
Select the “Enable” option and click on the “Browse S3” option to select the bucket to store the access logs
-
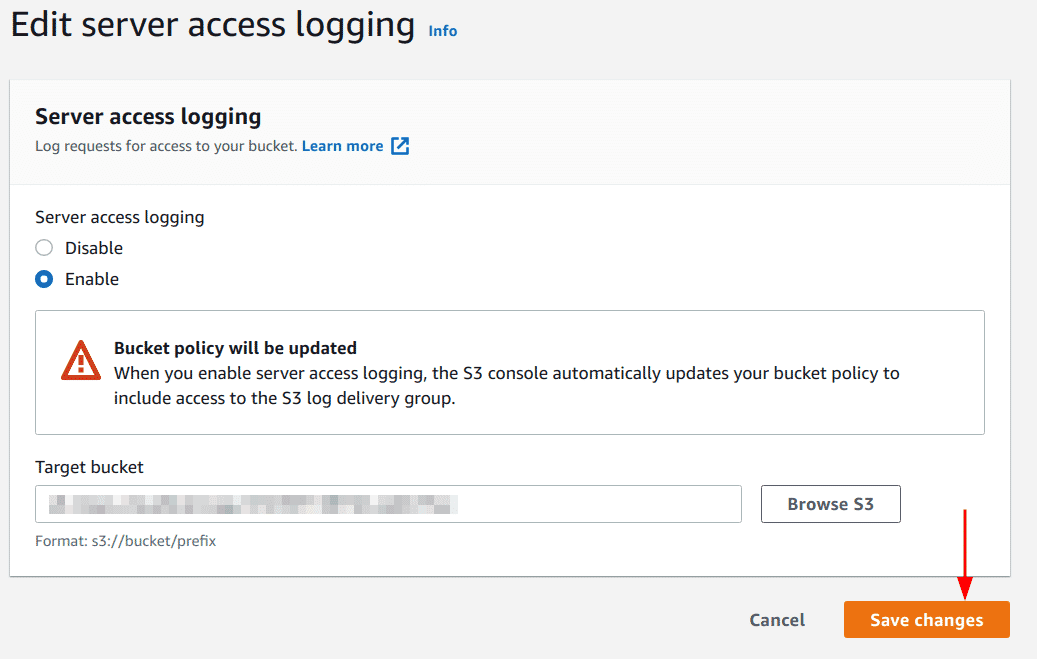
Select the bucket and click on the “Choose path” button
-
Lastly, click on the “Save changes” button
-
Alternatively, the AWS CLI can be used to enable server access logging for S3 buckets
- Before we can enable logging we need to update the bucket policy to allow AWS to logs data for our bucket, this can be done by running the following command
aws s3api put-bucket-policy --bucket <LOG BUCKET NAME> --policy file://policy.jsonpolicy.json contents:
{ "Version": "2012-10-17", "Statement": [ { "Sid": "S3ServerAccessLogsPolicy", "Effect": "Allow", "Principal": {"Service": "logging.s3.amazonaws.com"}, "Action": "s3:PutObject", "Resource": "arn:aws:s3:::<LOG BUCKET NAME>/Logs/*", "Condition": { "ArnLike": {"aws:SourceARN": "arn:aws:s3:::<SOURCE BUCKET NAME>"}, "StringEquals": {"aws:SourceAccount": "<SOURCE AWS ACCOUNT ID>"} } } ] }- Now, we can enable logging by running the following AWS CLI command
aws s3api put-bucket-logging --bucket <SOURCE BUCKET NAME> --bucket-logging-status file://logging.jsonlogging.json contents:
{

	"LoggingEnabled": {

 	"TargetBucket": "<Bucket TO STORE LOGS>",

   "TargetPrefix": "<OPTIONAL PREFIX>"

 }

}
Enable encryption at-rest
Data stored in S3 is not encrypted by default. We can enable encryption for our objects at rest to prevent unauthorized entities from reading it while it is stored in Amazon’s data centers. This is also a very popular compliance requirement around data security and is a highly recommended security best practice in the real world.
Bucket encryption can be enabled by following the given steps:
-
Log in to AWS console
-
Navigate to the S3 details page
-
Navigate to the relevant bucket’s details page
-
Click on the “Properties” tab
-
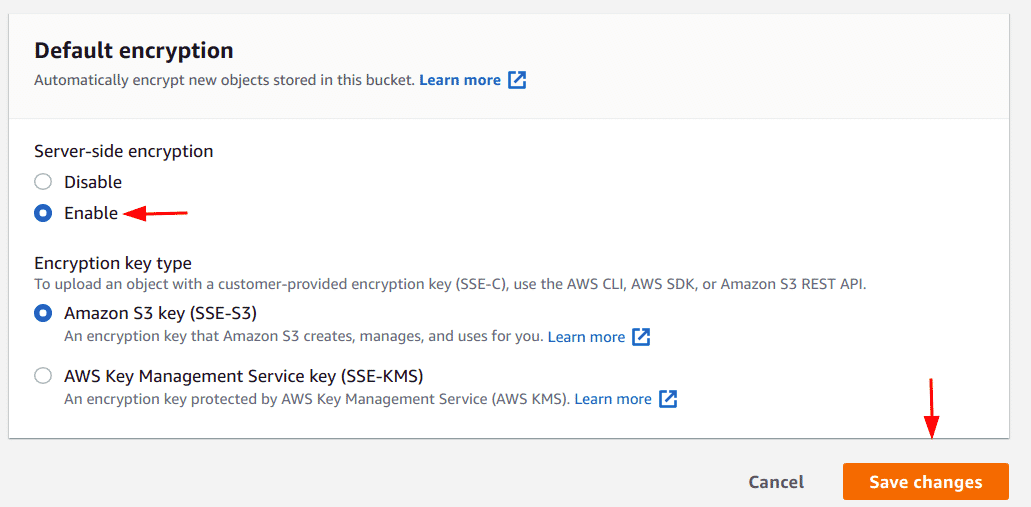
Scroll to the “Default encryption” section and click on the “Edit” button

-
Select the “Enable” option and click on save changes. Optionally, you can choose the “AWS Key Management Service key (SSE-KMS)” option to use a customer-managed key instead of letting AWS create and manage one for use
-
Alternatively, the following AWS CLI command can used to enable encryption (with AWS managed key):
aws s3api put-bucket-encryption --bucket <BUCKET NAME> --server-side-encryption-configuration '{"Rules": [{"ApplyServerSideEncryptionByDefault": {"SSEAlgorithm": "AES256"}}]}'
Enable encryption in-transit
Enabling encryption for our data at rest is nice, but what about it is in transit? Unencrypted data can be sniffed from networks while it is in transit between nodes. The HTTPS (HTTP over TLS) protocol helps us ensure that our data is secure while being transmitted between nodes by encrypting it thus preventing it from being sniffed.
S3 currently does not have a setting that can simply be enabled to enforce S3 API calls to only use HTTPS but, thankfully, there is a workaround. We can use the “aws:SecureTransport” condition in our bucket policies to enforce that all actions taken on our S3 resources are performed over HTTPS else the actions would be denied. To craft such a policy, we only need to add a Condition segment to our existing policies to enforce HTTPS. A sample bucket policy can be found below which uses the required directive to enforce usage of HTTPS:
{

	"Version": "2012-10-17",

  "Statement": {

  	"Effect": "Allow",

    "Action": "s3:*",

    "Resource": "arn:aws:iam::123412341234:user/*",

    "Condition": {"Bool": {"aws:SecureTransport": "true"}}

   }

}
To update or add a bucket policy to an S3 bucket, the ‘2. Disallow wildcards “*” in Bucket Policies’ section can be referred to.
Enable S3 Object Lock
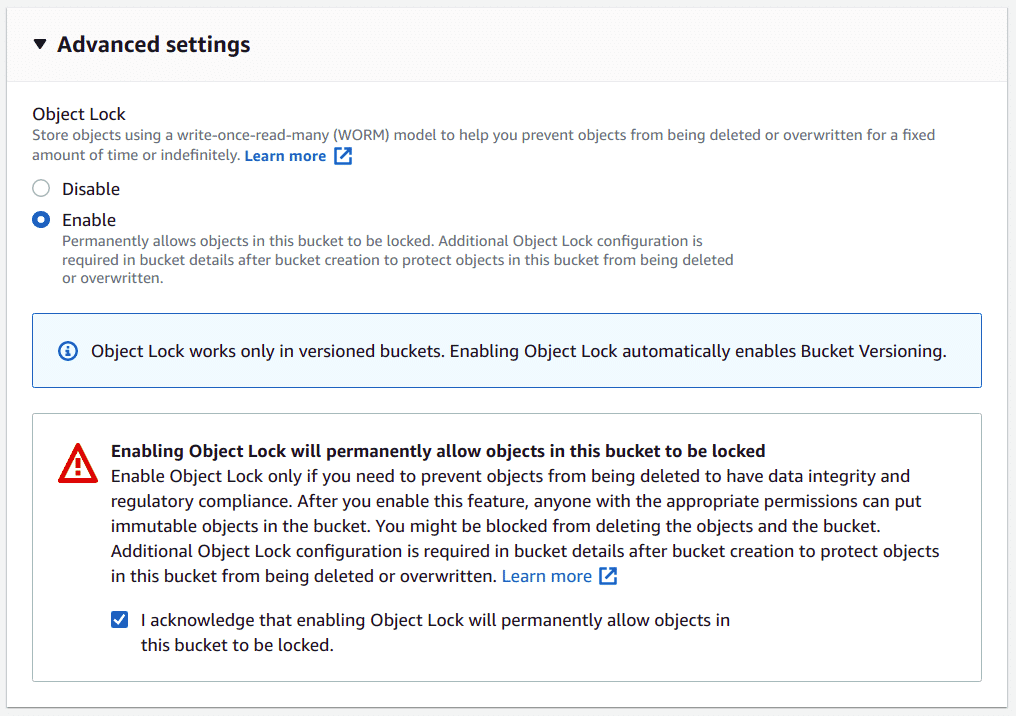
S3 object lock allows the implementation of a “Write Once Read Many” (WORM) model which stops the deletion of data accidentally. This configuration is really useful for buckets that might store logs such as CloudTrail logs. Currently, S3 object lock can only be enabled at the time of bucket creation. To enable S3 object lock follow the given steps:
-
On the bucket creation page, scroll to the “Advanced settings” section
-
Select the “Enable” option for Object Lock and also check the “I acknowledge..” option
-
Lastly, click on the “Create bucket” button
-
Alternatively, we can use the “—object-lock-enabled-for-bucket” flag to enable Object lock while creating an S3 bucket with AWS CLI as shown here
aws s3api create-bucket --bucket <BUCKET NAME> --object-lock-enabled-for-bucket
Enable Object Versioning
Object versioning is a feature that enables objects to be versioned, instead of being overwritten. This makes the data stored more secure and robust against accidental delete or write operations.
Bucket versioning can be enabled by following the given steps:
-
Log in to AWS console
-
Navigate to the S3 details page
-
Navigate to the relevant bucket’s details page
-
Click on the “Properties” tab
-
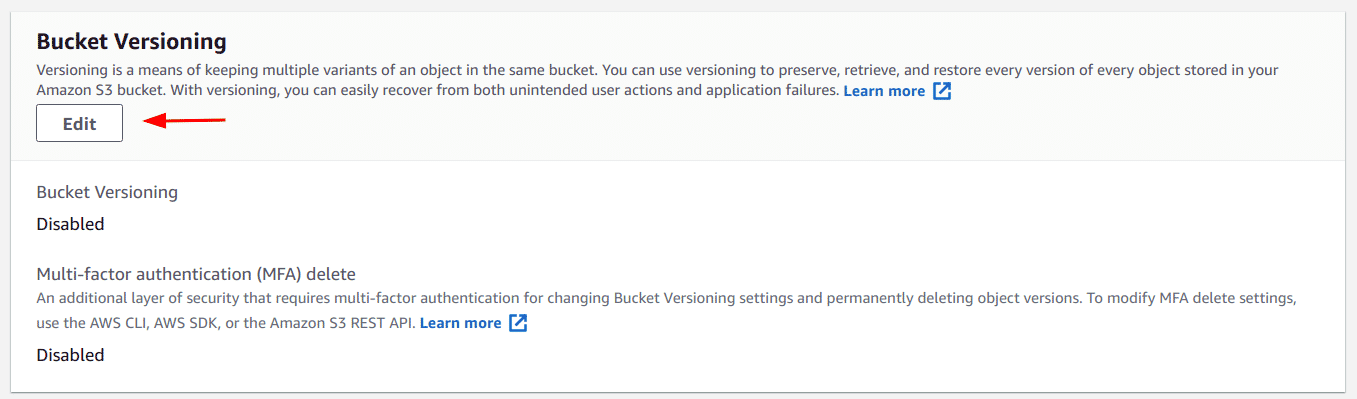
Scroll to the “Bucket Versioning” section and click on the “Edit” button
-
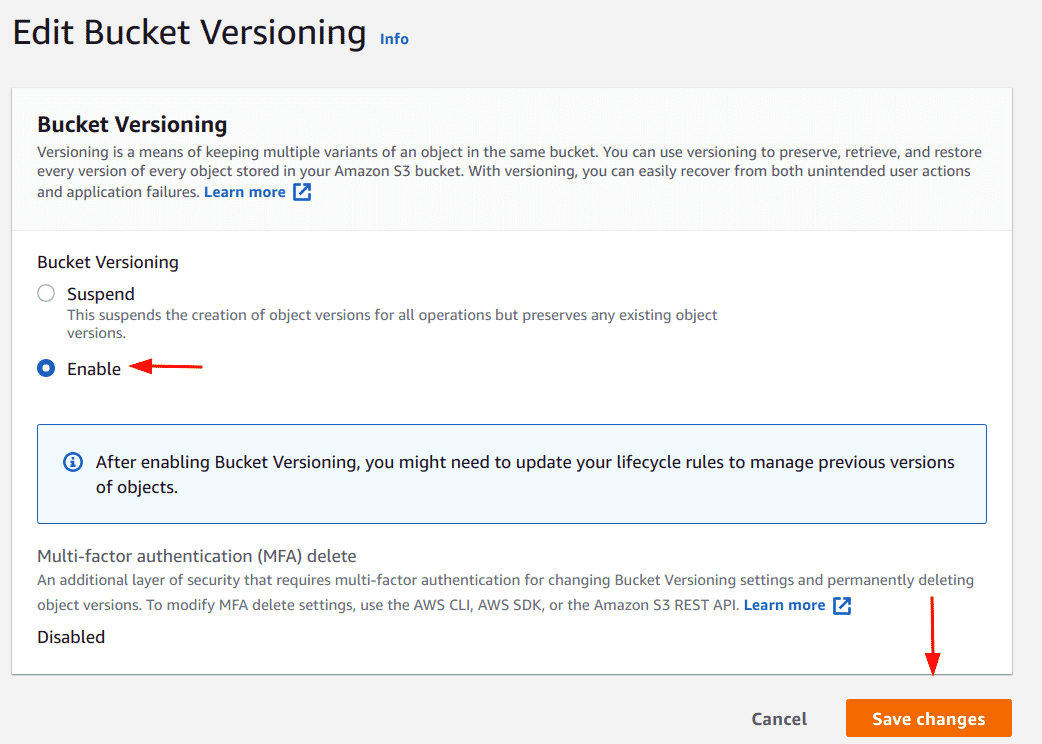
Select the enable option and click on the “Save changes” button
-
Alternatively, the below AWS CLI command can be used to enable object-versioning
aws s3api put-bucket-versioning --bucket <BUCKET NAME> --versioning-configuration Status=Enabled
Enable Multi-factor Authentication Delete
Object versioning can be coupled with the MFA requirement to perform delete operation on an object in the Bucket. When enabled, an MFA would be required to delete objects from S3.
To enable the MFA delete option for objects in S3, the following AWS CLI command can be used:
aws s3api put-bucket-versioning --bucket <BUCKET NAME> --versioning-configuration Status=Enabled,MFADelete=Enabled --mfa "<SERIAL NUMBER FOR MFA DEVICE>"
Note that, currently, the MFA delete option can only be enabled with AWS CLI and not the web console.
Conclusion
In this article, we looked at the top 10 security best practices you can put in use to secure the creation, maintenance and usage of S3 buckets. We saw how we can safeguard our buckets from public and unauthorised access by blocking public access, disallowing wildcards in our bucket policies, and ensuring we do not allow any authenticated user with AWS to read data from our buckets. We looked at what is the least privileged concept and how we can implement it for S3 buckets. We saw that we can enable server access logging to record all actions performed on our buckets for monitoring and incident response activities. Lastly, we found multiple ways to secure our data in our buckets including enabling server side encryption that also fulfils multiple compliance requirements.
These security measures are not meant to be an exhaustive list but a good starting point when starting with securing AWS S3. The list of security best practices may not fit everyone’s scenario and business requirements may often override some of the settings mentioned here. However, it is recommended to evaluate the configurations of S3 and selectively use the options mentioned in this post to enhance the overall security of your S3 usage.
***
This article is brought to you by Kloudle Academy, a free e-resource compilation, created and curated by Kloudle. Kloudle is a cloud security management platform that uses the power of automation and simplifies human requirements in cloud security. If you wish to give your feedback on this article, you can write to us here.

Riyaz Walikar
Founder & Chief of R&D
Riyaz is the founder and Chief of R&D at Kloudle, where he hunts for cloud misconfigurations so developers don’t have to. With over 15 years of experience breaking into systems, he’s led offensive security at PwC and product security across APAC for Citrix. Riyaz created the Kubernetes security testing methodology at Appsecco, blending frameworks like MITRE ATT&CK, OWASP, and PTES. He’s passionate about teaching people how to hack—and how to stay secure.