Table of Contents
What is Kloudle?
DigitalOcean onboarding for Kloudle via Automated Onboarding
Prerequisites
Steps to onboard DigitalOcean to Kloudle
For users coming to the Kloudle dashboard from the DigitalOcean marketplace
For all other users coming to the Kloudle dashboard
DigitalOcean onboarding for Kloudle
Steps to onboard DigitalOcean to Kloudle via the automated onboarding process
For users coming to the Kloudle dashboard from the DigitalOcean marketplace
-
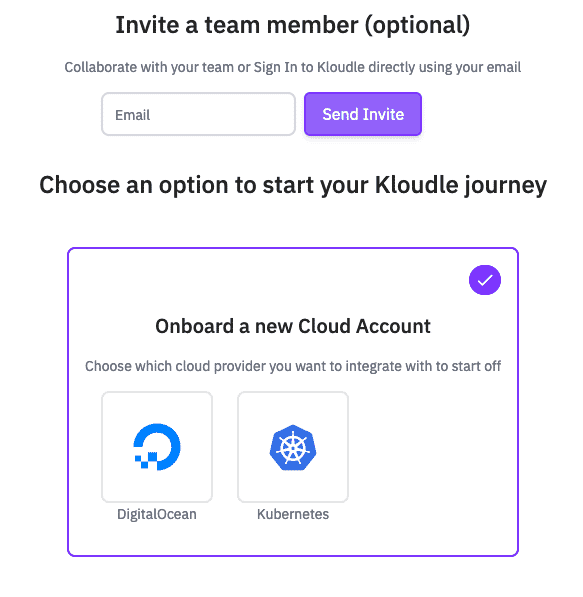
Click on DigitalOcean on the “Onboard a new Cloud Account” page
-
Follow the instructions under “Automated Onboarding of DigitalOcean account” below
For all other users coming to the Kloudle dashboard
-
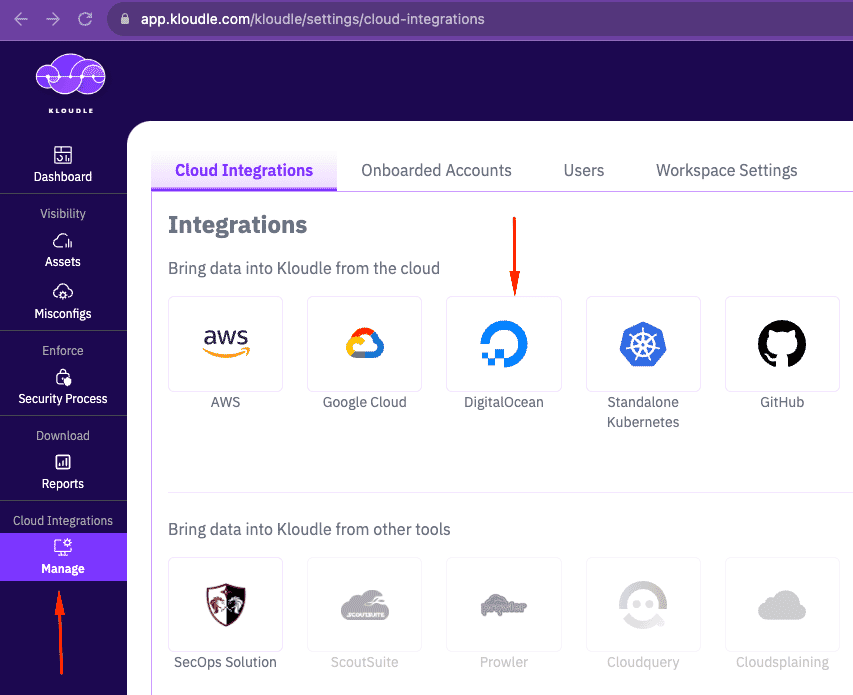
Click on DigitalOcean under “Manage” and “Cloud Integrations”
-
Follow the instructions under “Automated Onboarding of DigitalOcean account” below
Automated Onboarding of DigitalOcean account
-
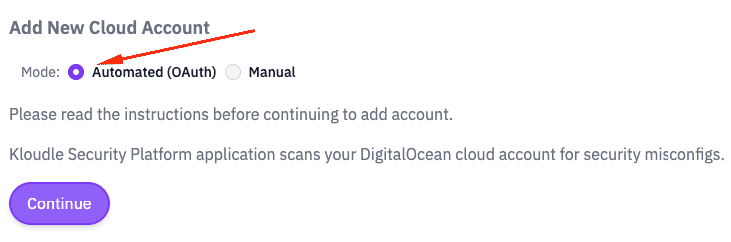
Select “Automated (OAuth)” radio button, if not already selected so. Click Continue.
-
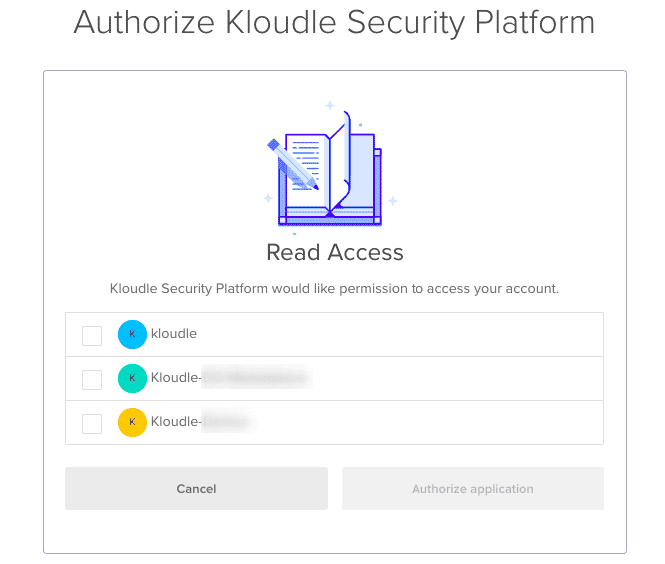
Login to your DigitalOcean account, if prompted
-
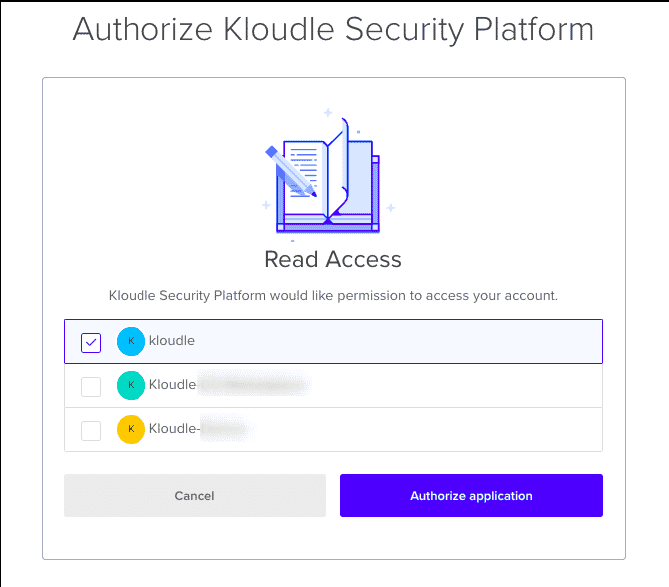
From the DigitalOcean accounts shown, select the account that you want to onboard to DigitalOcean.
-
Click the “Authorize application” button to Authorize Kloudle’s access to your specific account
-
The DigitalOcean account will be successfully added and onboarded to your Kloudle account.