What is Kloudle?
Kloudle is a Digital Assets Security Automation Platform for SREs and DevOps. When integrated with your Cloud or SaaS provider, Kloudle takes periodic security snapshots and provides complete security contextual visibility that allows you to make informed decisions about your infrastructure, the assets and their various configurations.
Kloudle collects metadata about the resources and analyzes them to identify misconfigurations and using a massive research powered knowledgebase, identifies what would go wrong if these misconfigurations were exploited and what you can do to fix them.
As part of making sure the lives of SREs and DevOps become easier, Kloudle offers the ability to create “rules” that allow a user to take automated actions against a baseline. These automated actions, which we call Security Processes, allow users to configure a series of steps that kick in when custom events occur to ensure the security of the cloud and SaaS platform being monitored.
What is this document about?
This document details the steps that are required to create a Public Private keypair that can be used to onboard a MongoDB Cloud Atlas provider to Kloudle so that Kloudle can make API requests and retrieve responses.
MongoDB Cloud Onboarding steps for Kloudle
Pre-Requisites
- An Organization wide administrator account which will be used to login and create the keypair
Creating a new Org wide ReadOnly Public Private Keypair
-
Login to your MongoDB Cloud Atlas account at https://account.mongodb.com/account/login with a user with Admin privileges
-
Click on the gear icon next to the name of the organization in the top left corner of the screen. Copy the “Organization ID” as this is needed to onboard the account.
-
In the organization settings page, click on
Access Managerfrom the menu on the left of the page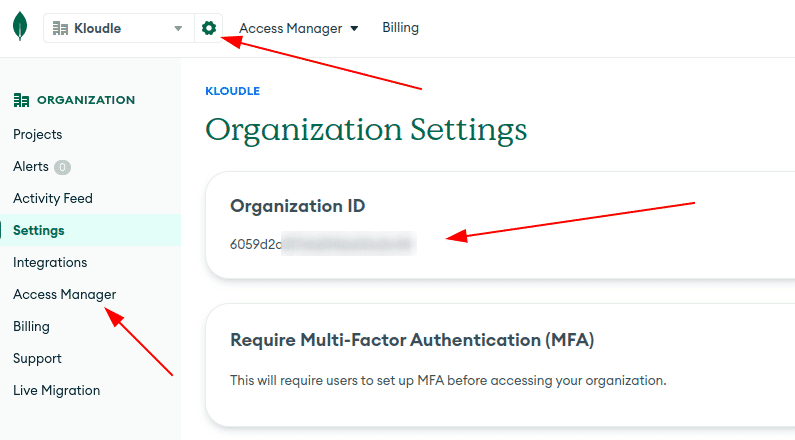
-
Click on “Create API Key” button on the right side of the page under “Access Manager”

-
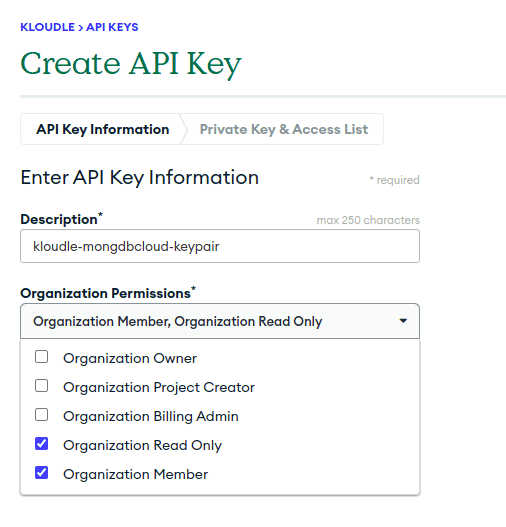
In the “Create API Key” page, enter a short description of the key - “kloudle-mongdbcloud-keypair”
-
Add the “Organization Read Only” and “Organization Member” permissions
-
Click “Next”.
-
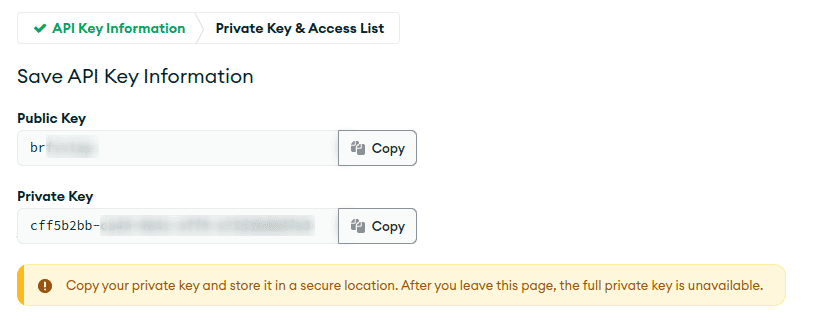
In the next page, copy the “Public Key” and the “Private Key” as this will not be displayed again.
-
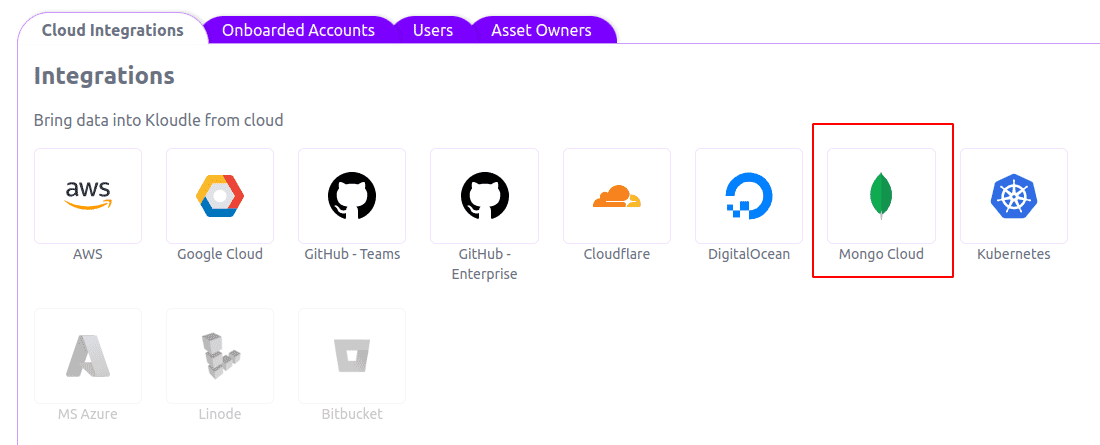
Now in Kloudle dashboard, go to Manage and click on Mongo Cloud under Cloud Integrations
-
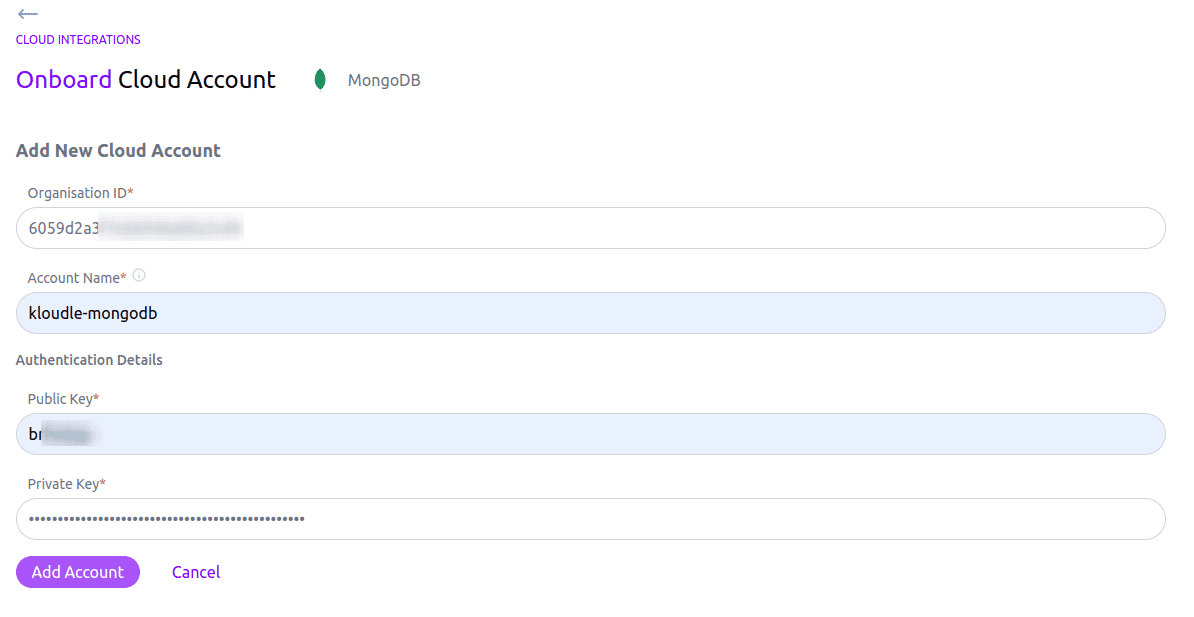
Add the “Organisation ID”, “Account Name” and the authentication details. The “Organisation ID” is what you copied in Step 2. The “Account Name” is a custom name that you can give to describe your account.
-
Click on “Add Account” to complete the setup.
Video Instructions

Riyaz Walikar
Founder & Chief of R&D
Riyaz is the founder and Chief of R&D at Kloudle, where he hunts for cloud misconfigurations so developers don’t have to. With over 15 years of experience breaking into systems, he’s led offensive security at PwC and product security across APAC for Citrix. Riyaz created the Kubernetes security testing methodology at Appsecco, blending frameworks like MITRE ATT&CK, OWASP, and PTES. He’s passionate about teaching people how to hack—and how to stay secure.