- What is Kloudle?
- What is this document about?
- Azure Service Principal setup via web console
- Azure Service Principal setup using an Automated script
- Onboard Azure to Kloudle
- Video Instructions
What is Kloudle?
Kloudle is a Digital Assets Security Automation Platform for SREs and DevOps. When integrated with your Cloud or SaaS provider, Kloudle takes periodic security snapshots and provides complete security contextual visibility that allows you to make informed decisions about your infrastructure, the assets and their various configurations.
Kloudle collects metadata about the resources and analyses them to identify misconfigurations and using a massive research powered knowledge base, identifies what would go wrong if these misconfigurations were exploited and what you can do to fix them.
As part of making sure the lives of SREs and DevOps become easier, Kloudle offers the ability to create “rules” that allow a user to take automated actions against a baseline. These automated actions, which we call Security Processes, allow users to configure a series of steps that kick in when custom events occur to ensure the security of the monitored cloud and SaaS platform.
What is this document about?
This document details the steps to set up an Azure service principal, add the required roles, and generate credentials for the service principal that are required for onboarding Azure to Kloudle. There are two ways of setting up the Azure service principal - via web console or using a quick automated script in cloud shell - as described in the following sections. Users can follow either of the two ways.
Azure Service Principal setup via web console
Kloudle needs a Service Principal to onboard an Azure account. The following sections show how to create a service principal, add the required roles, and generate credentials for the service principal via web console to be used for onboarding Azure to Kloudle.
Pre-Requisites when using the web console
Following are the pre-requisite to create a service principal via web console:
- An Azure account that has Owner/Administrator privileges to Azure. The user should be able to create App Registrations
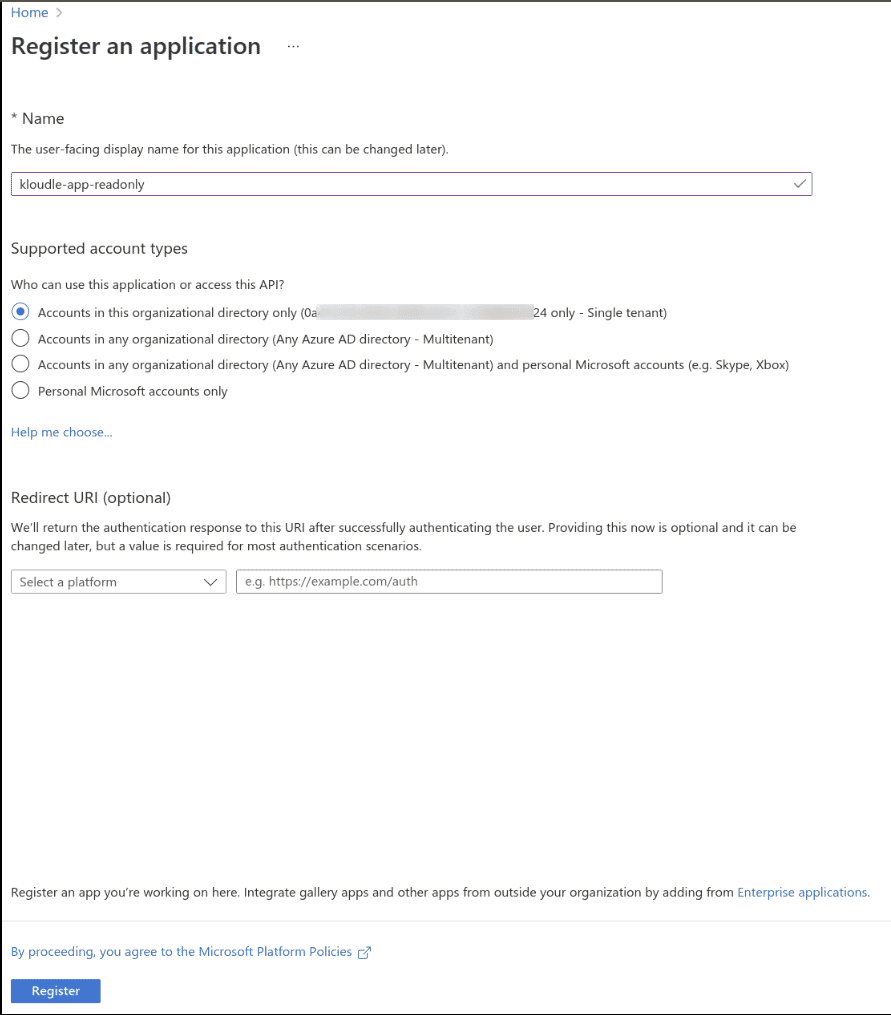
Create a new App registration
-
Start a new App registration using the link https://portal.azure.com/#view/Microsoft_AAD_RegisteredApps/CreateApplicationBlade/quickStartType~/null/isMSAApp~/false
-
Provide kloudle-app-readonly as the name
-
Select Accounts in this organizational directory only (Default Directory only - Single tenant) under Supported account types
-
Click on Register
-
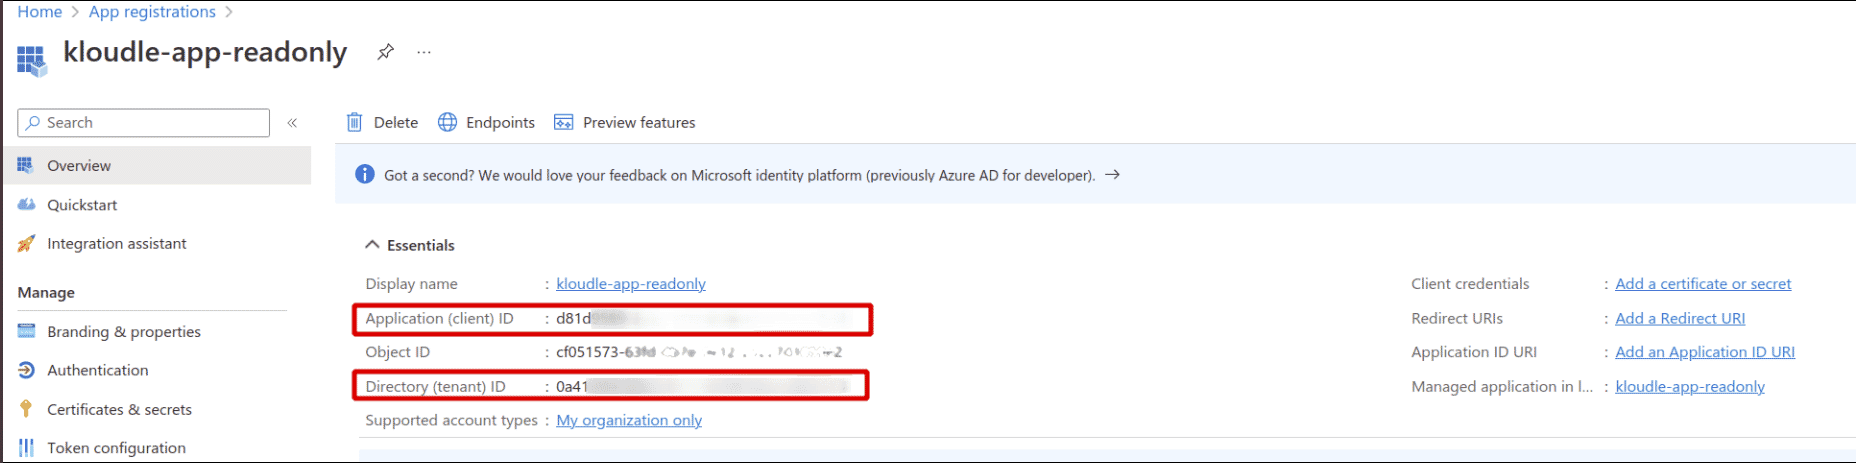
Note the following values from the App page. These values will be required when onboarding the Azure account to Kloudle
a. Application (client) ID b. Directory (tenant) ID
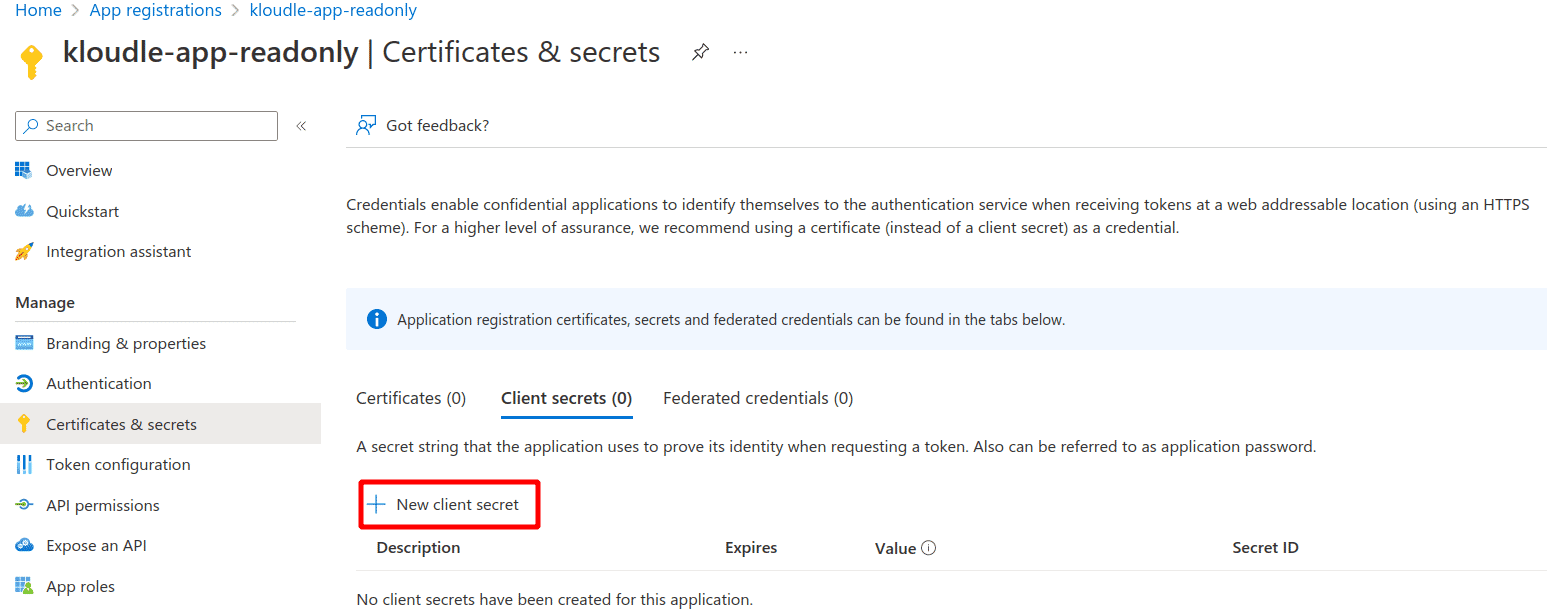
Generate an App Secret for the app
-
Click on Add a certificate or secret
-
Click on New client secret
-
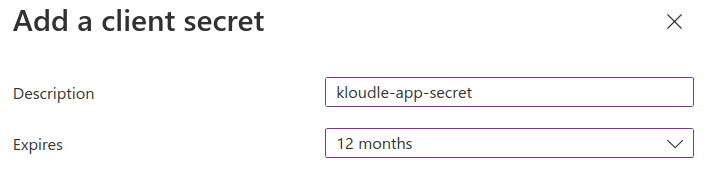
Give the secret a description of kloudle-app-secret and choose expiry of 12 months
-
Click on add to create the secret
-
Copy the value of the secret as this will not be shown again. This value is the Application (client) Secret

Get Azure Subscription ID
-
Search for Subscriptions in the Azure search box
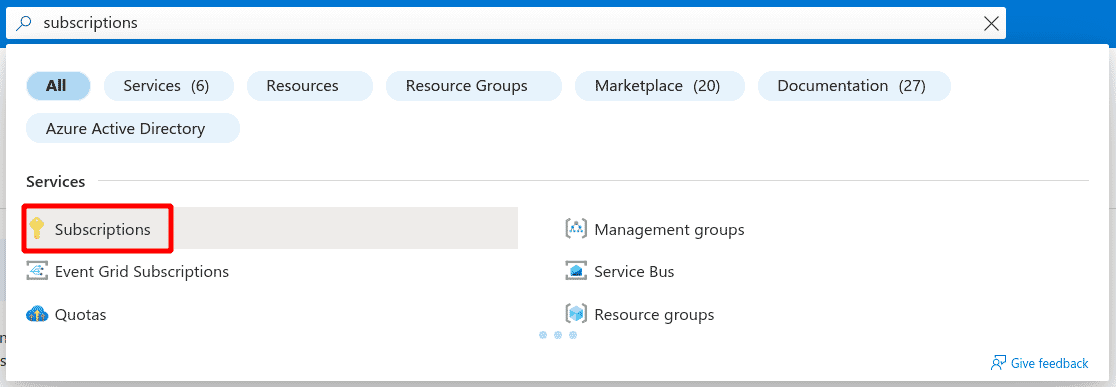
-
Under Subscriptions, note the Subscription ID of the one that you want to onboard to Kloudle

Assign Roles to the App for Azure Access
Assign the “Reader” permission
-
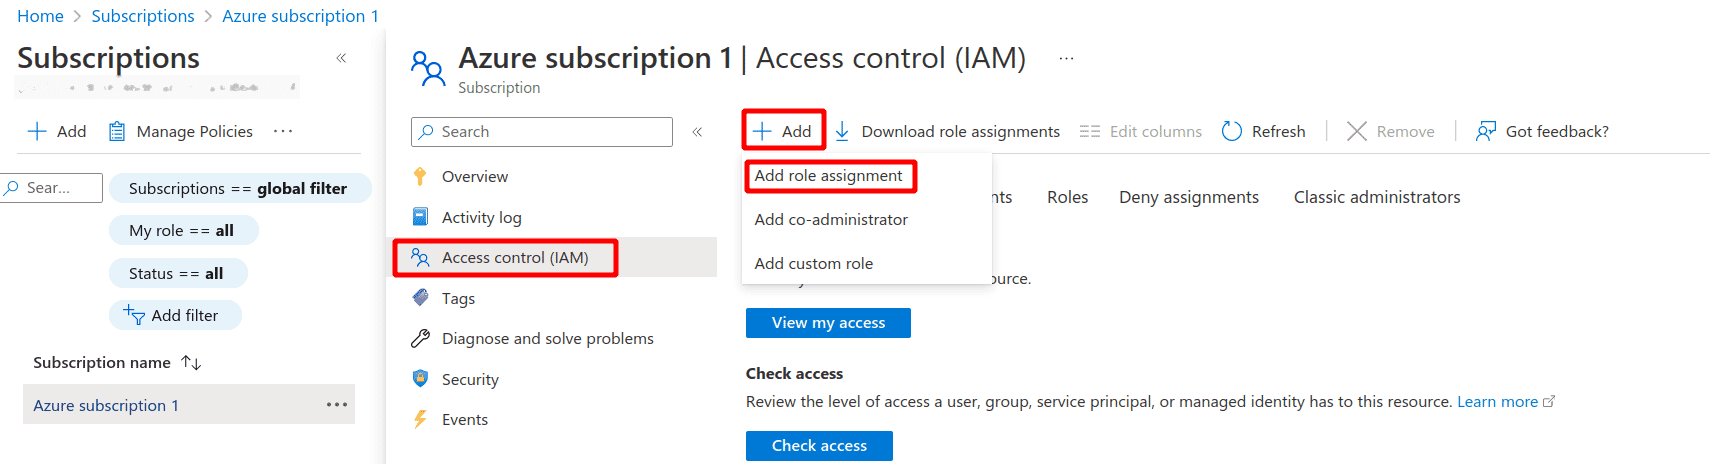
Click on the selected Subscription and in the subscription detail page, click on Access Control (IAM)
-
Click on ”+ Add” and Add role assignment
-
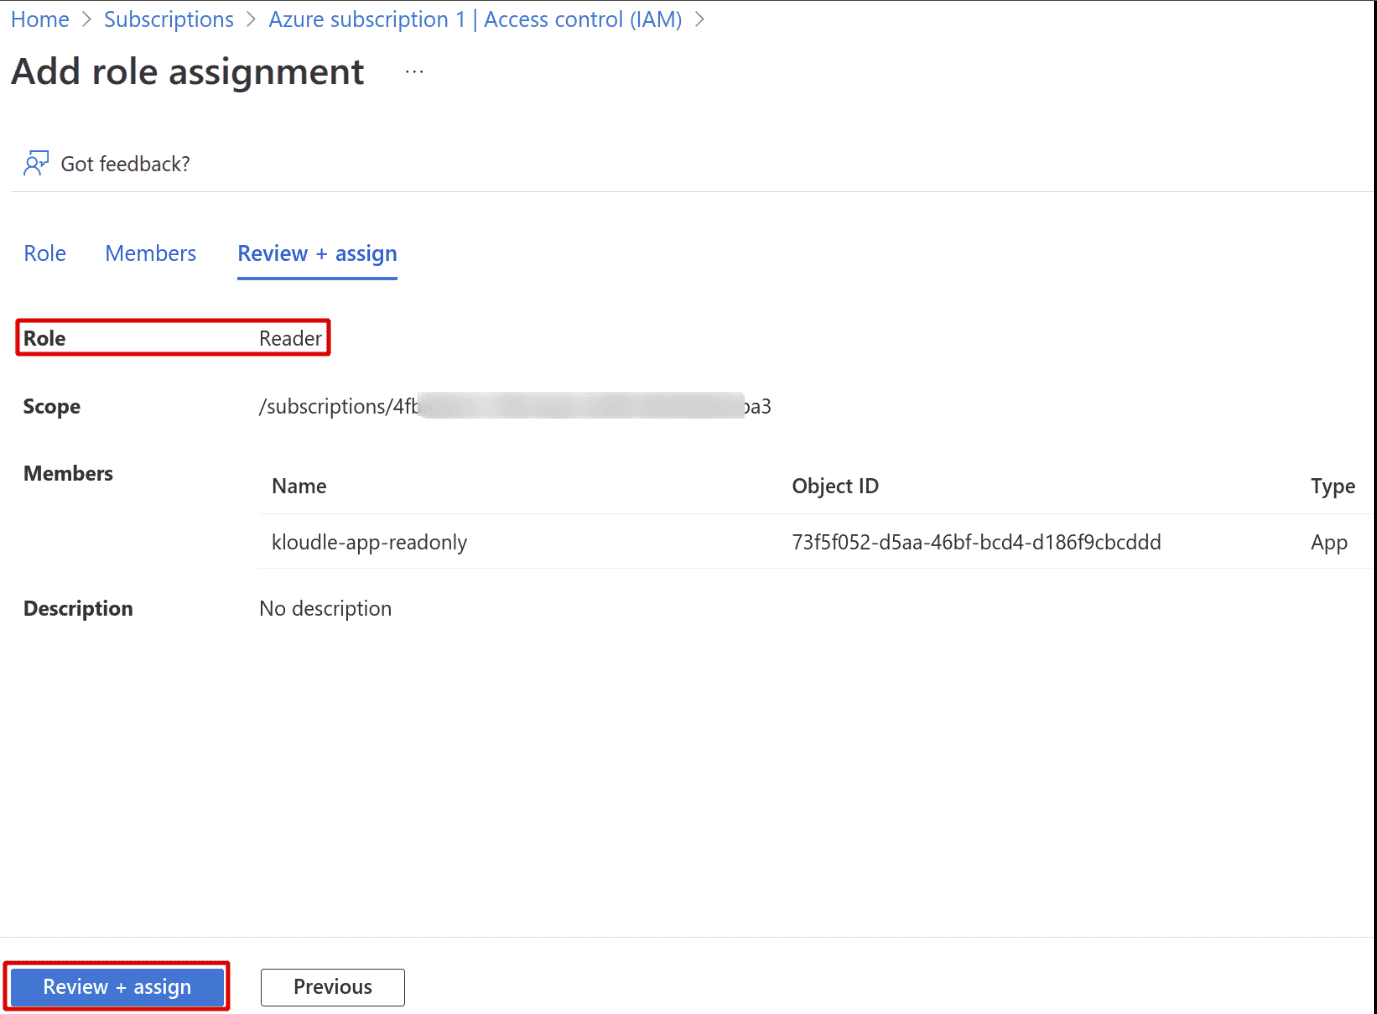
In the Add role assignment page, click on Reader role. Click the Next button
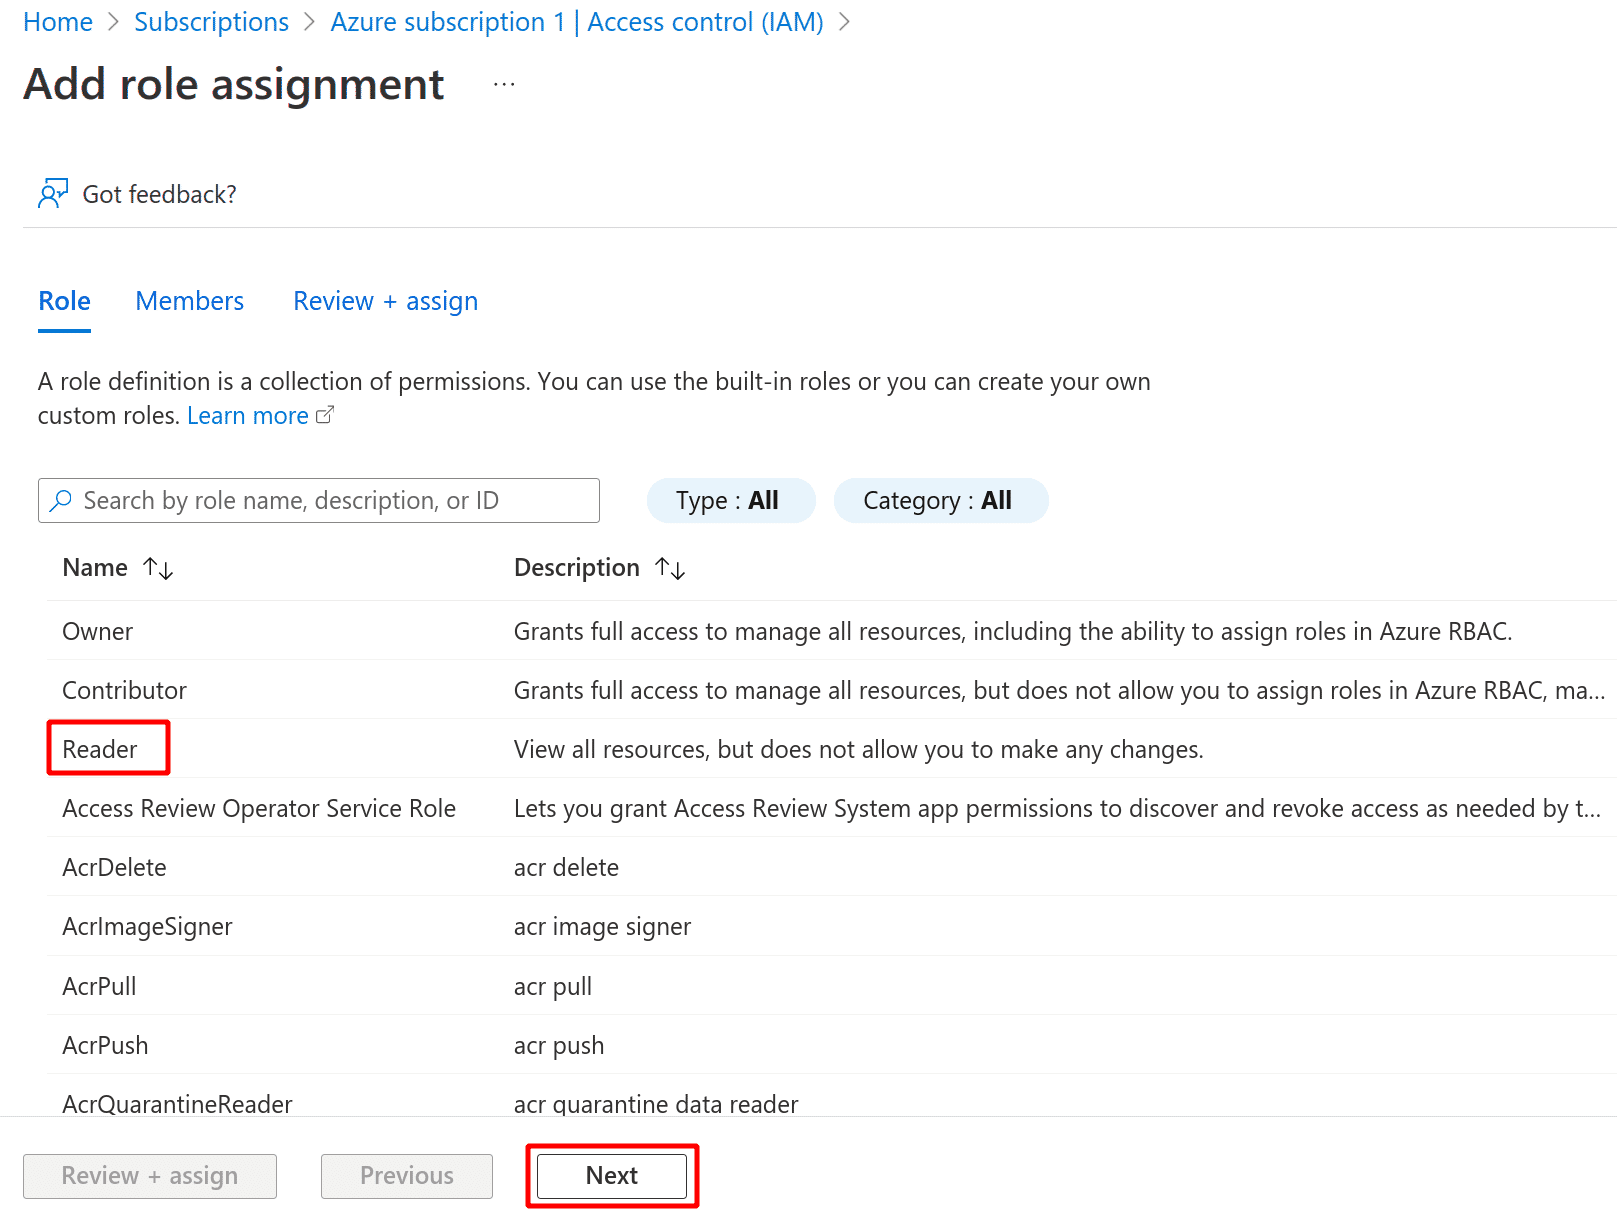
-
Click on ”+ Select members” and in the right pane, type the name of the app that was created. Select the application when it is populated. Click Select. Click on the Next button
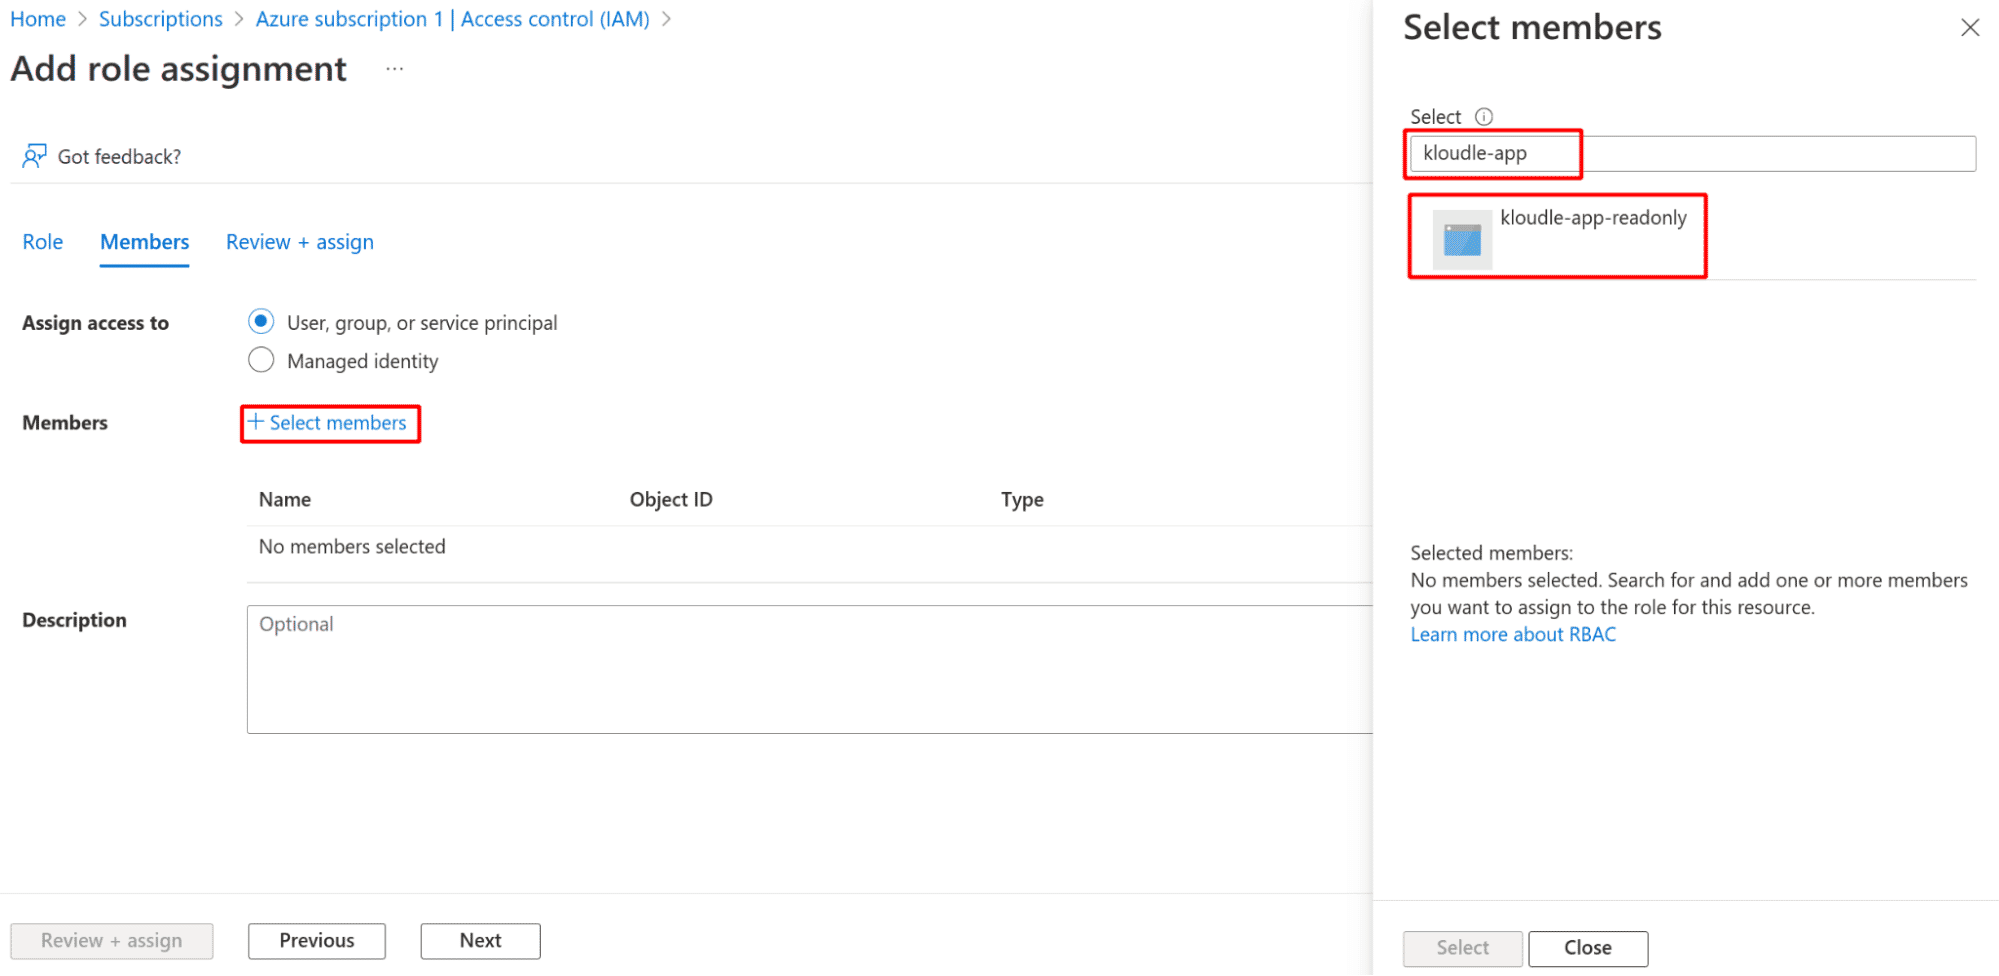
-
Click on Review + assign button
Assign the “Reader and Data Access” permission
-
In the subscription detail page, click on Access Control (IAM)
-
Click on ”+ Add” and Add role assignment
-
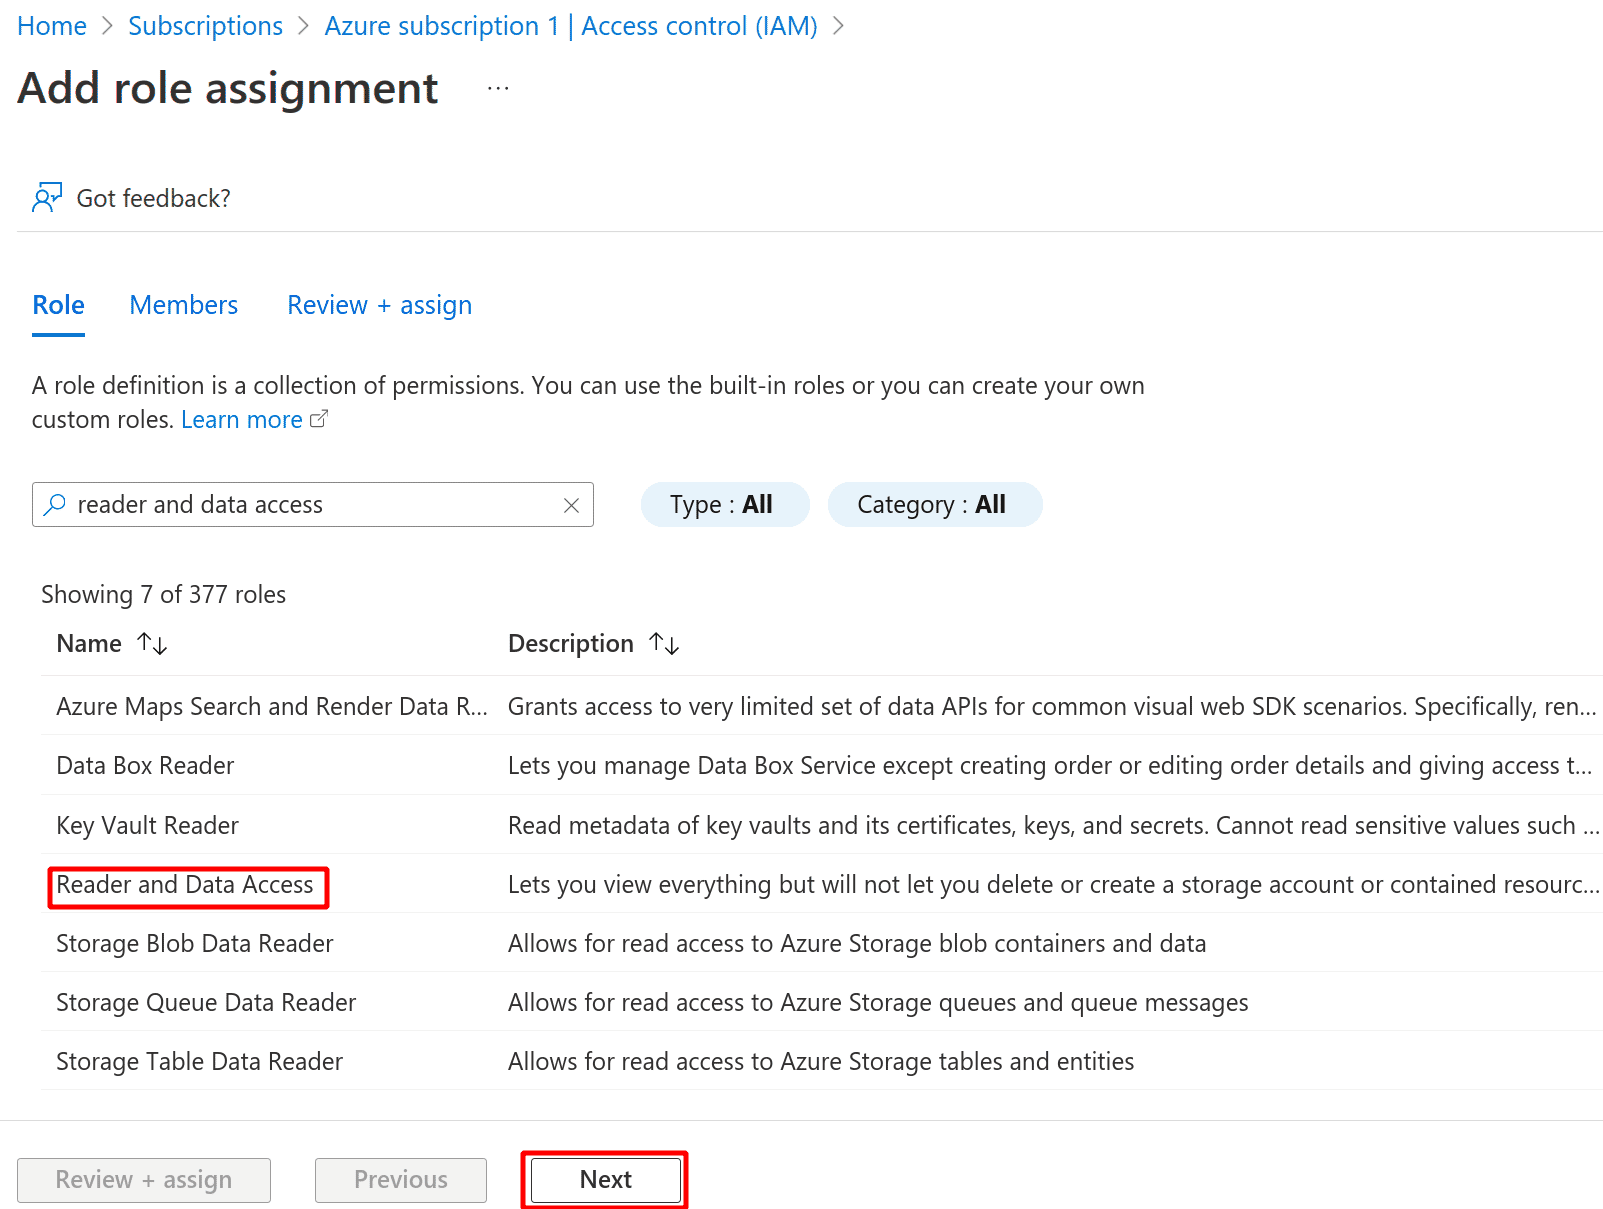
Search for the Reader and Data Access role and click Next
-
Select the app in the next page and click Next
-
Review the role and click on “Review + assign” button
Assign the “Security Reader” permission
-
In the subscription detail page, click on Access Control (IAM)
-
Click on ”+ Add” and Add role assignment
-
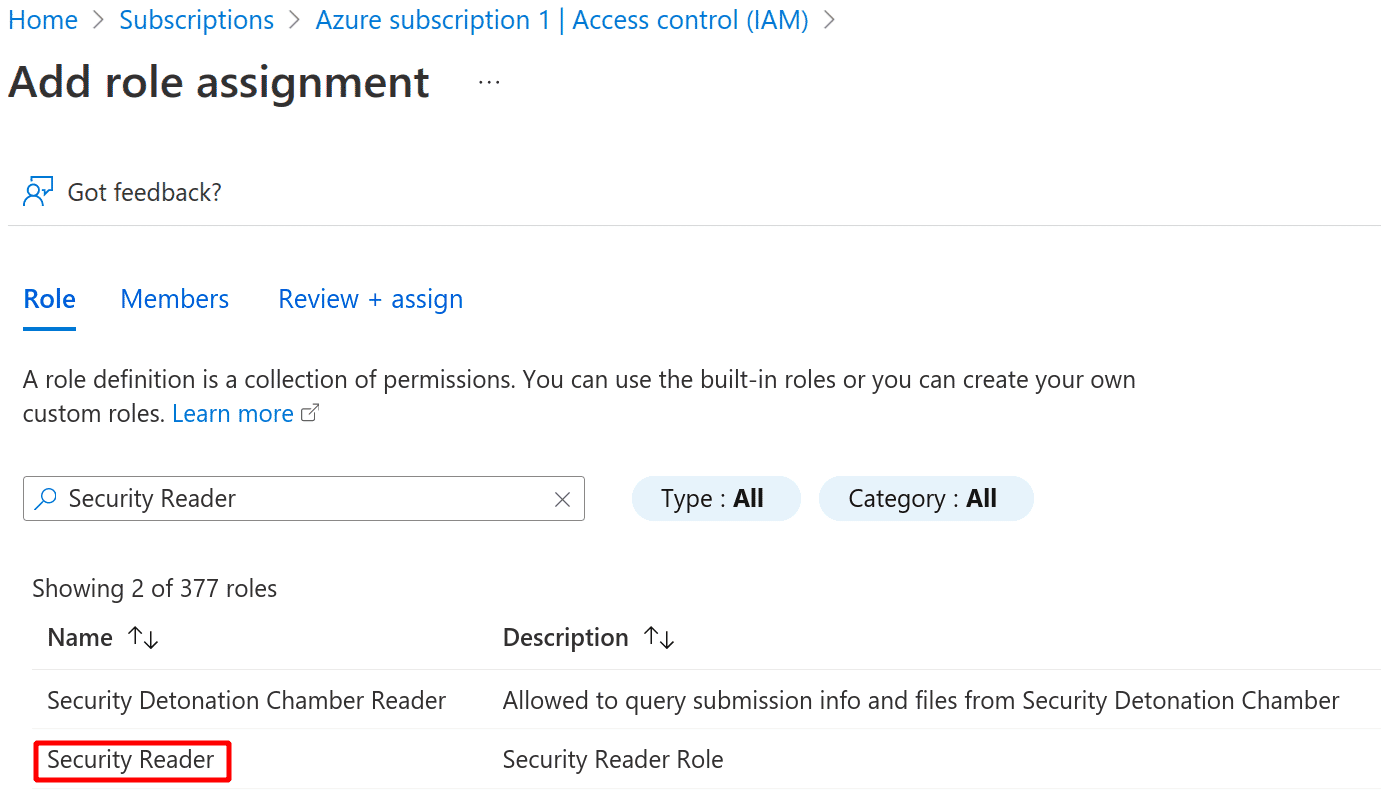
Search for the Security Reader role and click Next
-
Select the app in the next page and click Next
-
Review the role and click on “Review + assign” button
Assign the “Website Contributor” permission
-
In the subscription detail page, click on Access Control (IAM)
-
Click on ”+ Add” and Add role assignment
-
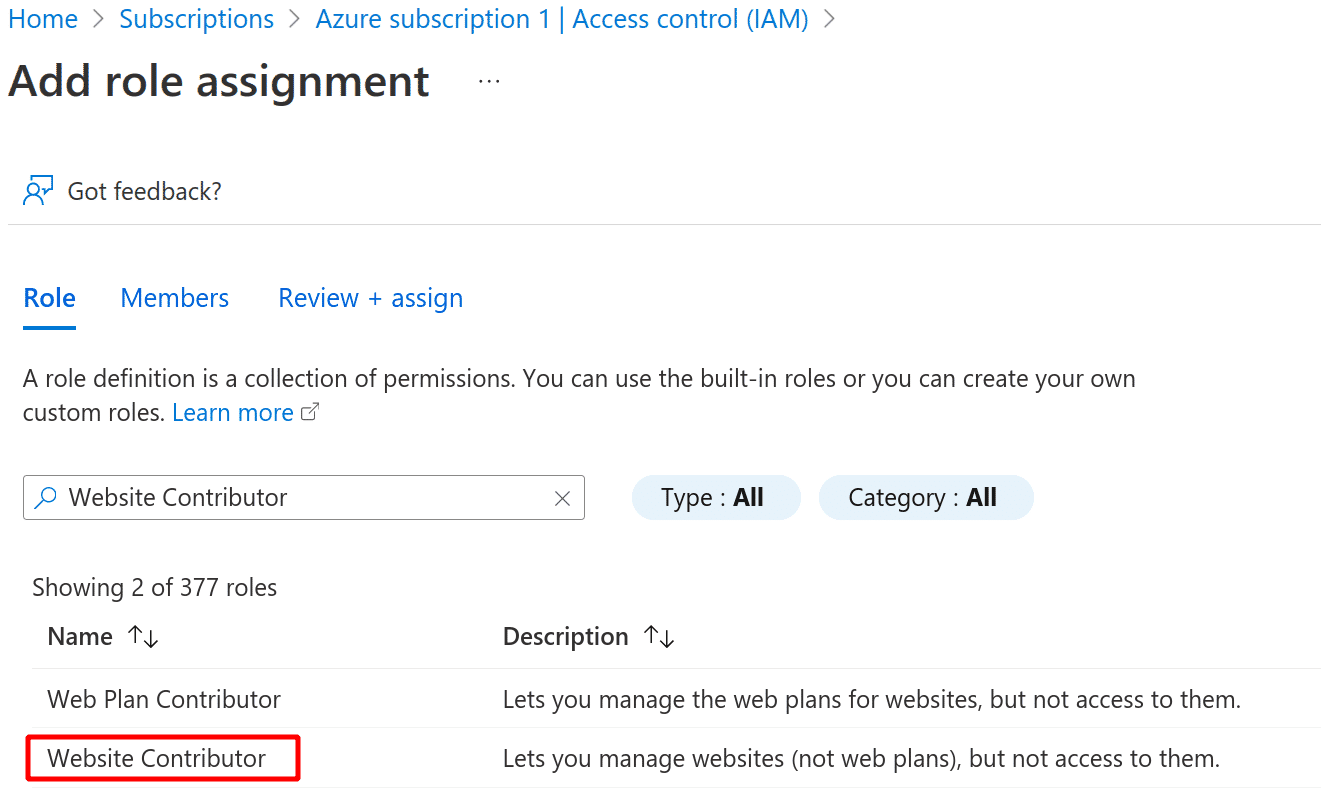
Search for the Website Contributor role and click Next
-
Select the app in the next page and click Next
-
Review the role and click on “Review + assign” button
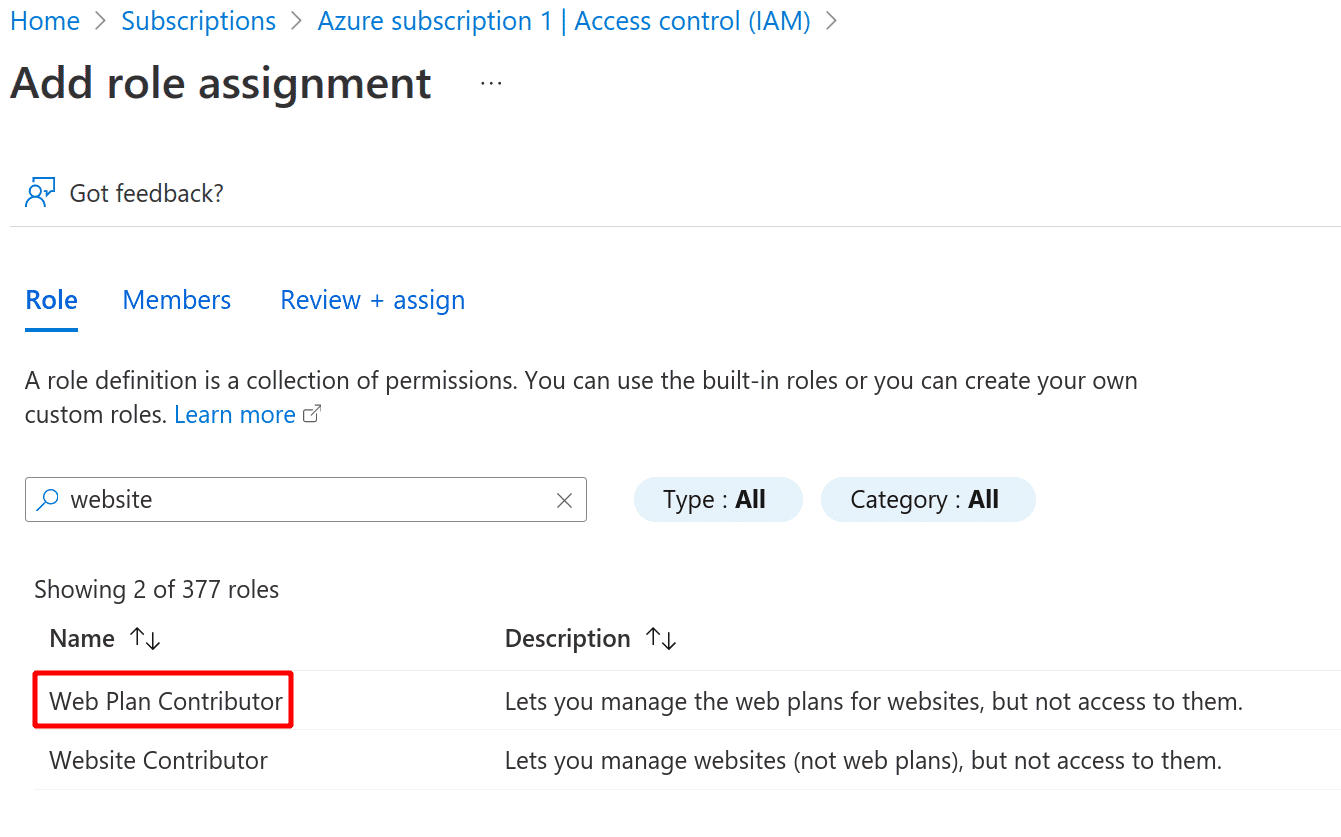
Assign the “Web Plan Contributor” permission
-
In the subscription detail page, click on Access Control (IAM)
-
Click on ”+ Add” and Add role assignment
-
Search for the Website Contributor role and click Next
-
Select the app in the next page and click Next
-
Review the role and click on “Review + assign” button
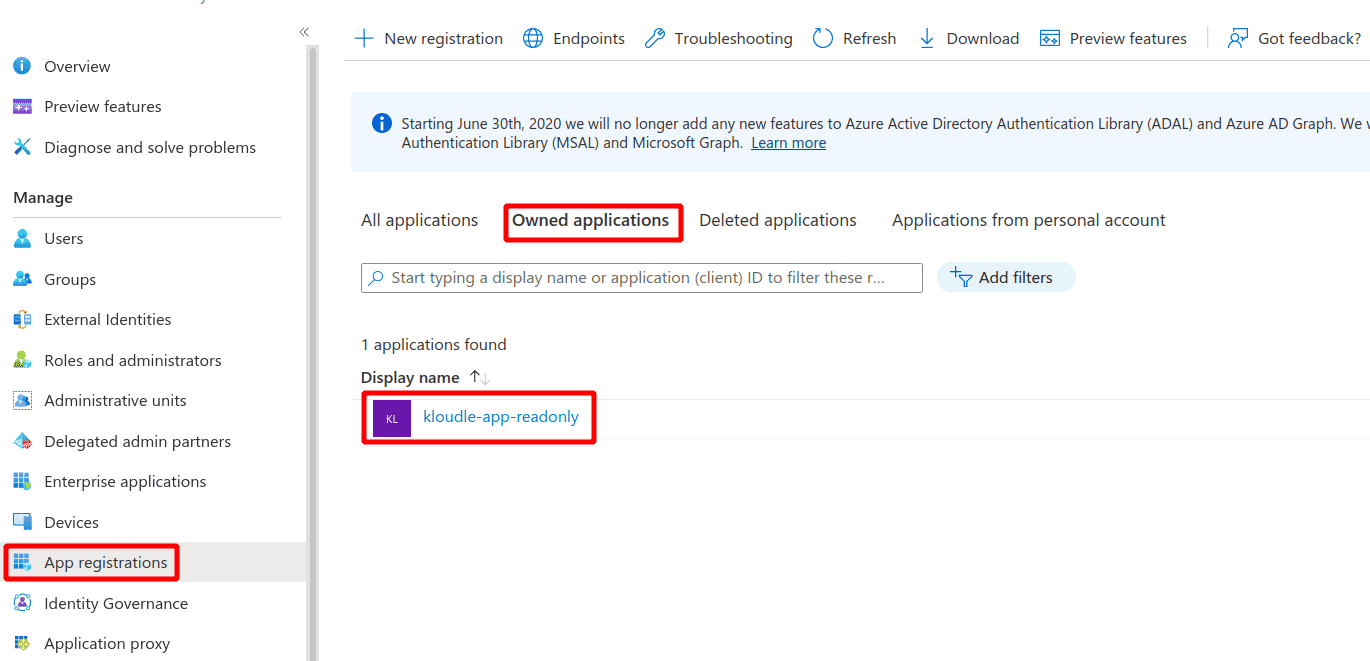
Add Microsoft Graph and Windows Azure AD App Permissions
-
Search for Azure Active Directory in the Azure Search box

-
Click on App Registrations in the left menu and select the App that we created
-
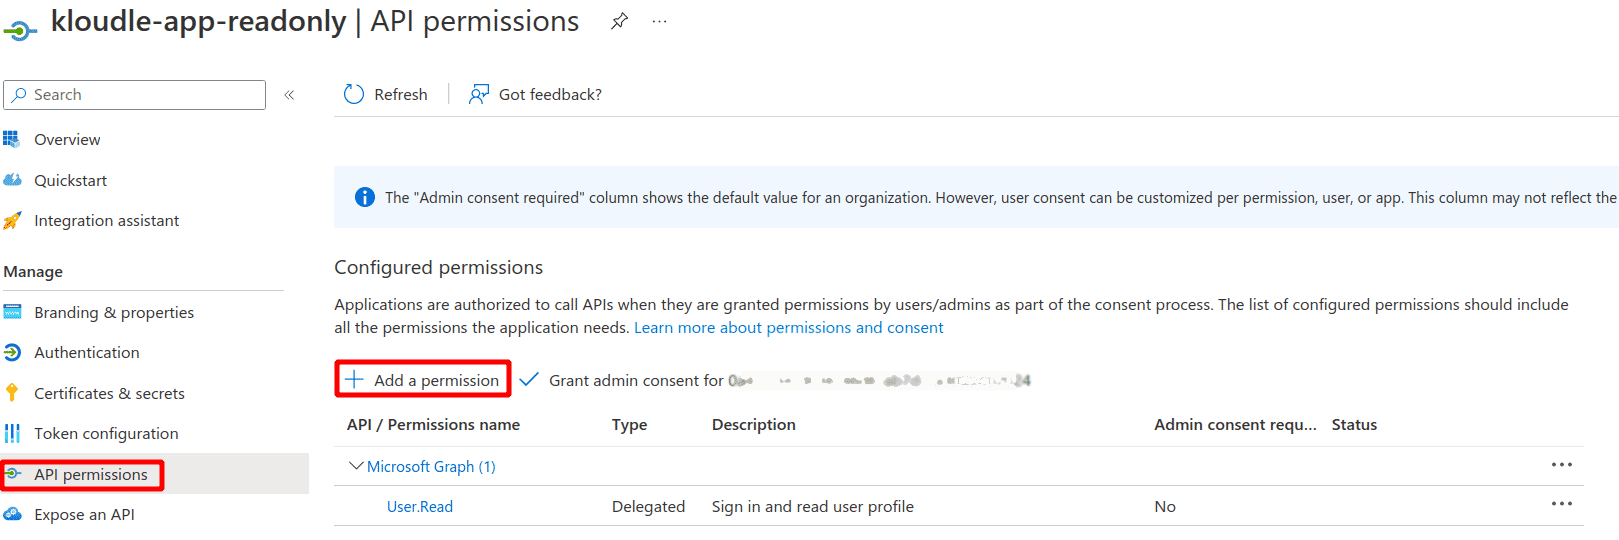
Click on API permissions and then ”+ Add a permission” as shown below
-
Search for string
00000002-0000-0000-c000-000000000000in the Request API permissions under APIs my organization uses tab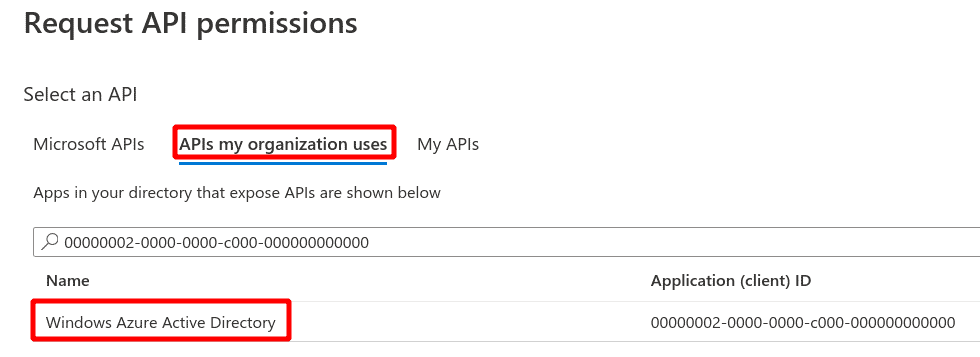
-
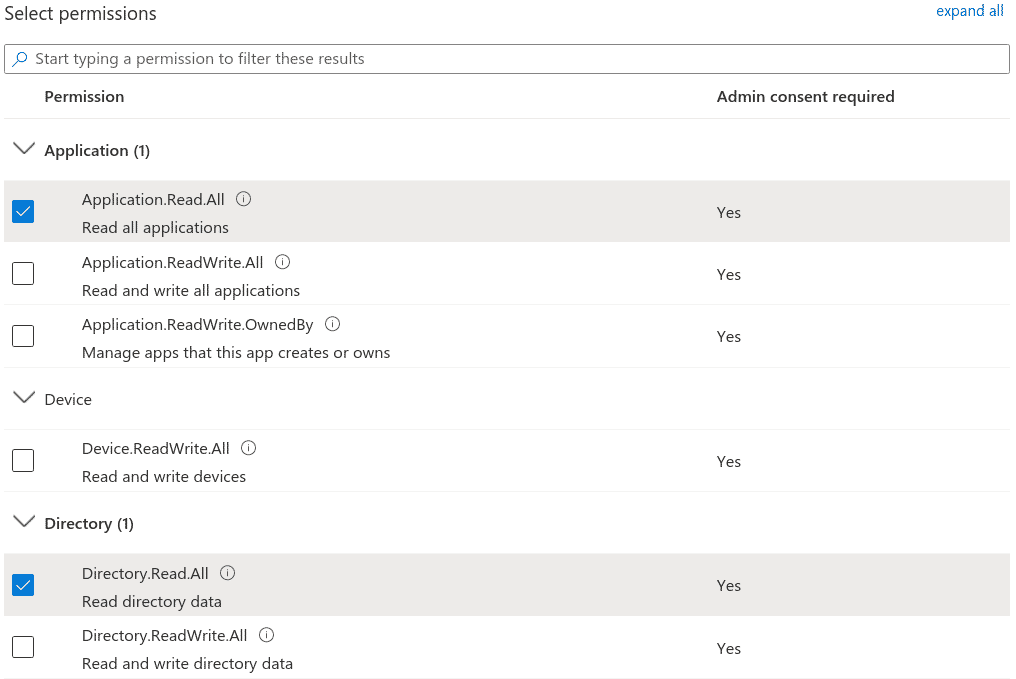
Select the Windows Azure Active Directory entry that has been found and select Application permissions
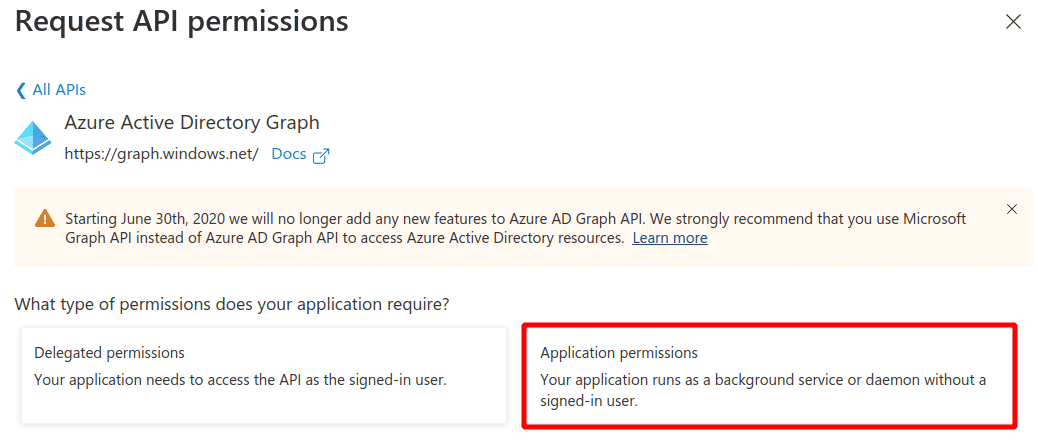
-
Select Application.Read.All and Directory.Read.All permission from the menu. Click Add permissions
-
Click on ”+ Add a permission” again

-
Search for
00000003-0000-0000-c000-000000000000in the Request API permissions under APIs my organization uses tab
-
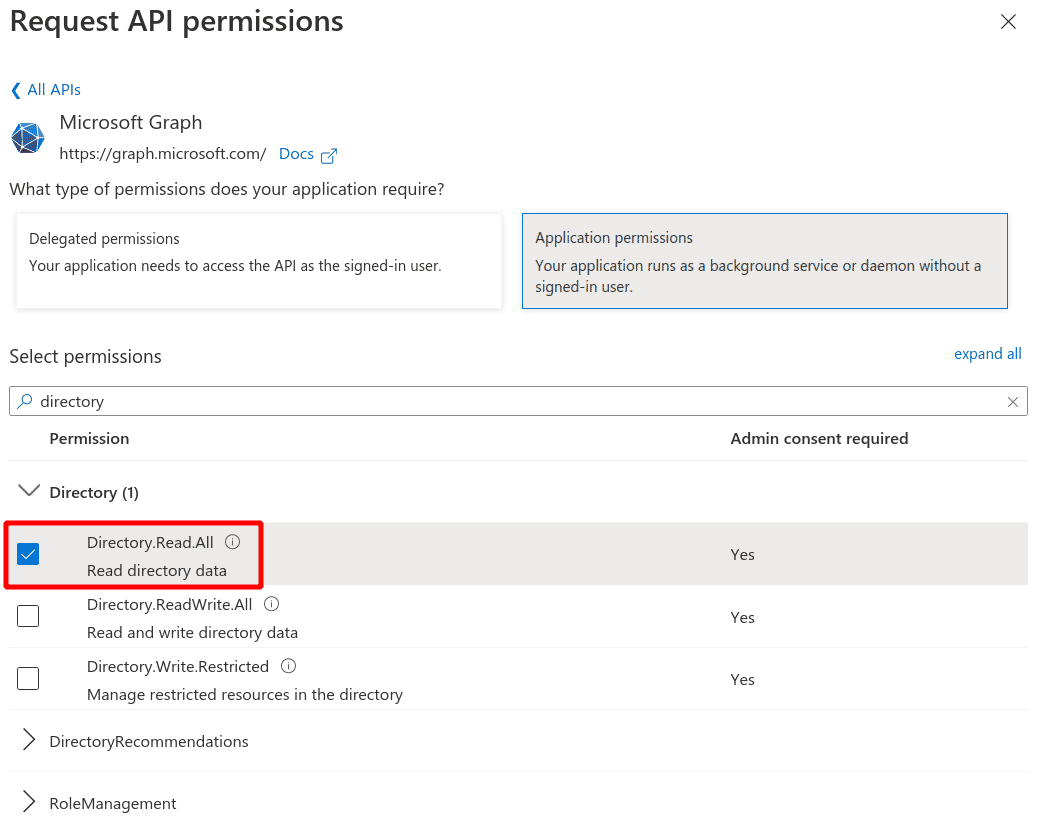
Select the Microsoft Graph entry that has been found and select Application permissions
-
In the Select permissions search box, search for Directory and select Directory.Read.All. Click on Add permissions
-
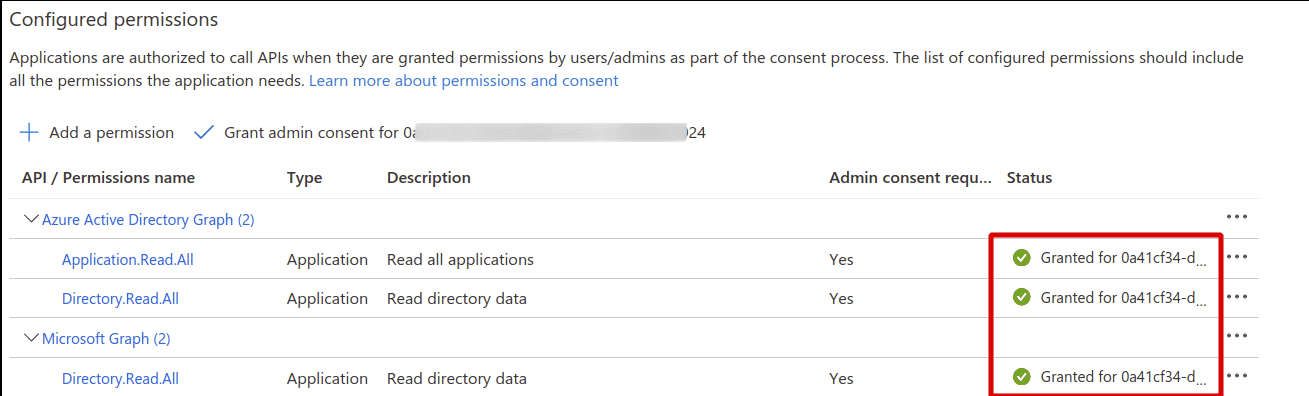
The App’s Configured Permissions should look like the following
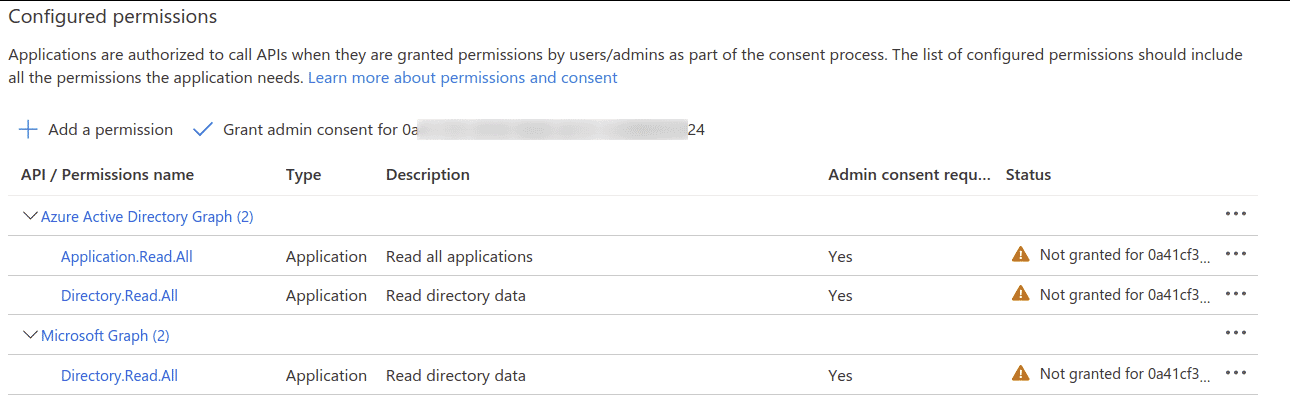
-
Click on Grant admin consent for Default Directory and Yes on the confirmation to complete this section
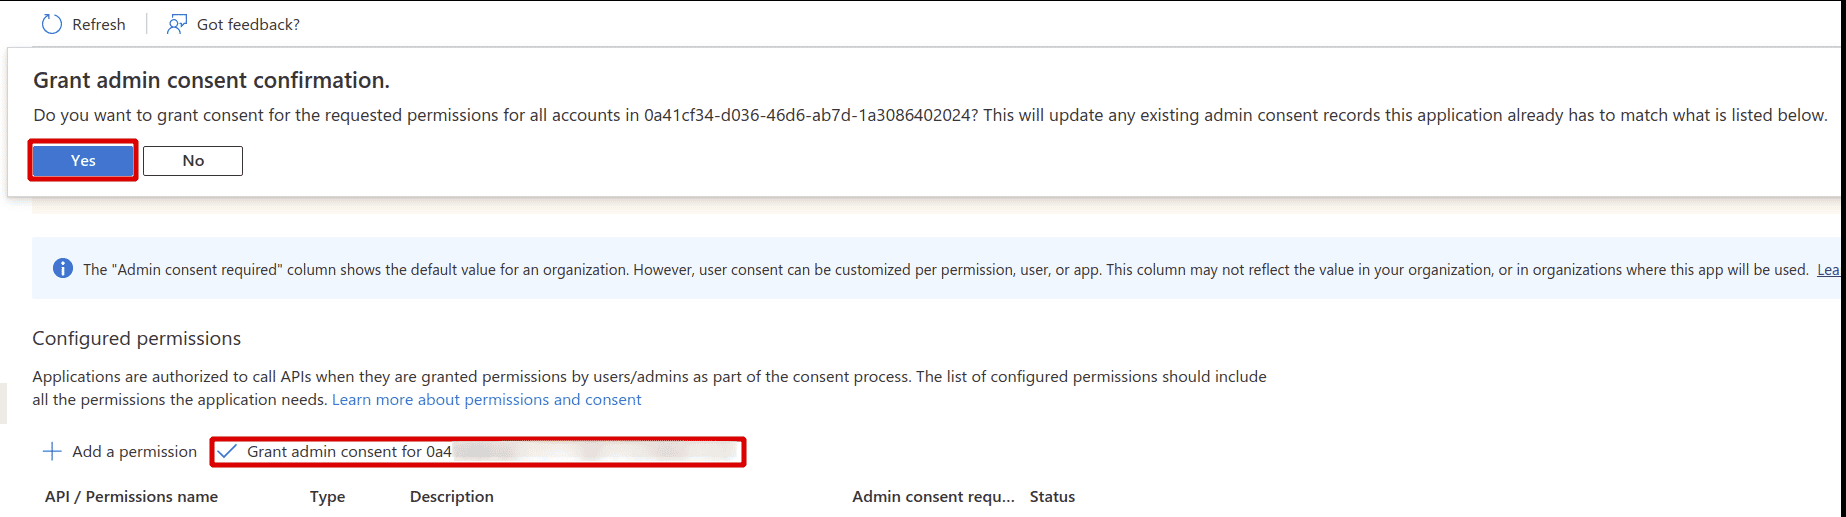
-
The status should turn green for the API permissions that were added as shown below
Azure Service Principal setup using an Automated script
Kloudle needs a Service Principal to onboard an Azure account. The following sections shows a quick way to create a service principal, add the required roles, and generate credentials for the service principal using an automated script that will be used for onboarding Azure to Kloudle.
Pre-Requisites (when using Automated script)
Following are the pre-requisite to set up a service principal using the automated script:
-
An Azure account that has Owner/Administrator privileges to Azure. The user should be able to create App Registrations
-
Access to Azure Cloud Shell where this script will be run. The Azure Cloud Shell has all the required tooling for this script to work quickly and without additional configuration
-
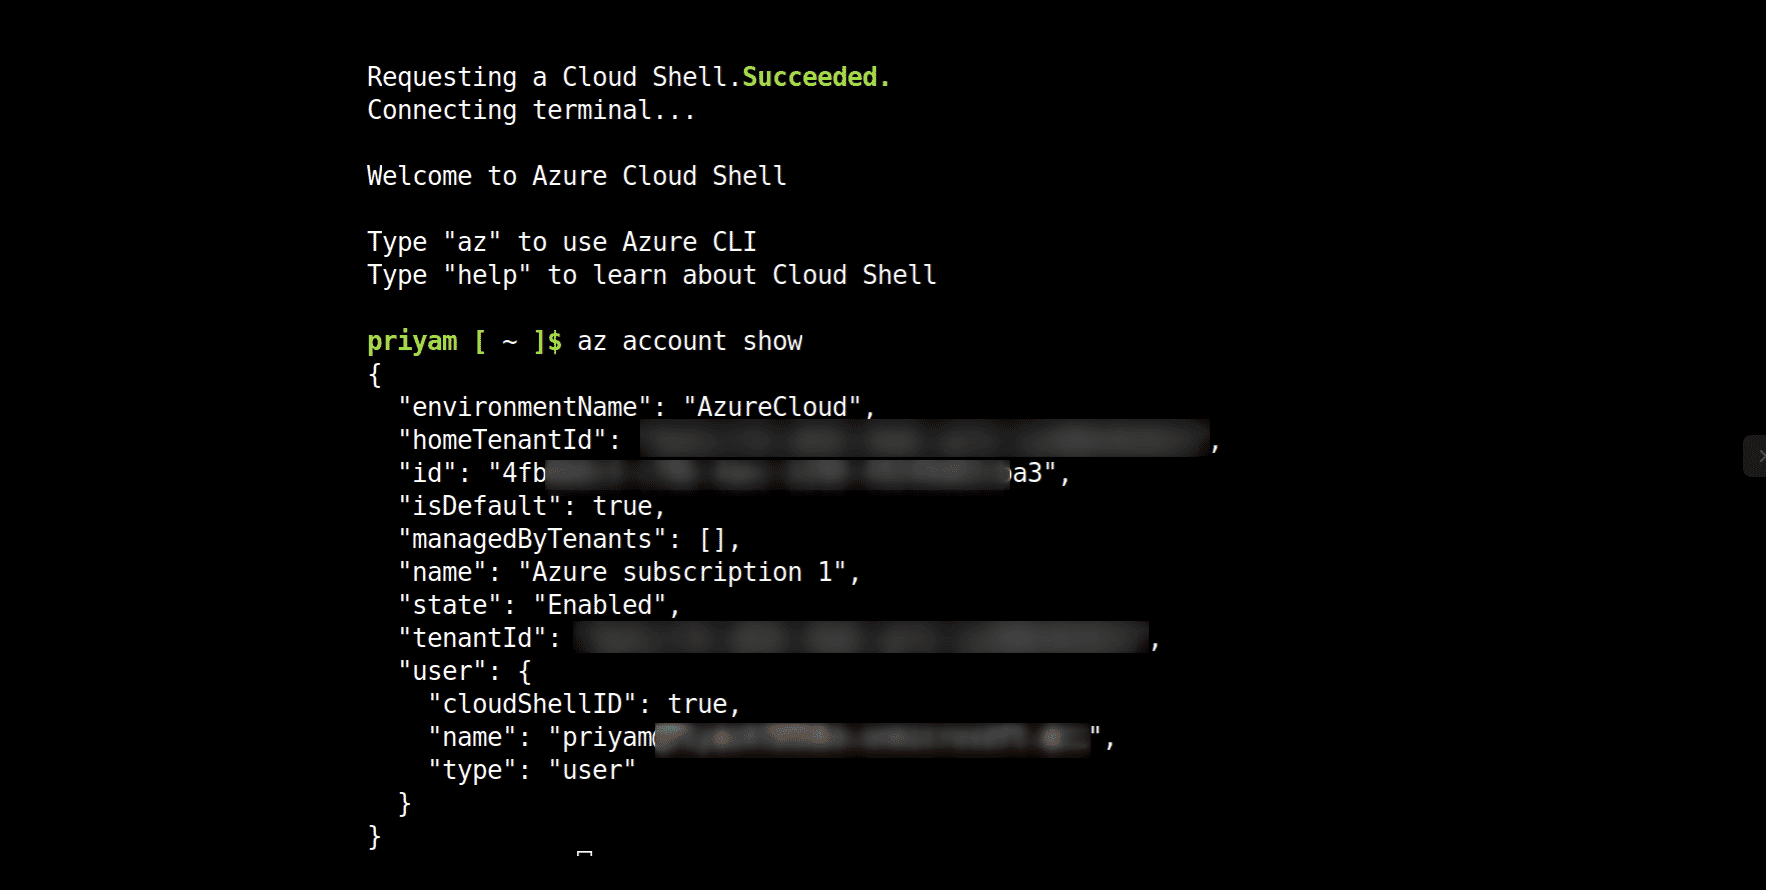
Also ensure that you are in the correct Azure account and the correct subscription in Azure Cloud Shell. You can confirm this by running az account show command before running the script
Steps to set up the service principal
Following are the steps to create a service principal, add the required roles, and generate credentials for the service principal:
-
Launch Azure Cloud Shell and make sure you are in the correct Azure account and Subscription by running az account show command in Azure Cloud Shell
Note: If you are running the Azure Cloud shell for the first time, you will be prompted to choose a Storage and to select Bash or Windows Powershell. Please choose Bash to proceed

-
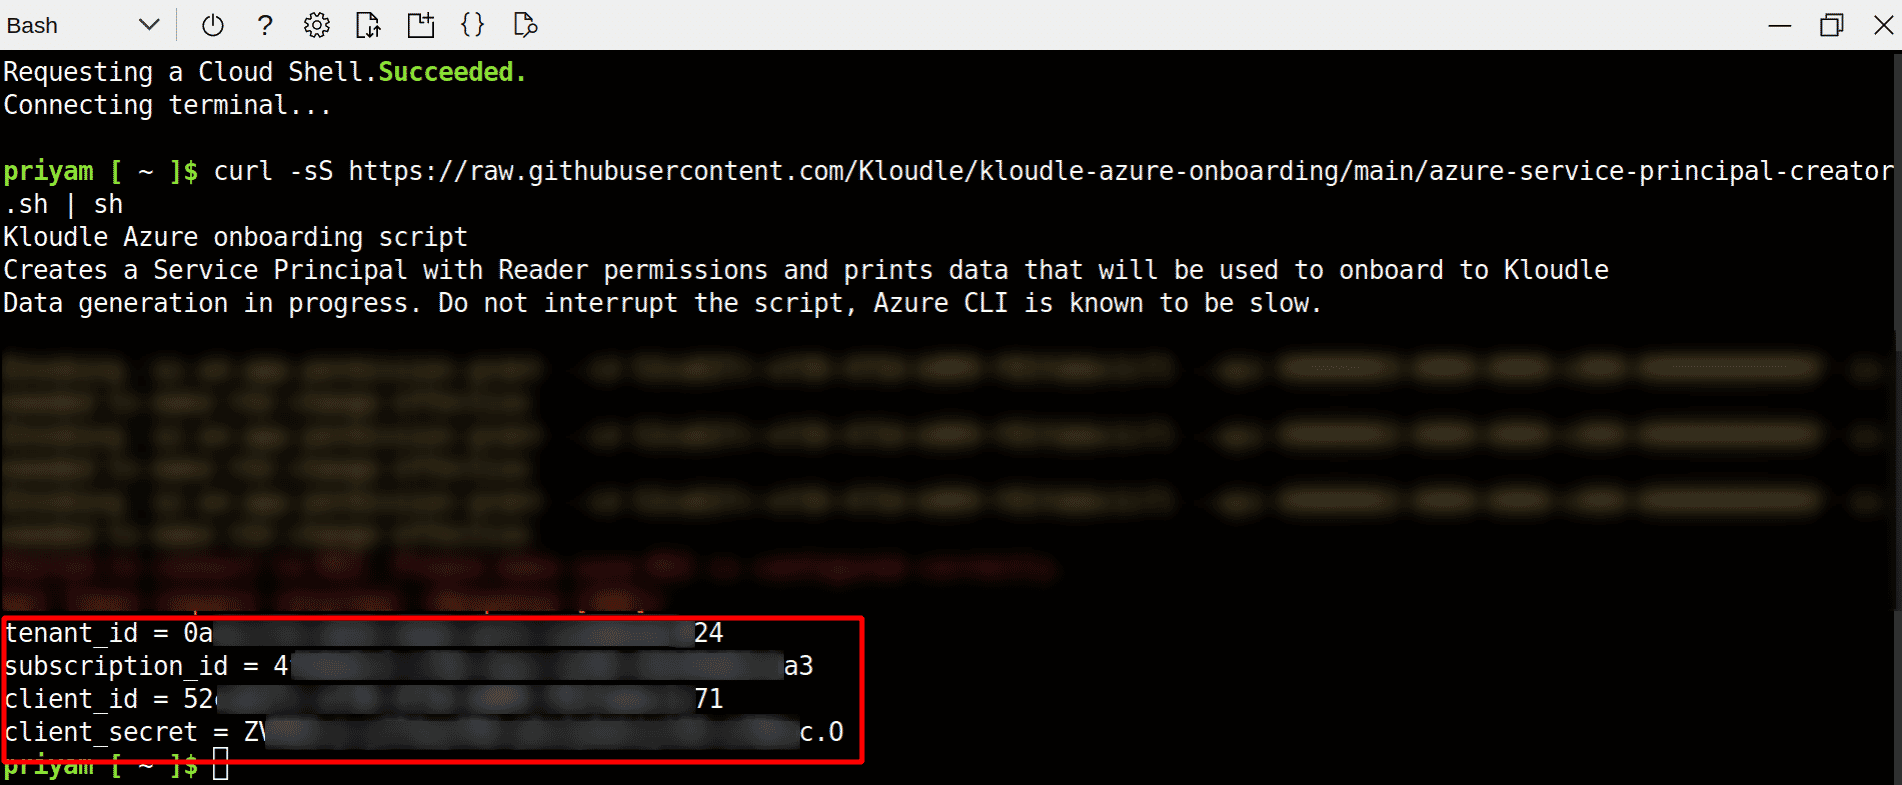
Run the following command in Azure Cloud Shell
curl -sS https://raw.githubusercontent.com/Kloudle/kloudle-azure-onboarding/main/azure-service-principal-creator.sh | sh -
This will create a service principal, add the required roles and generate credentials for the service principal to be used for onboarding the Azure account to Kloudle. Note down the tenant_id, subscription_id, client_id, and client_secret values
Onboard Azure to Kloudle
Once the Application ID (client_id), Application Secret (client_secret), Directory ID (tenant_id), and Subscription ID (subscription_id) are ready with you, follow the steps below to onboard your Azure account to Kloudle:
-
Log in to your Kloudle workspace at https://app.kloudle.com
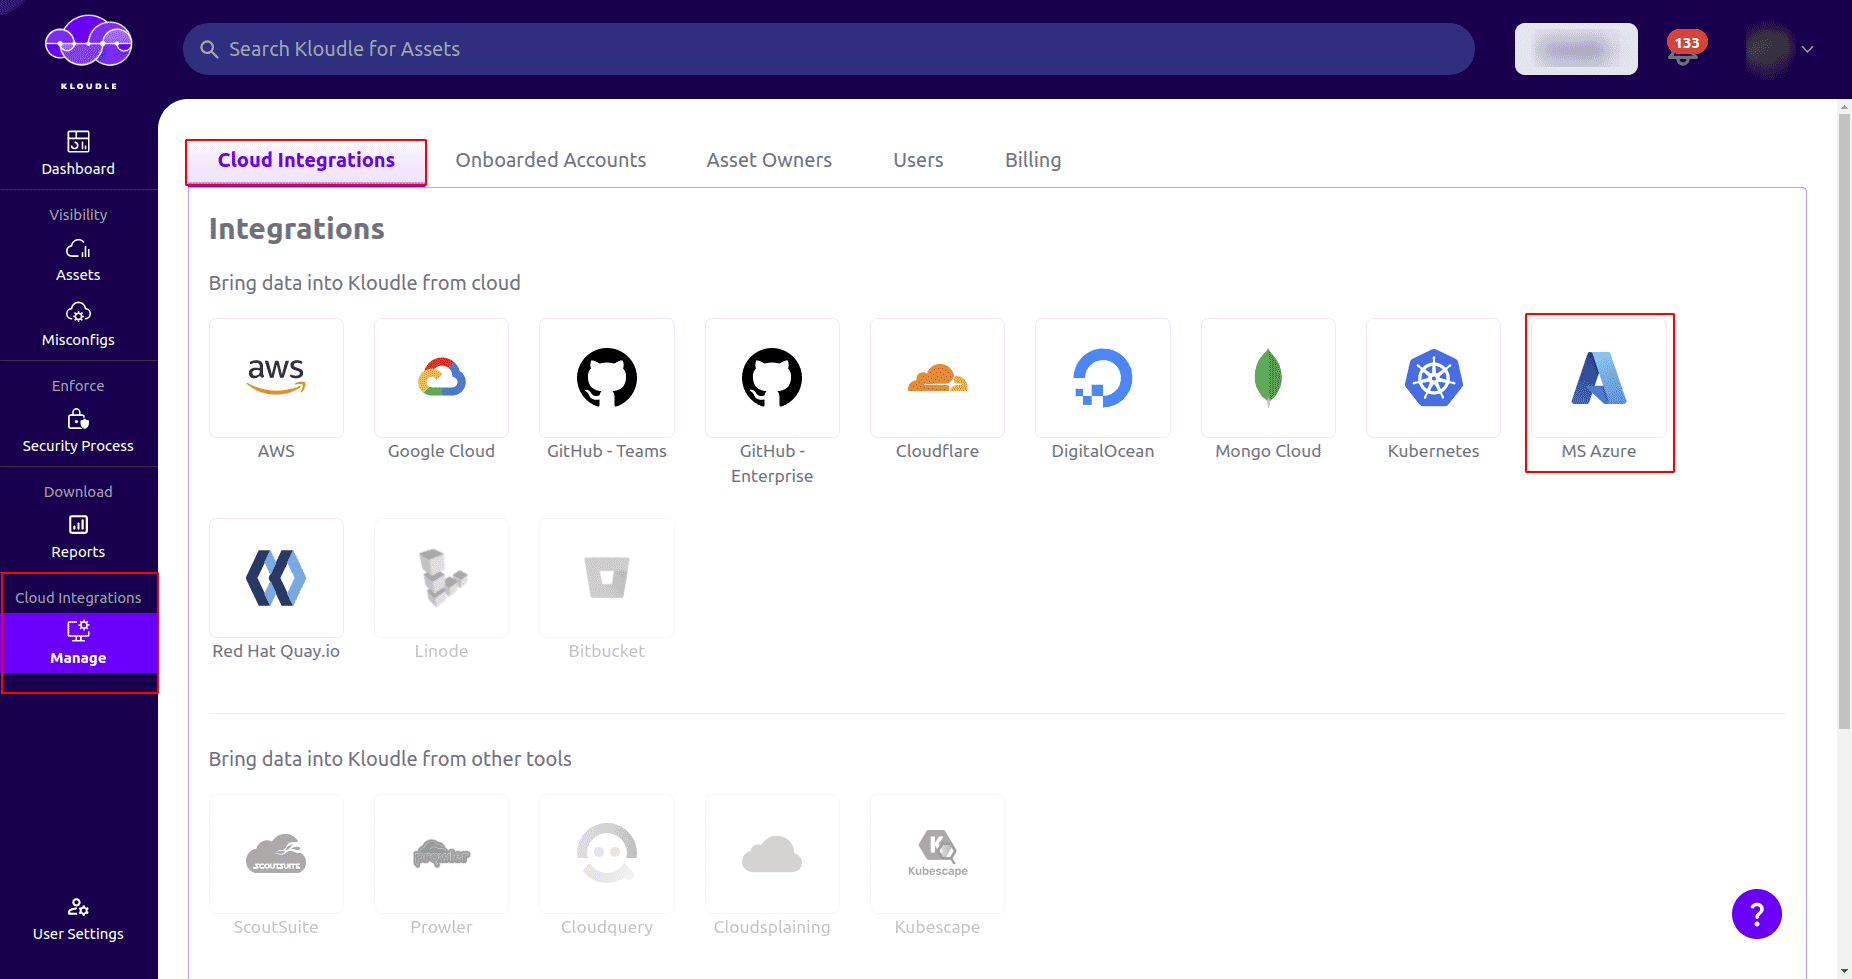
-
In the side menu, go to Manage and select MS Azure under Cloud Integrations tab
-
On the onboard cloud account page, provide the Account Name. You can give a custom name for the account being onboarded
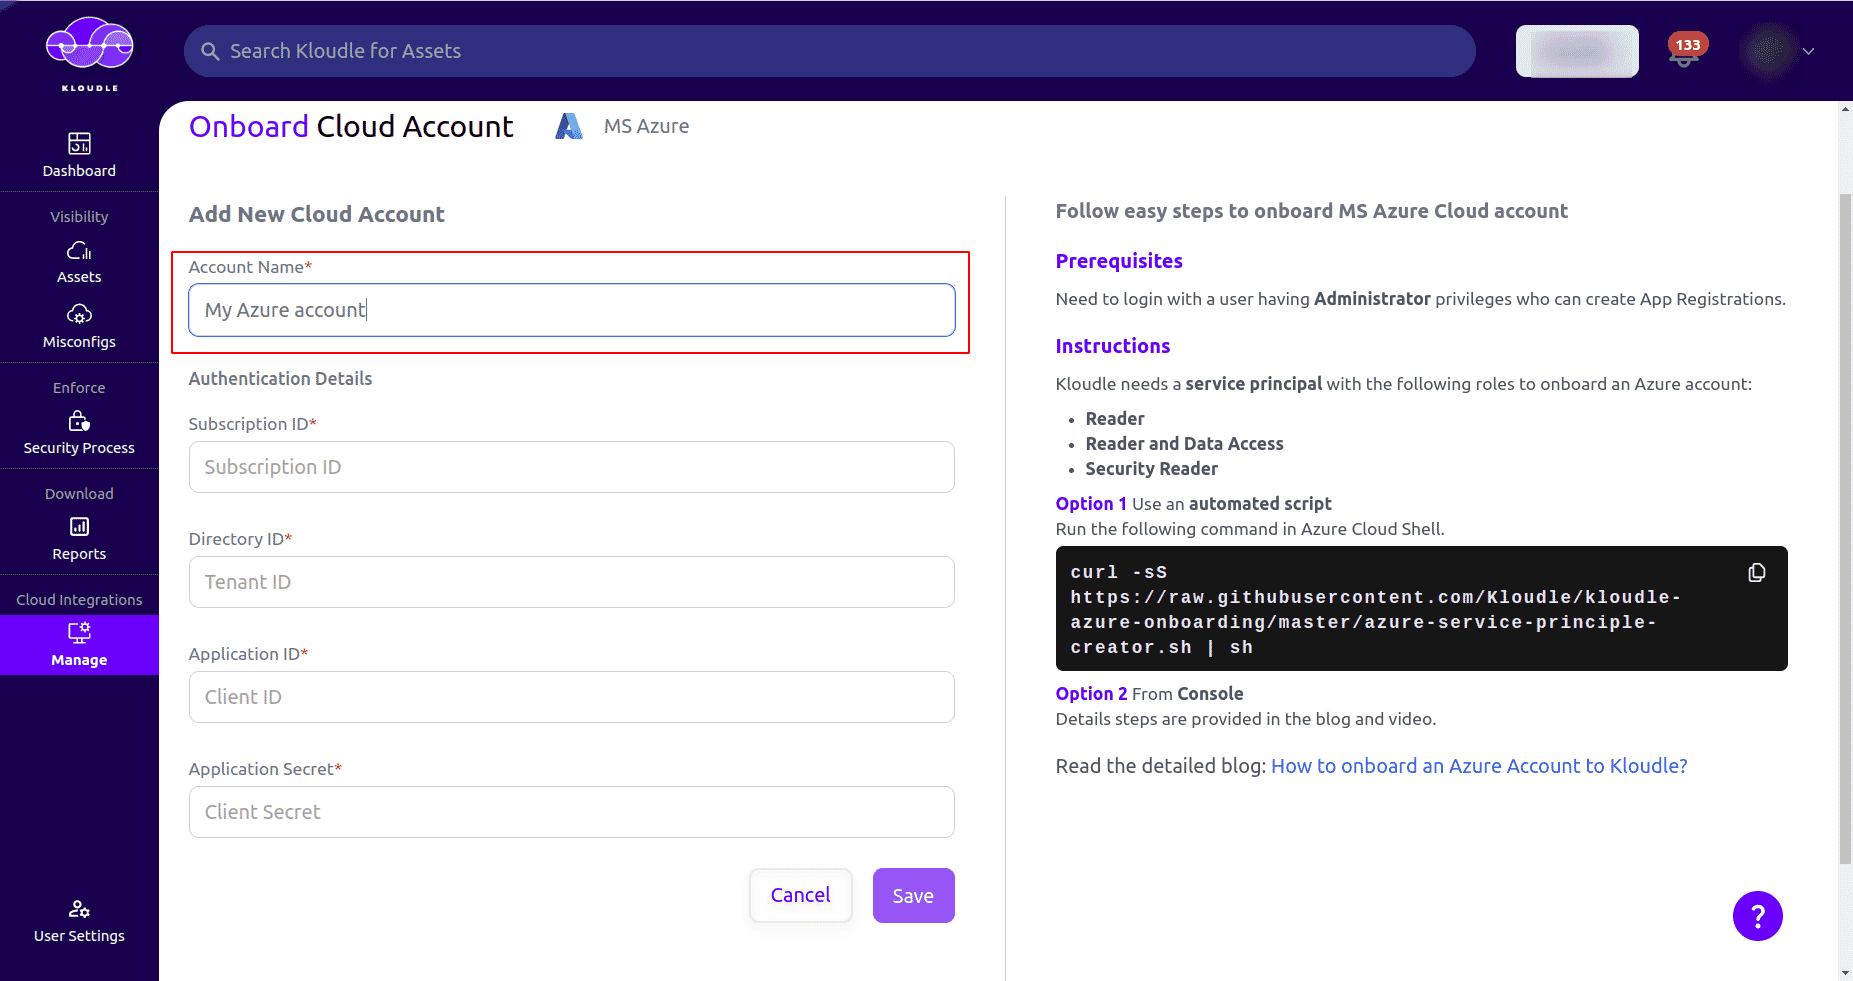
-
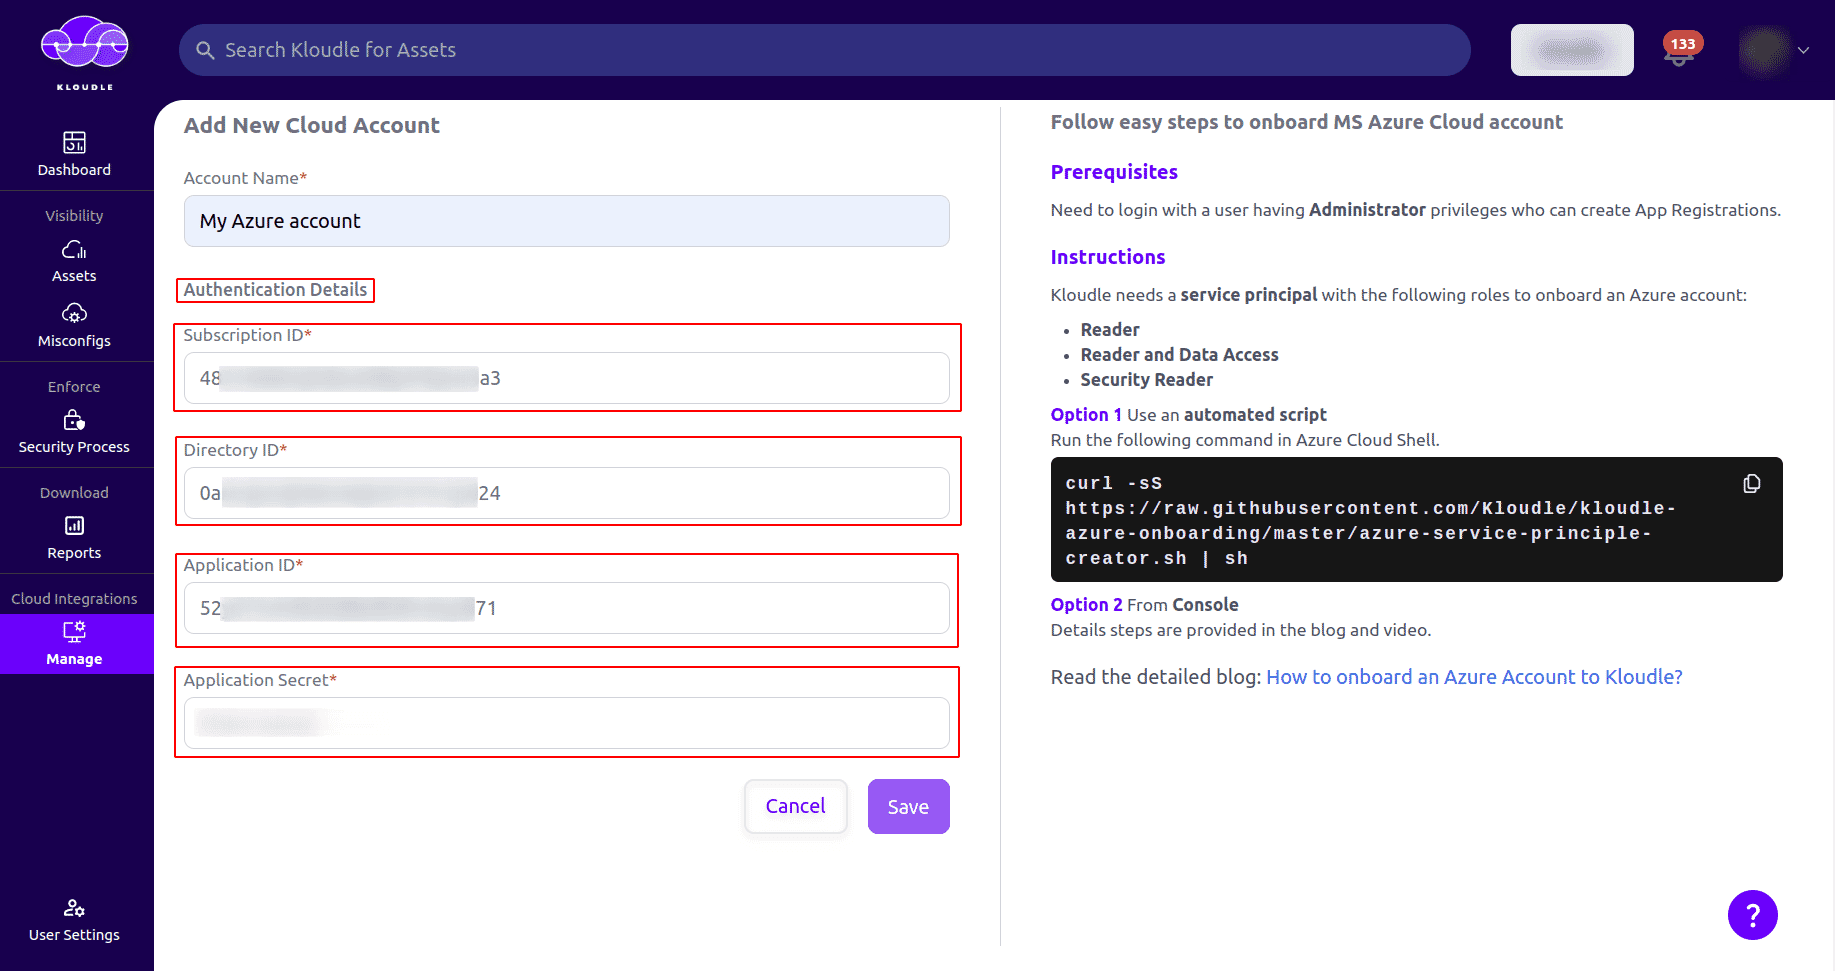
Next, under Authentication Details section provide the following information that we had captured in the previous sections:
a. Subscription ID (subscription_id) b. Directory ID (tenant_id) c. Application ID (client_id) d. Application Secret (client_secret)
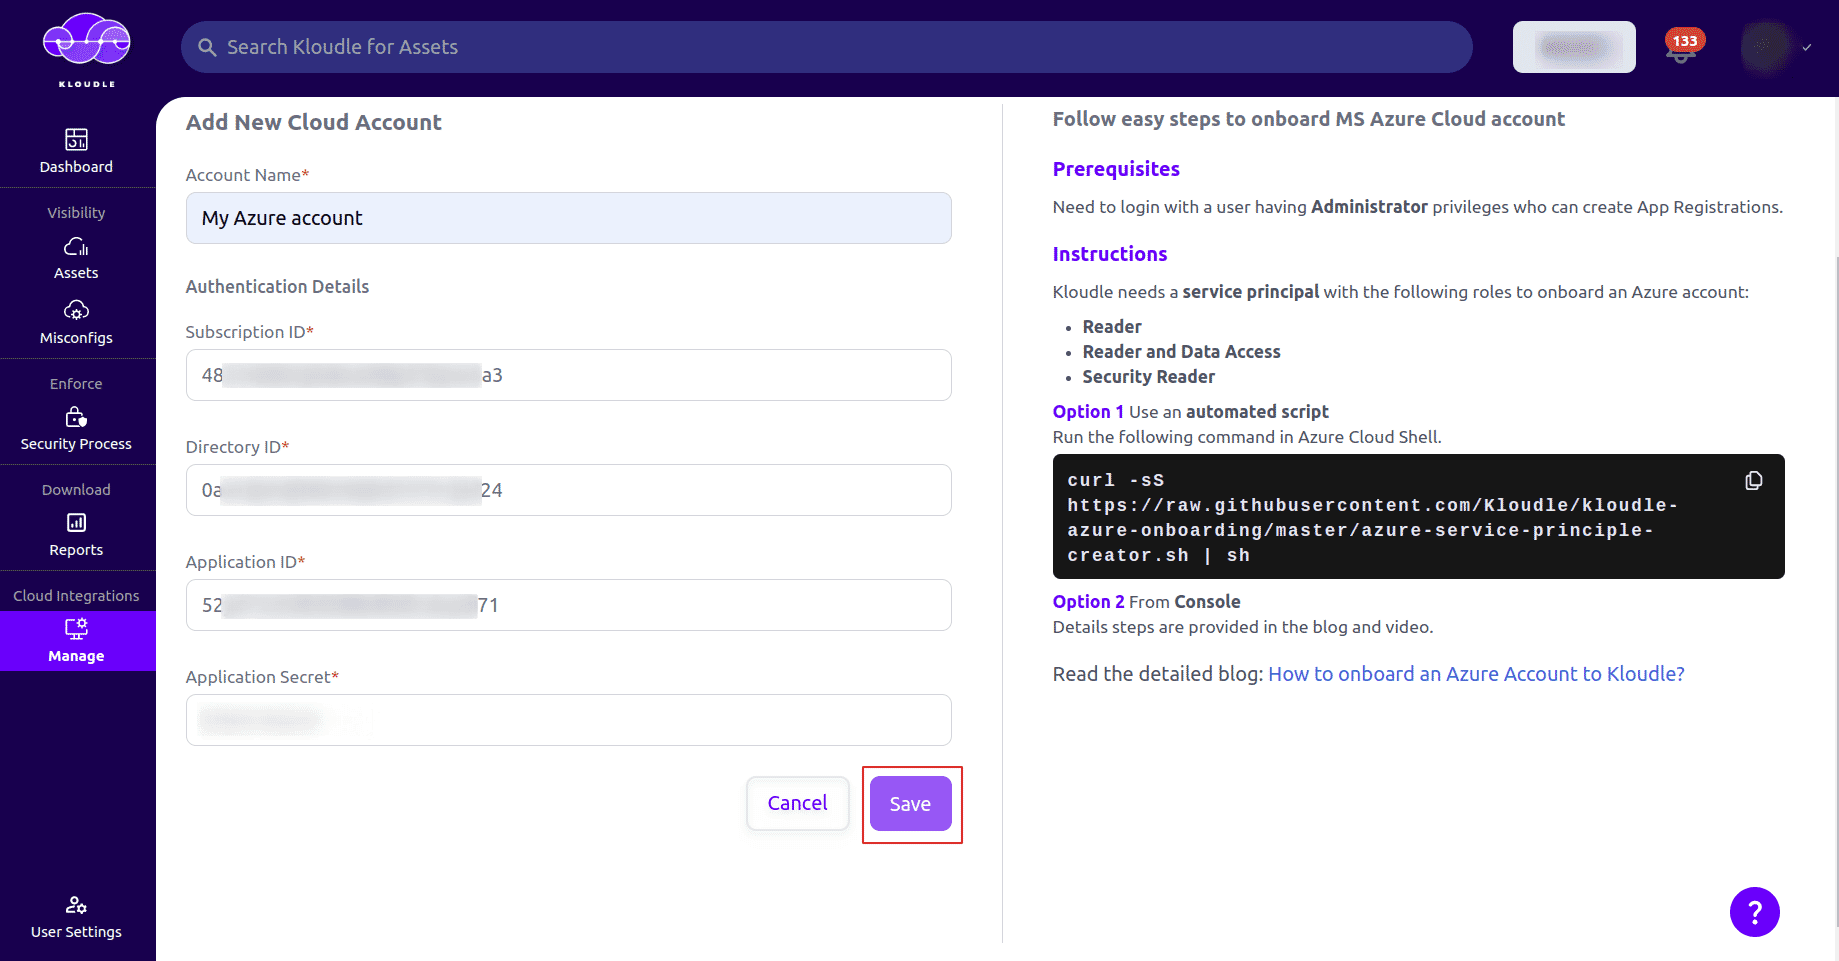
-
Once the authentication details are verified, click on Save button and your Azure account will be onboarded to Kloudle
Video Instructions
Here’s a video that shows how you can do this.

Akash Mahajan
Founder & CEO
Akash is the founder of Kloudle, a developer-first cloud security scanner. He’s spent 20+ years in cybersecurity and now builds tools that make securing cloud infra simple, fast, and frustration-free.
Akash Mahajan
Founder & CEO
Akash is the founder of Kloudle, a developer-first cloud security scanner. He’s spent 20+ years in cybersecurity and now builds tools that make securing cloud infra simple, fast, and frustration-free.